How to store and access information?
Overview
Your information in SplashID Classic is stored as records.
Each record belongs to a category and is of a particular type. Use categories and types to organise your records as you wish.
Each record contains
- A name
- A category
- A type
- Unlimited fields with labels
- Unlimited notes
- Tags
- Sync option
- Dates and times to track its creation and updates to it
Records screens
All your records can be viewed in the My Records screen. The My Records screen can be reached by clicking on the My Records link in the application menu.
Some examples of records are shown below. You can use your imagination to store information in the way you like it.
- Login information to a website or application
- Personal ID
- Driving license
- Passport details
- Insurance details
- Bank profiles
When you unlock the application on your device, you will be taken to the screen that shows all your records by default. You can search, filter or sort them to see them in the way that suits you.
The sections below explain more about records, and other related elements that you will use to manage your information in records.
My Records
The My Records screen displays all your records. This is the first entry in your application menu.
The structure of this screen differs on mobiles, tablets and desktops as explained below.
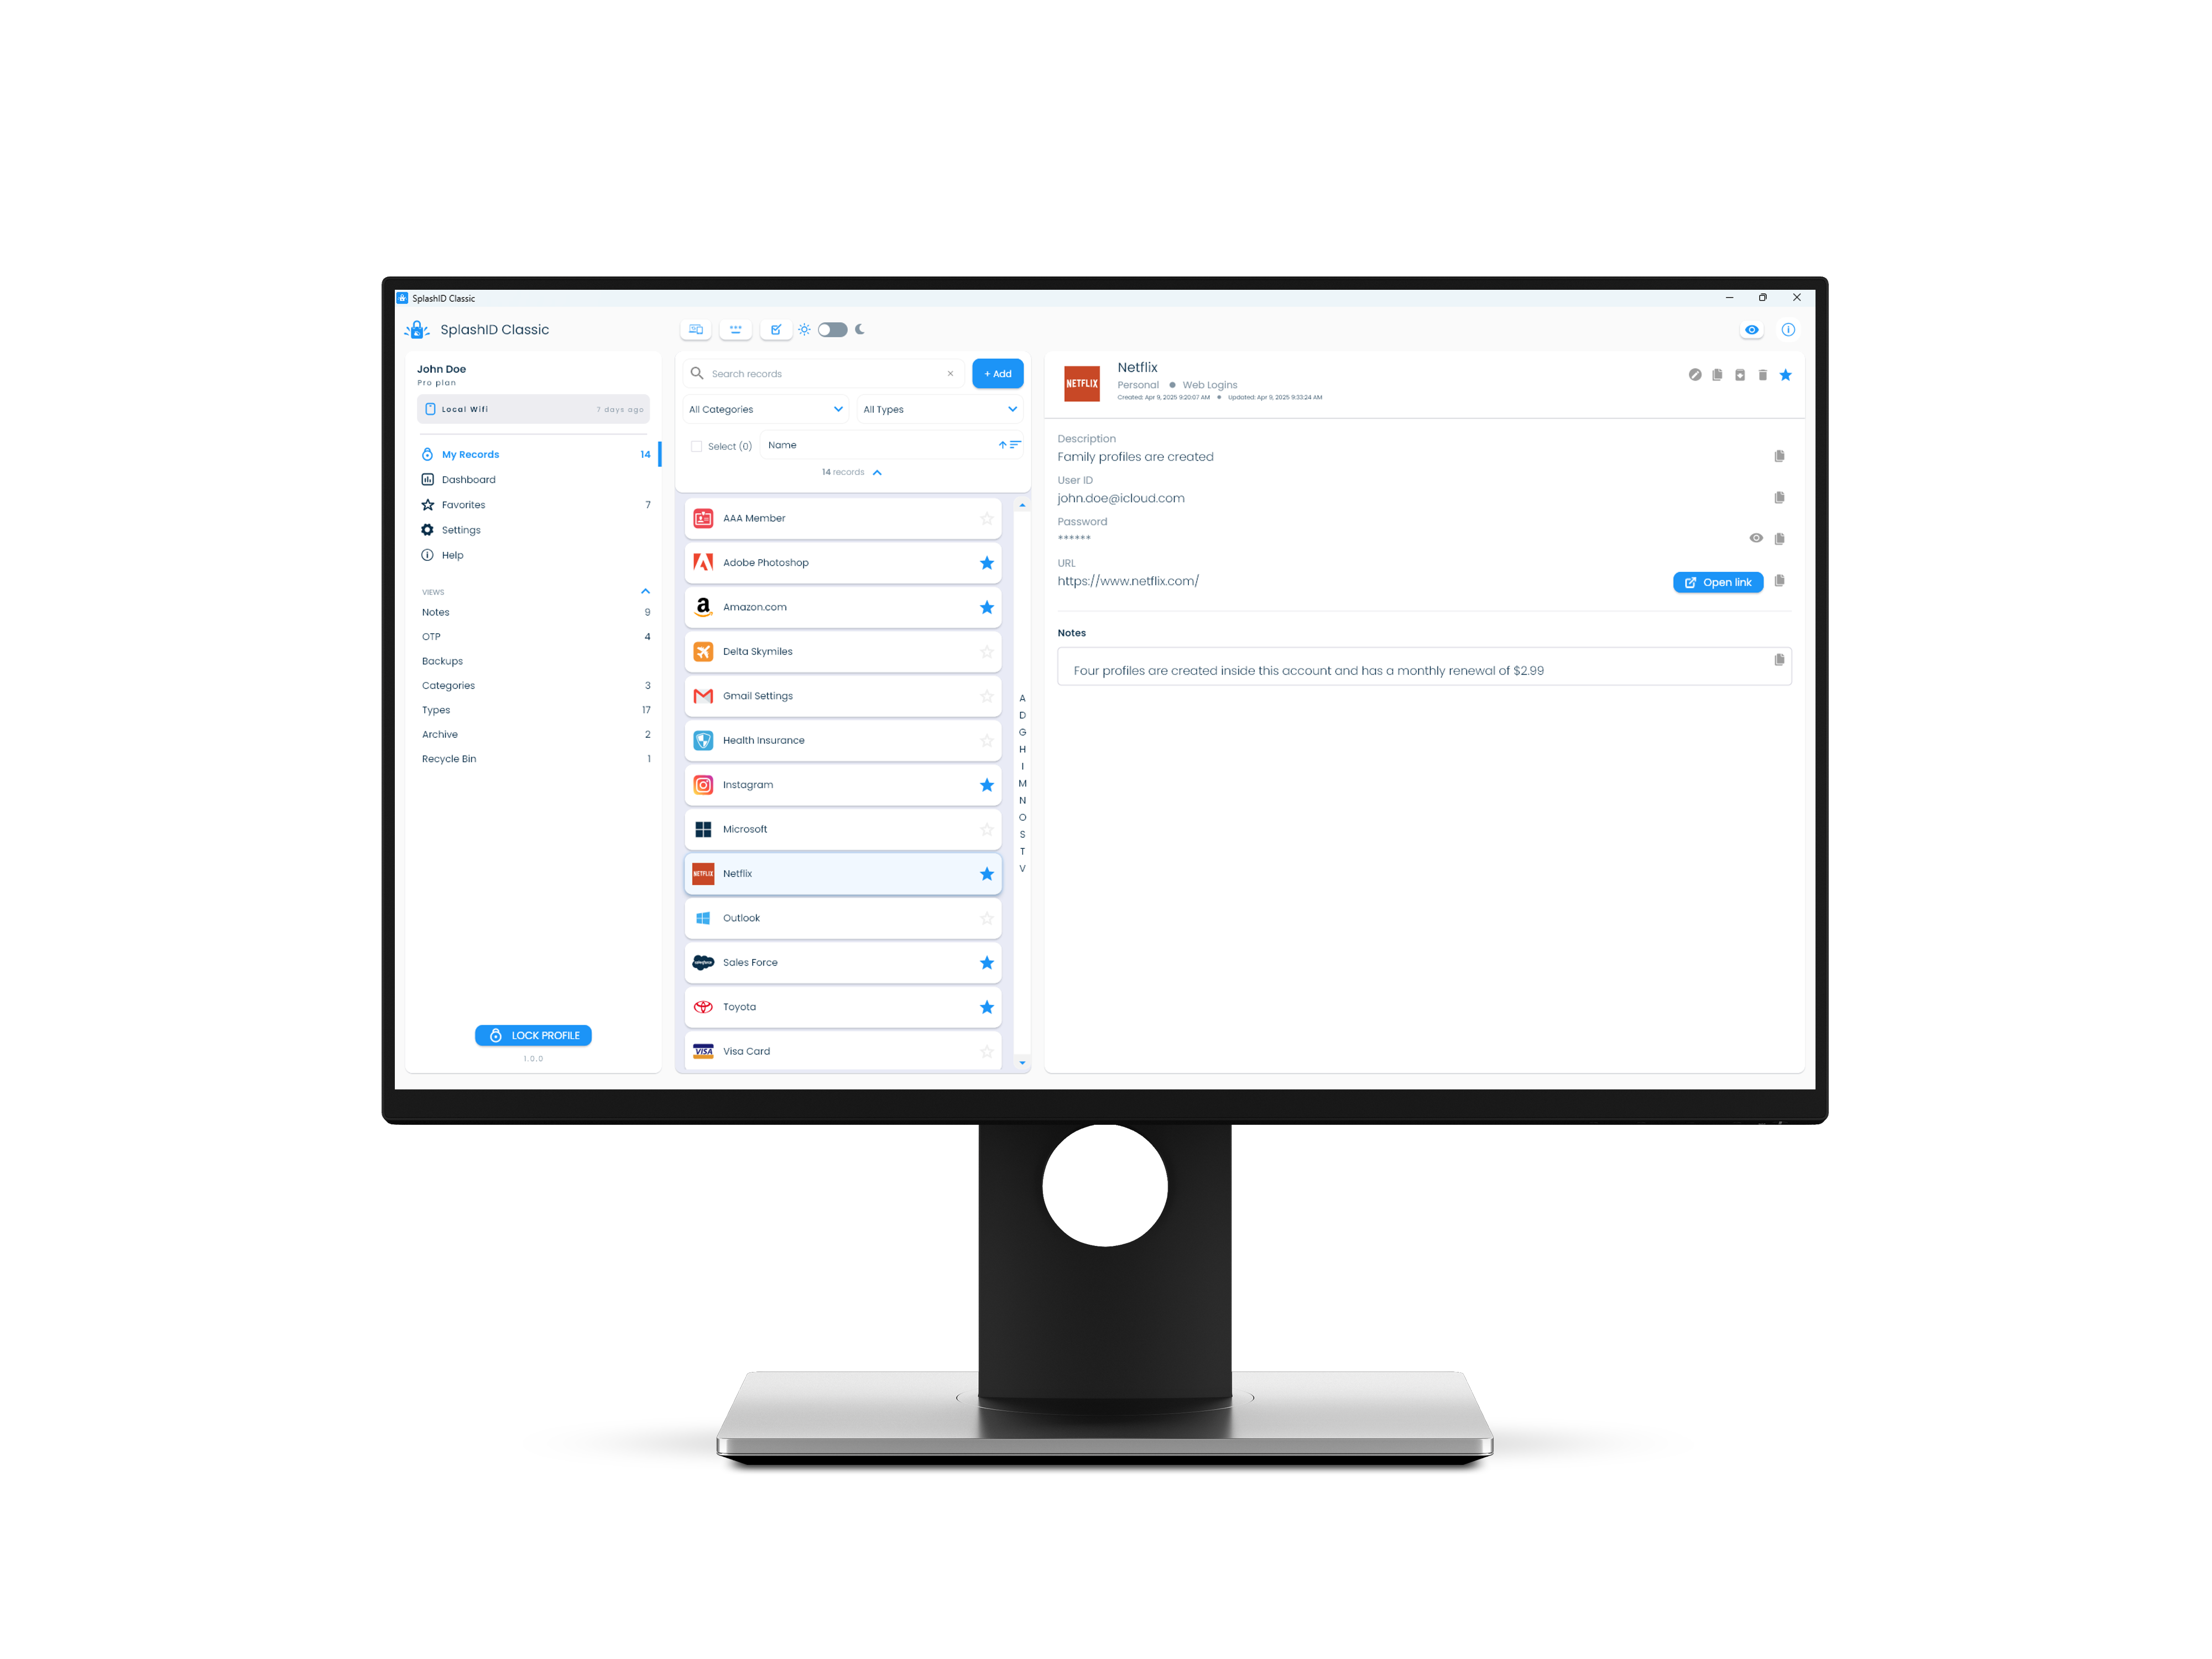
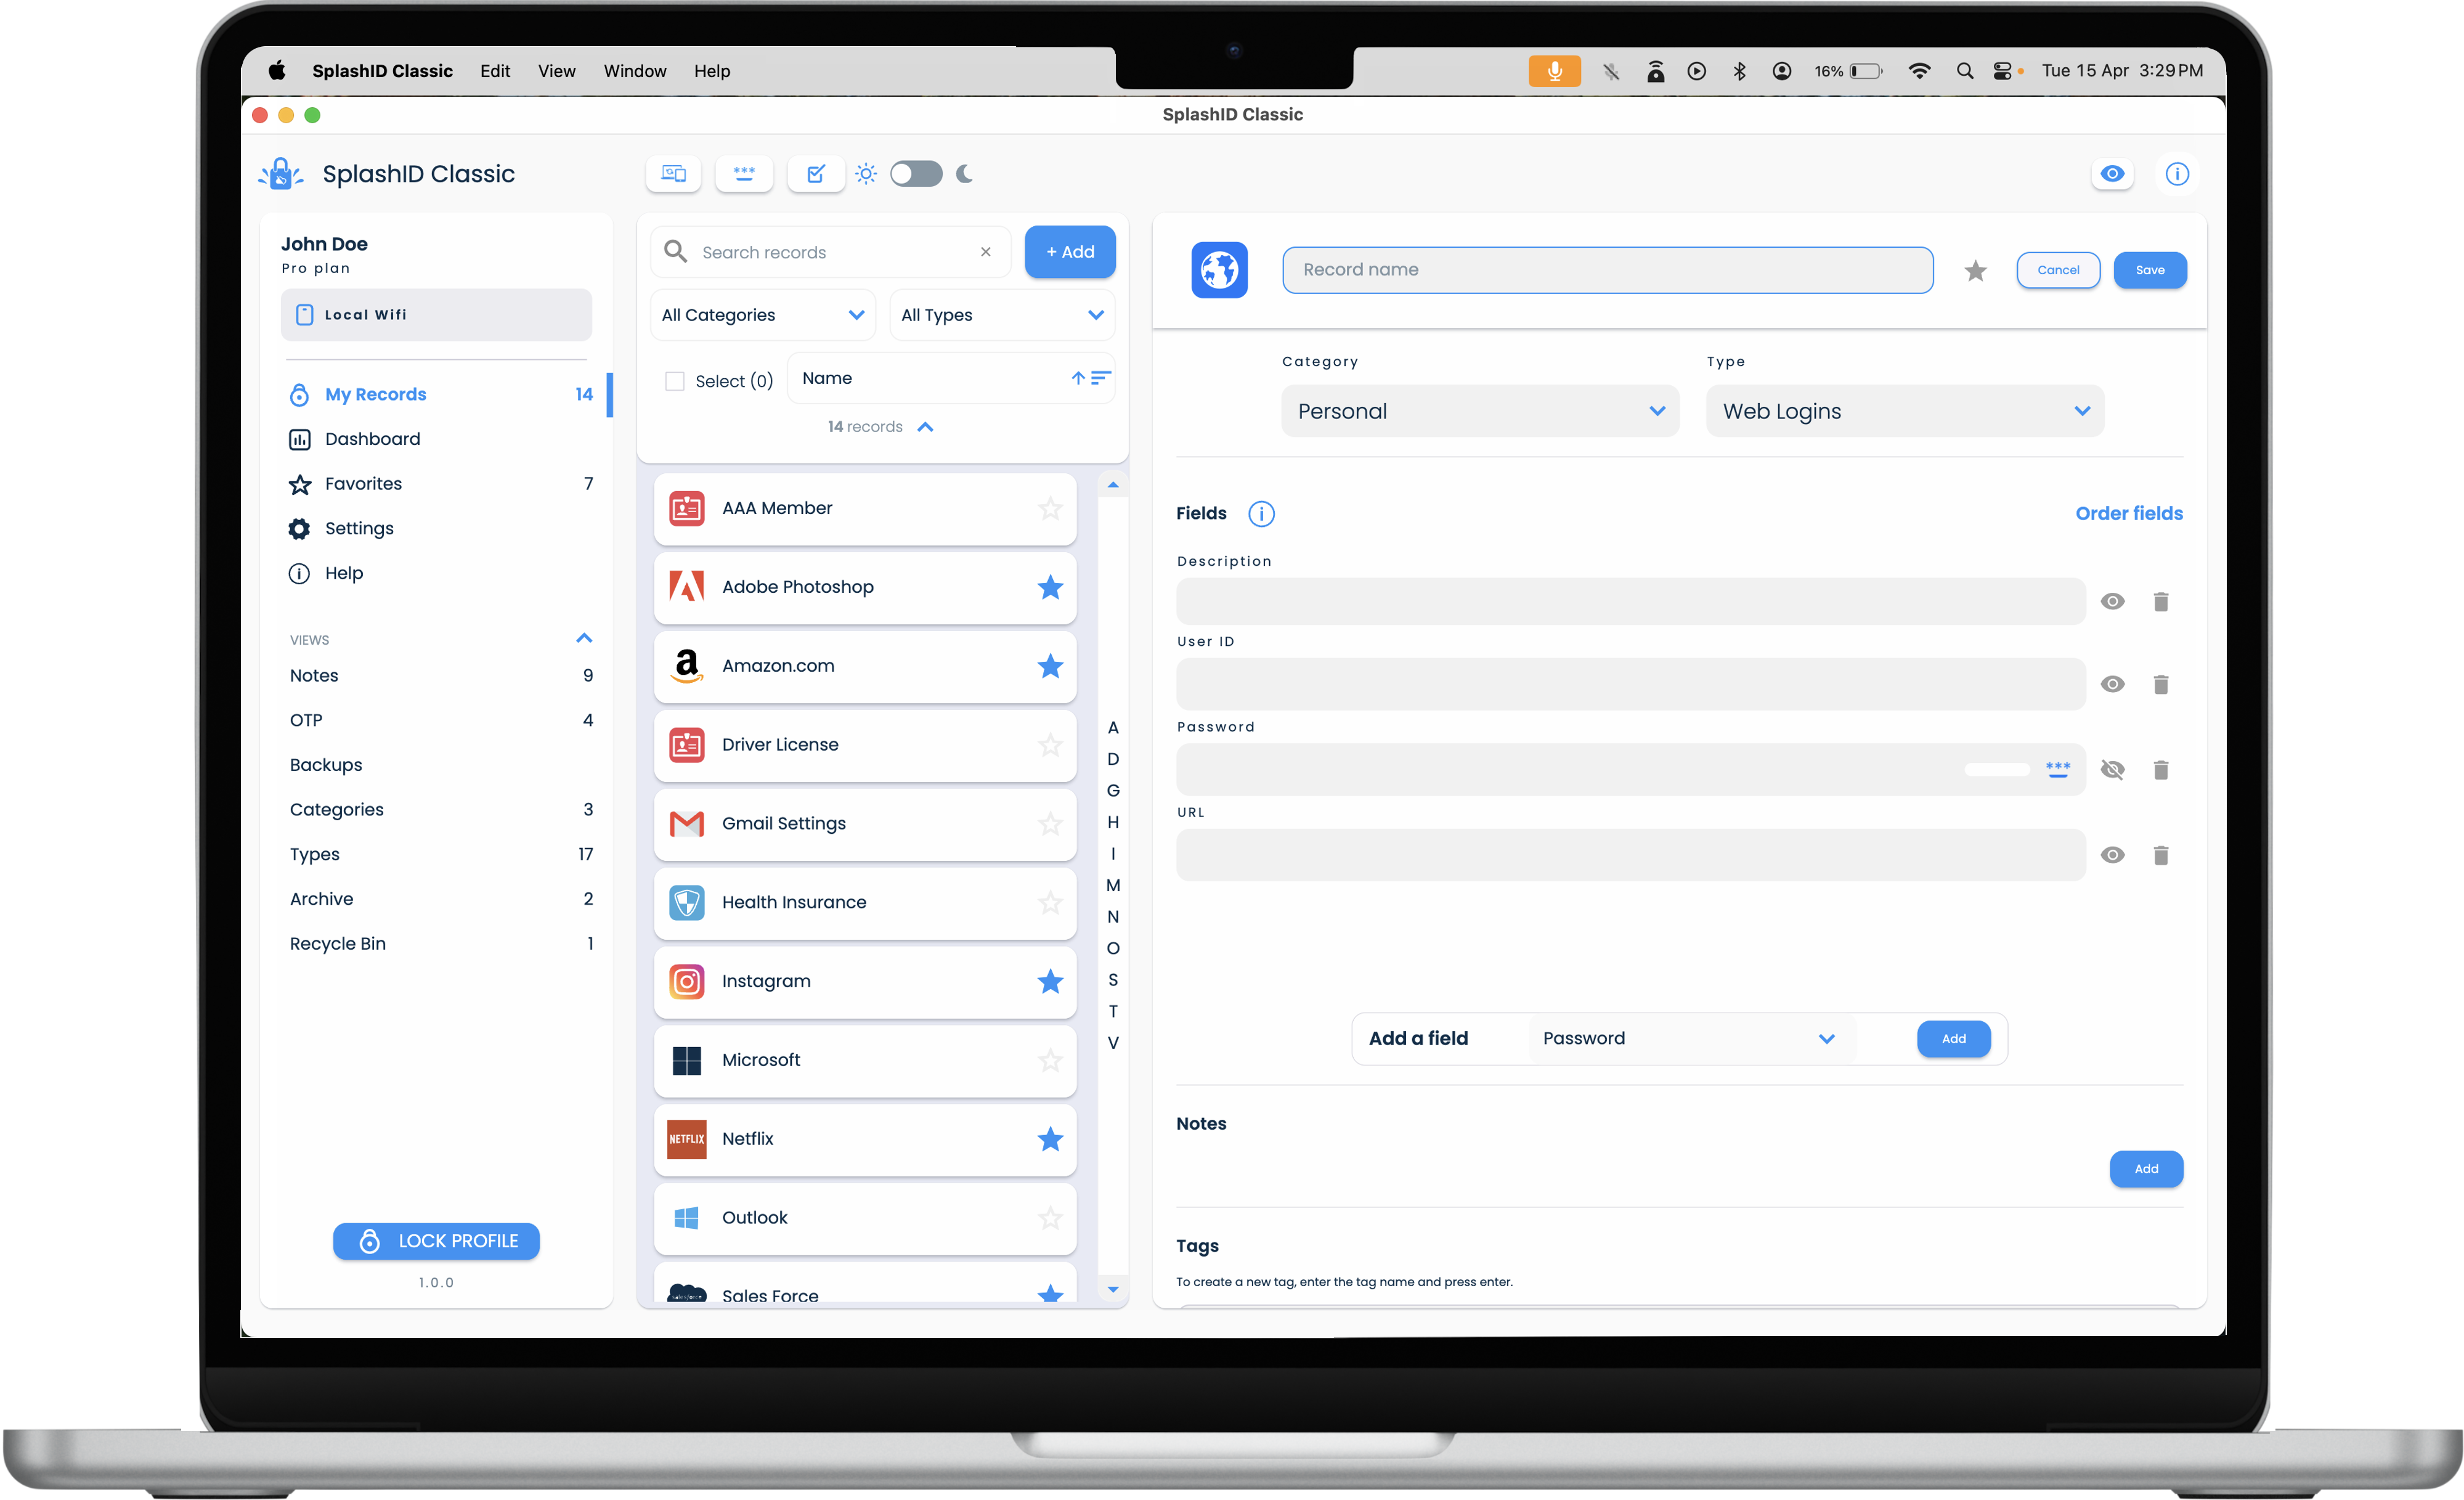
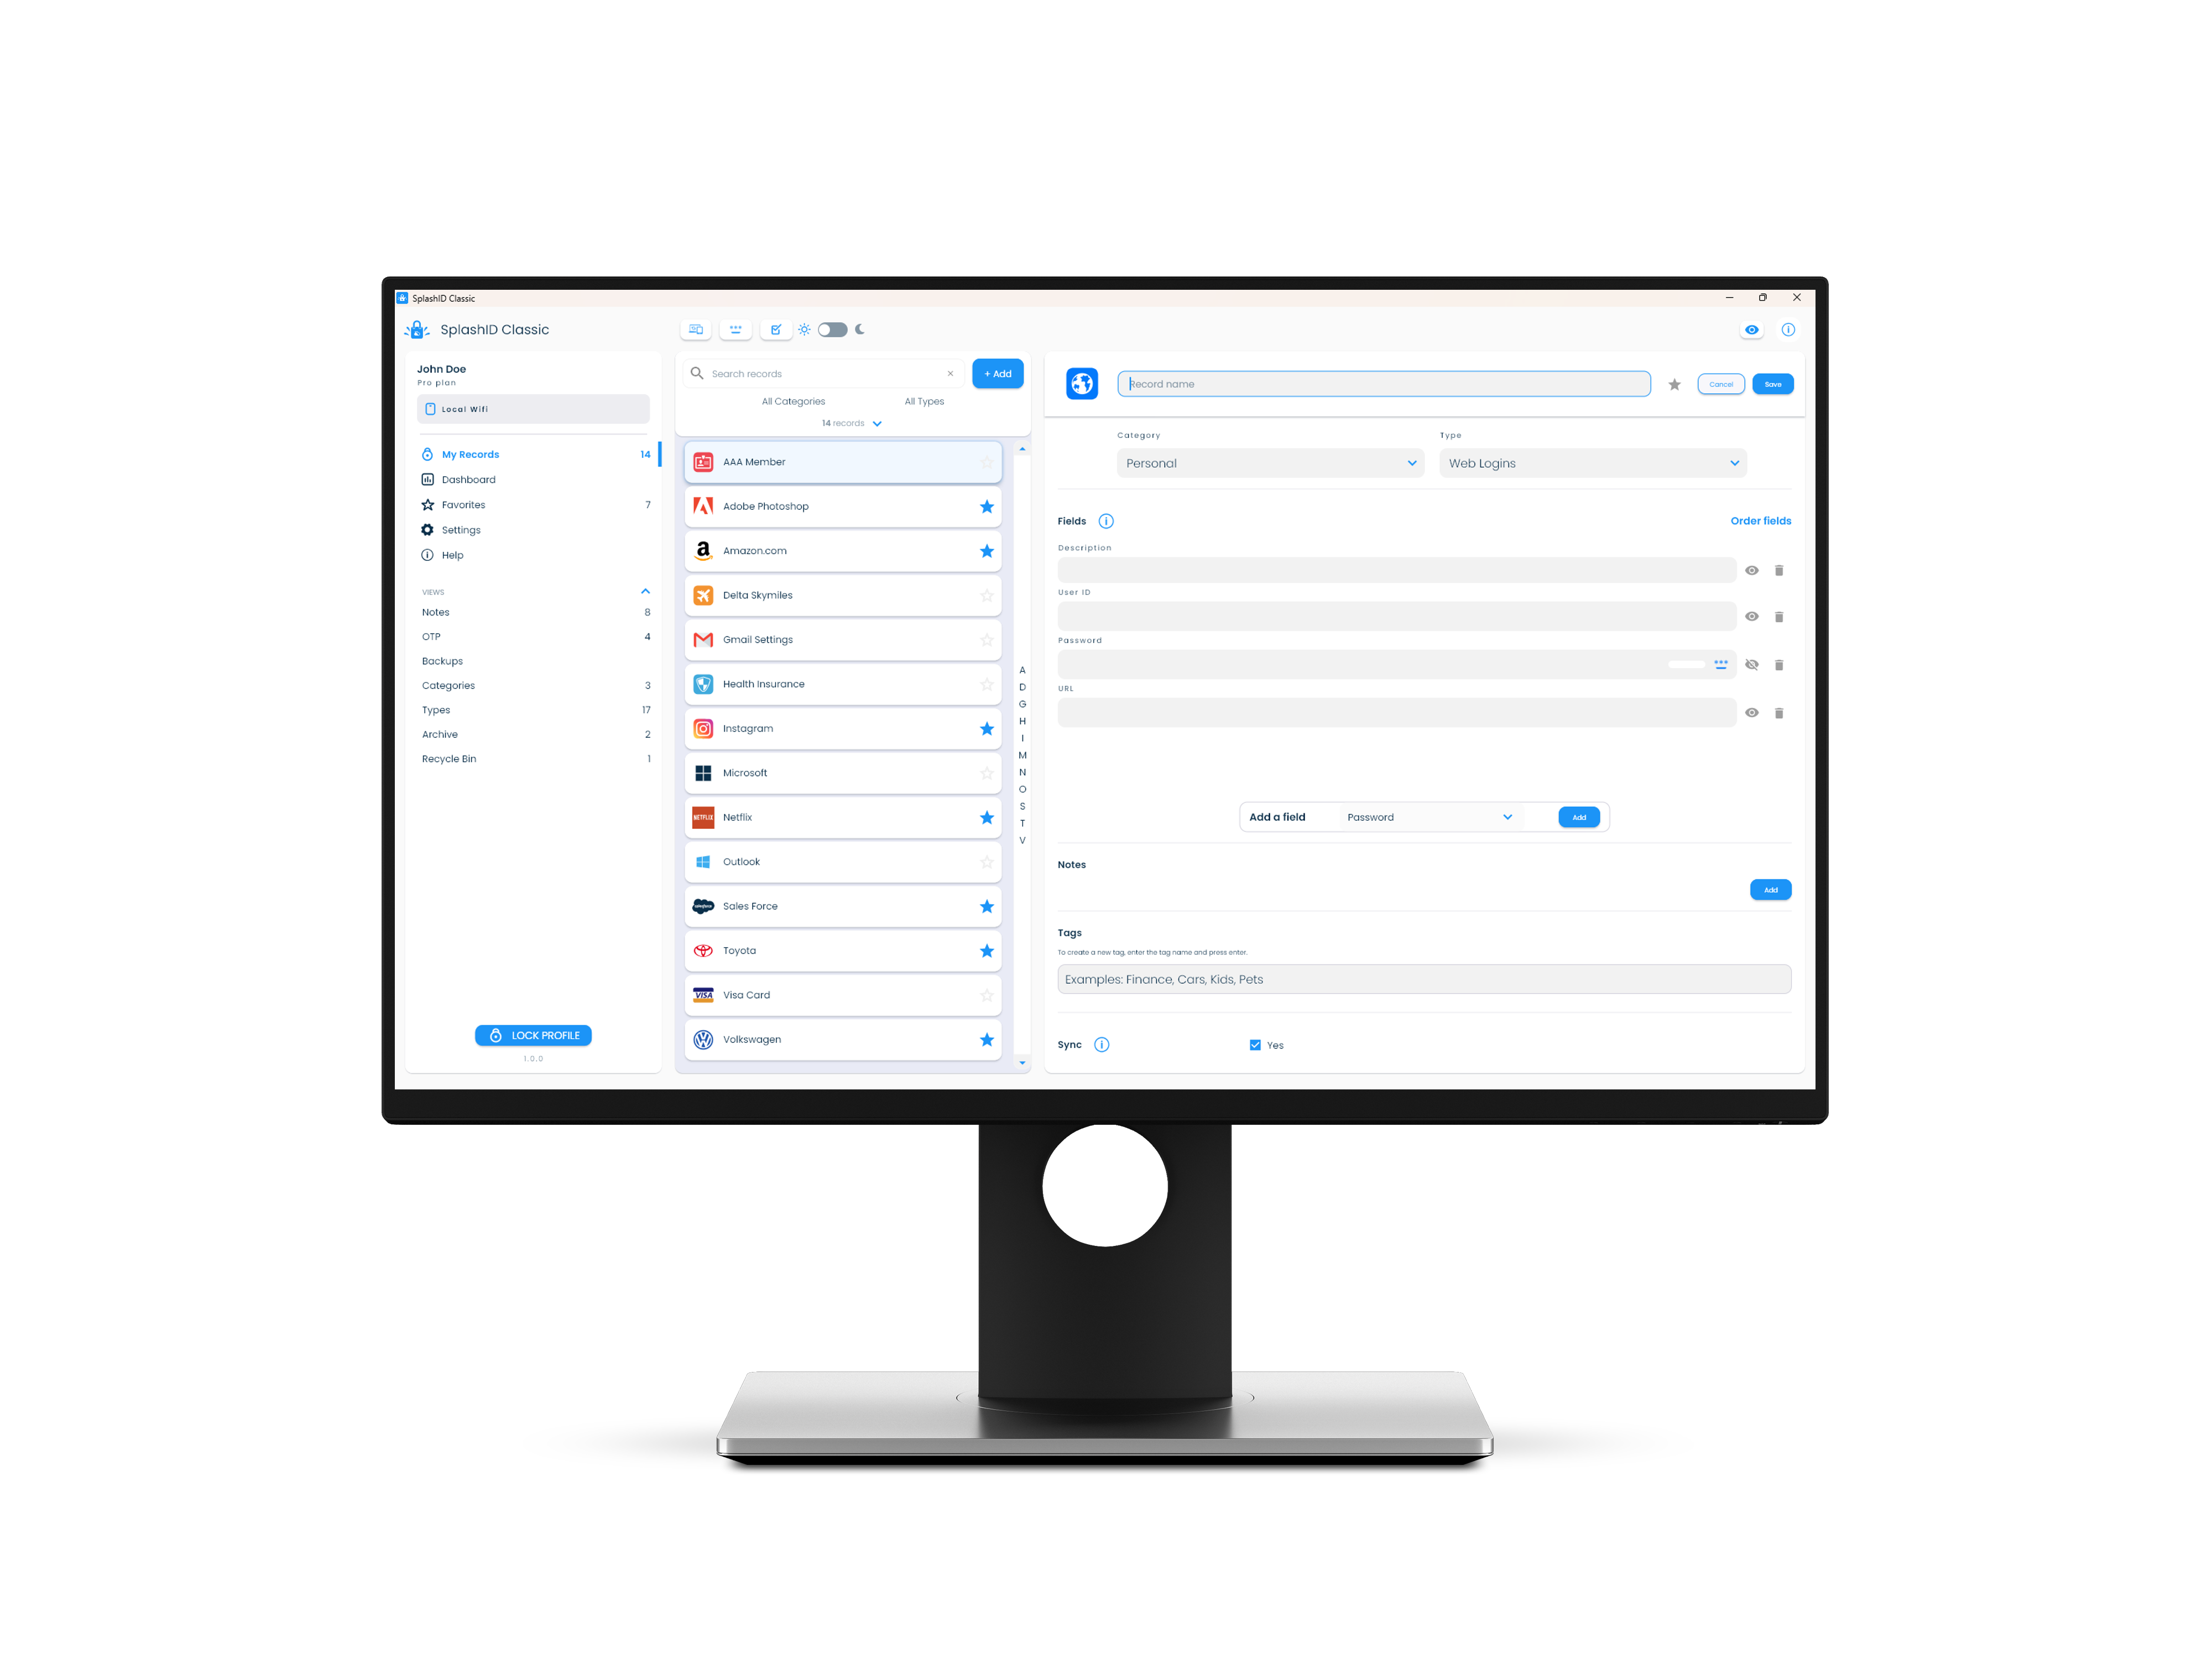
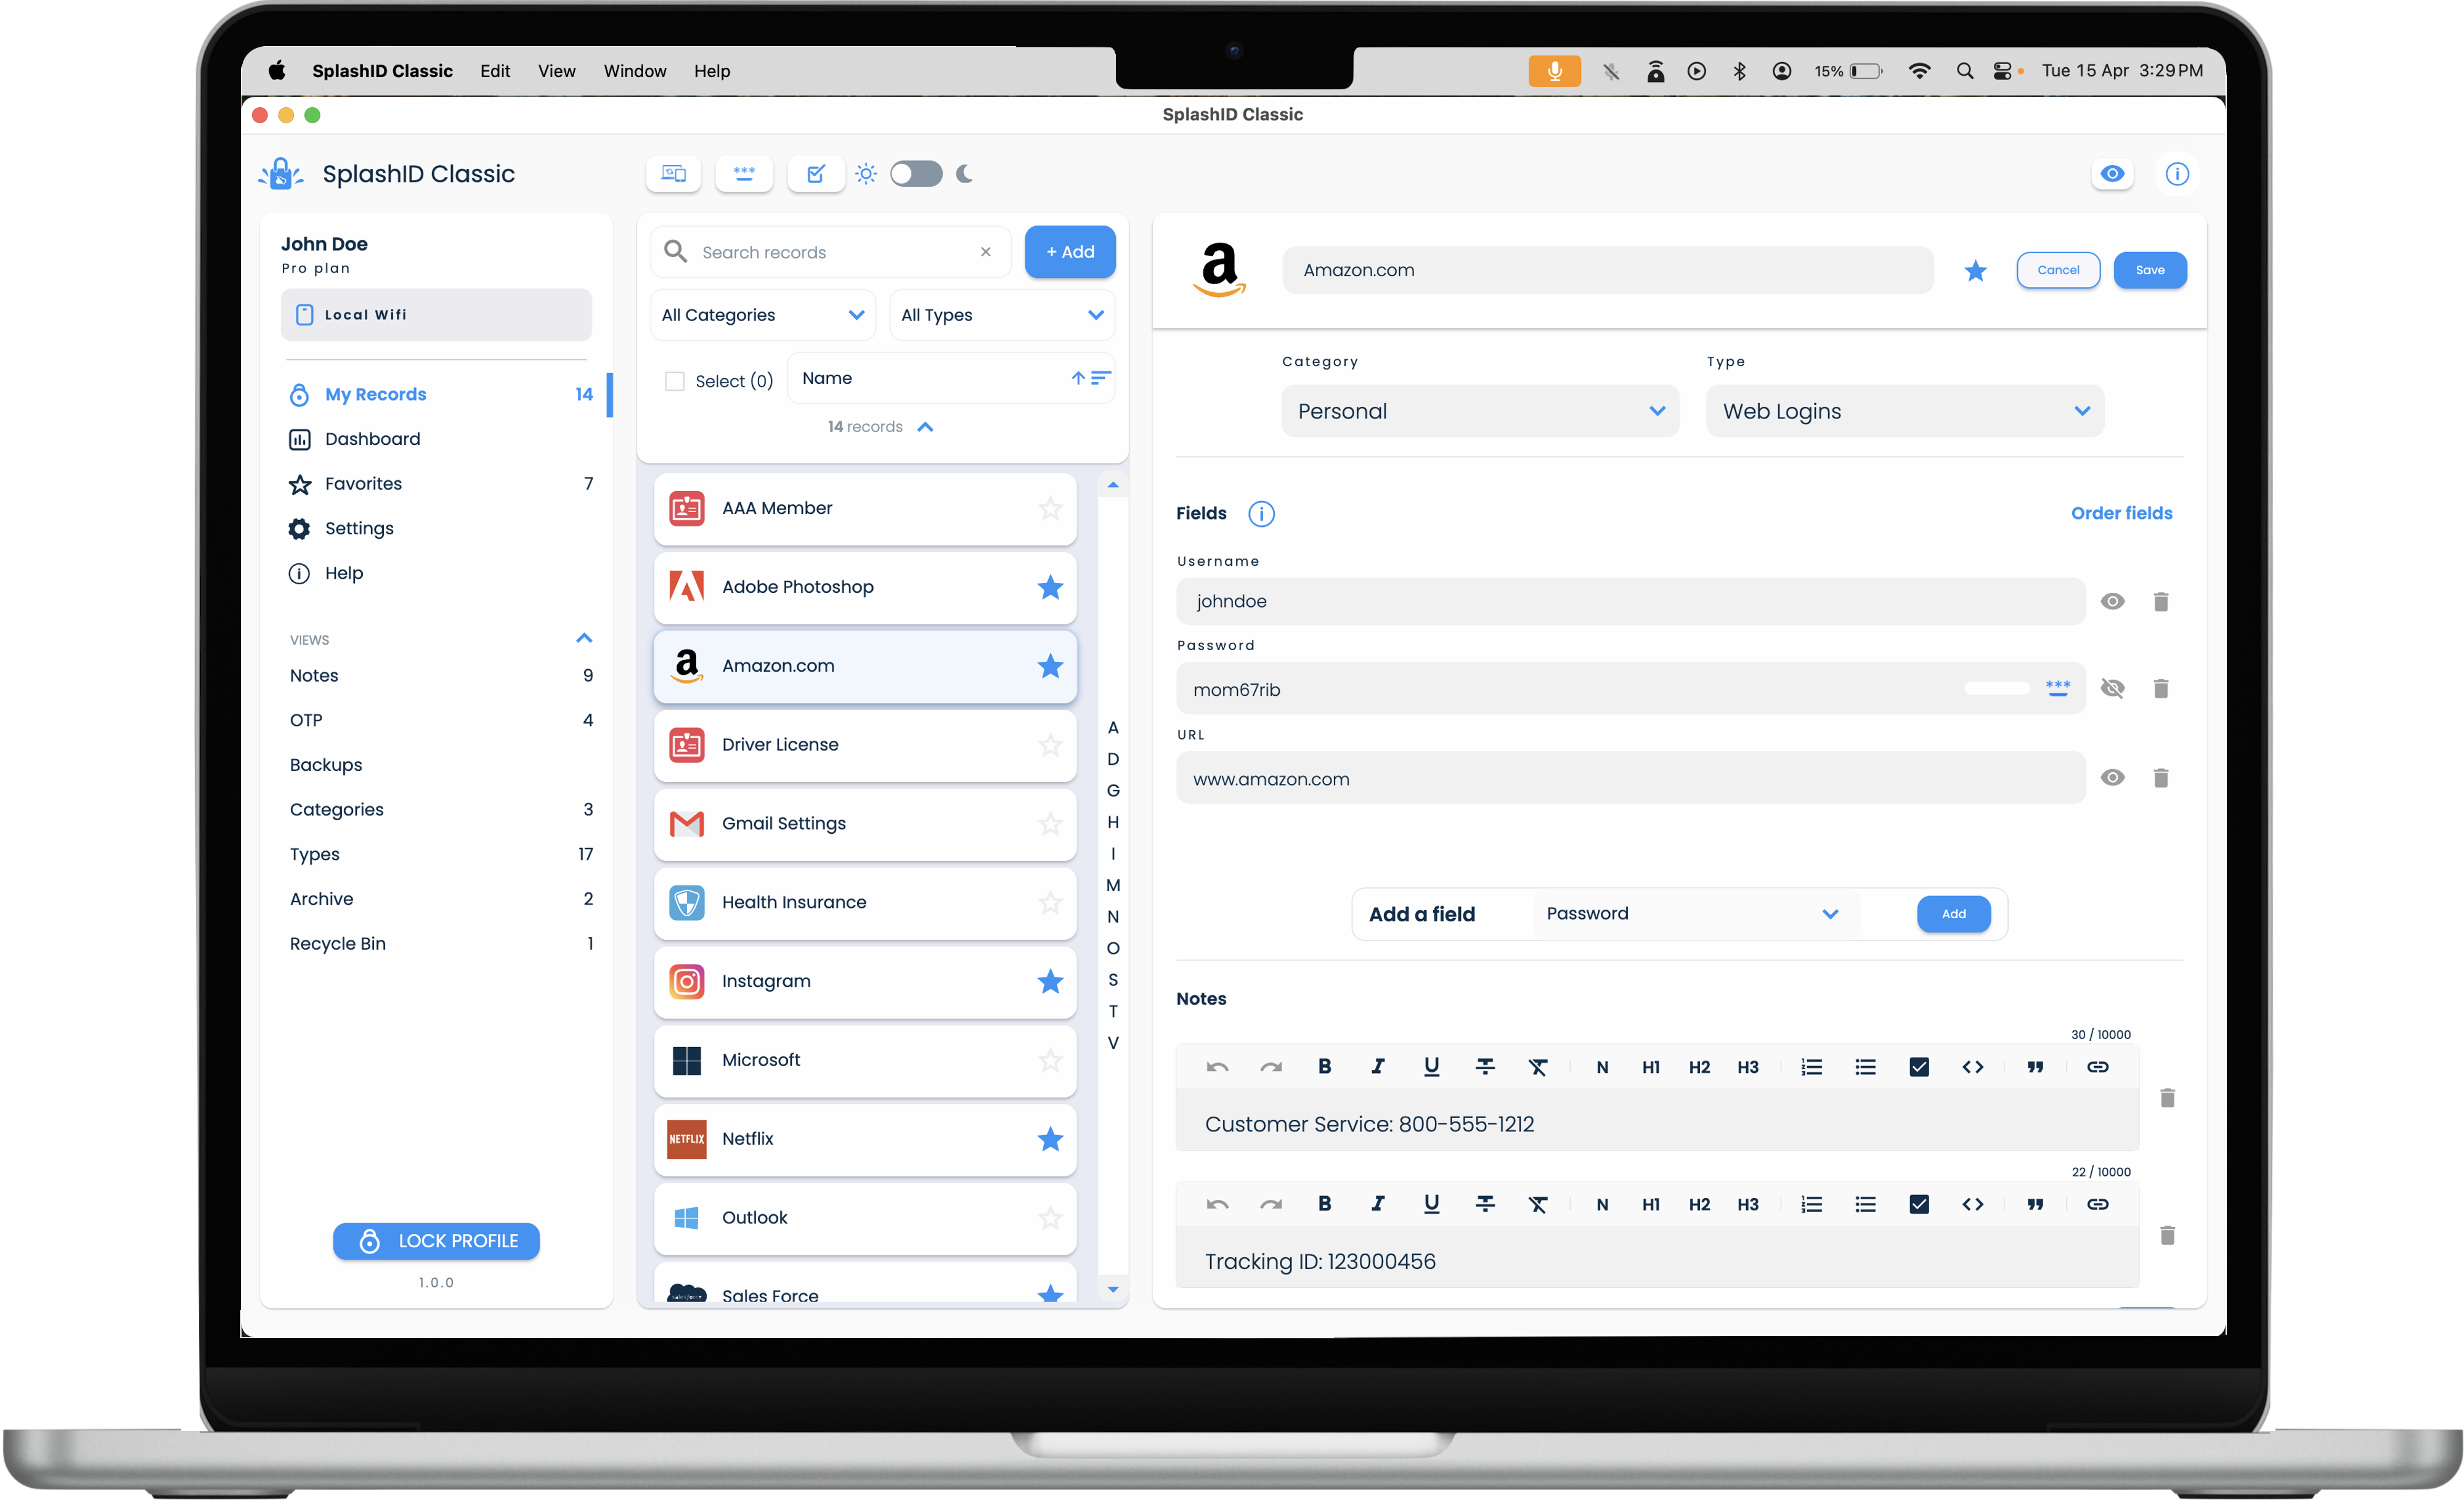
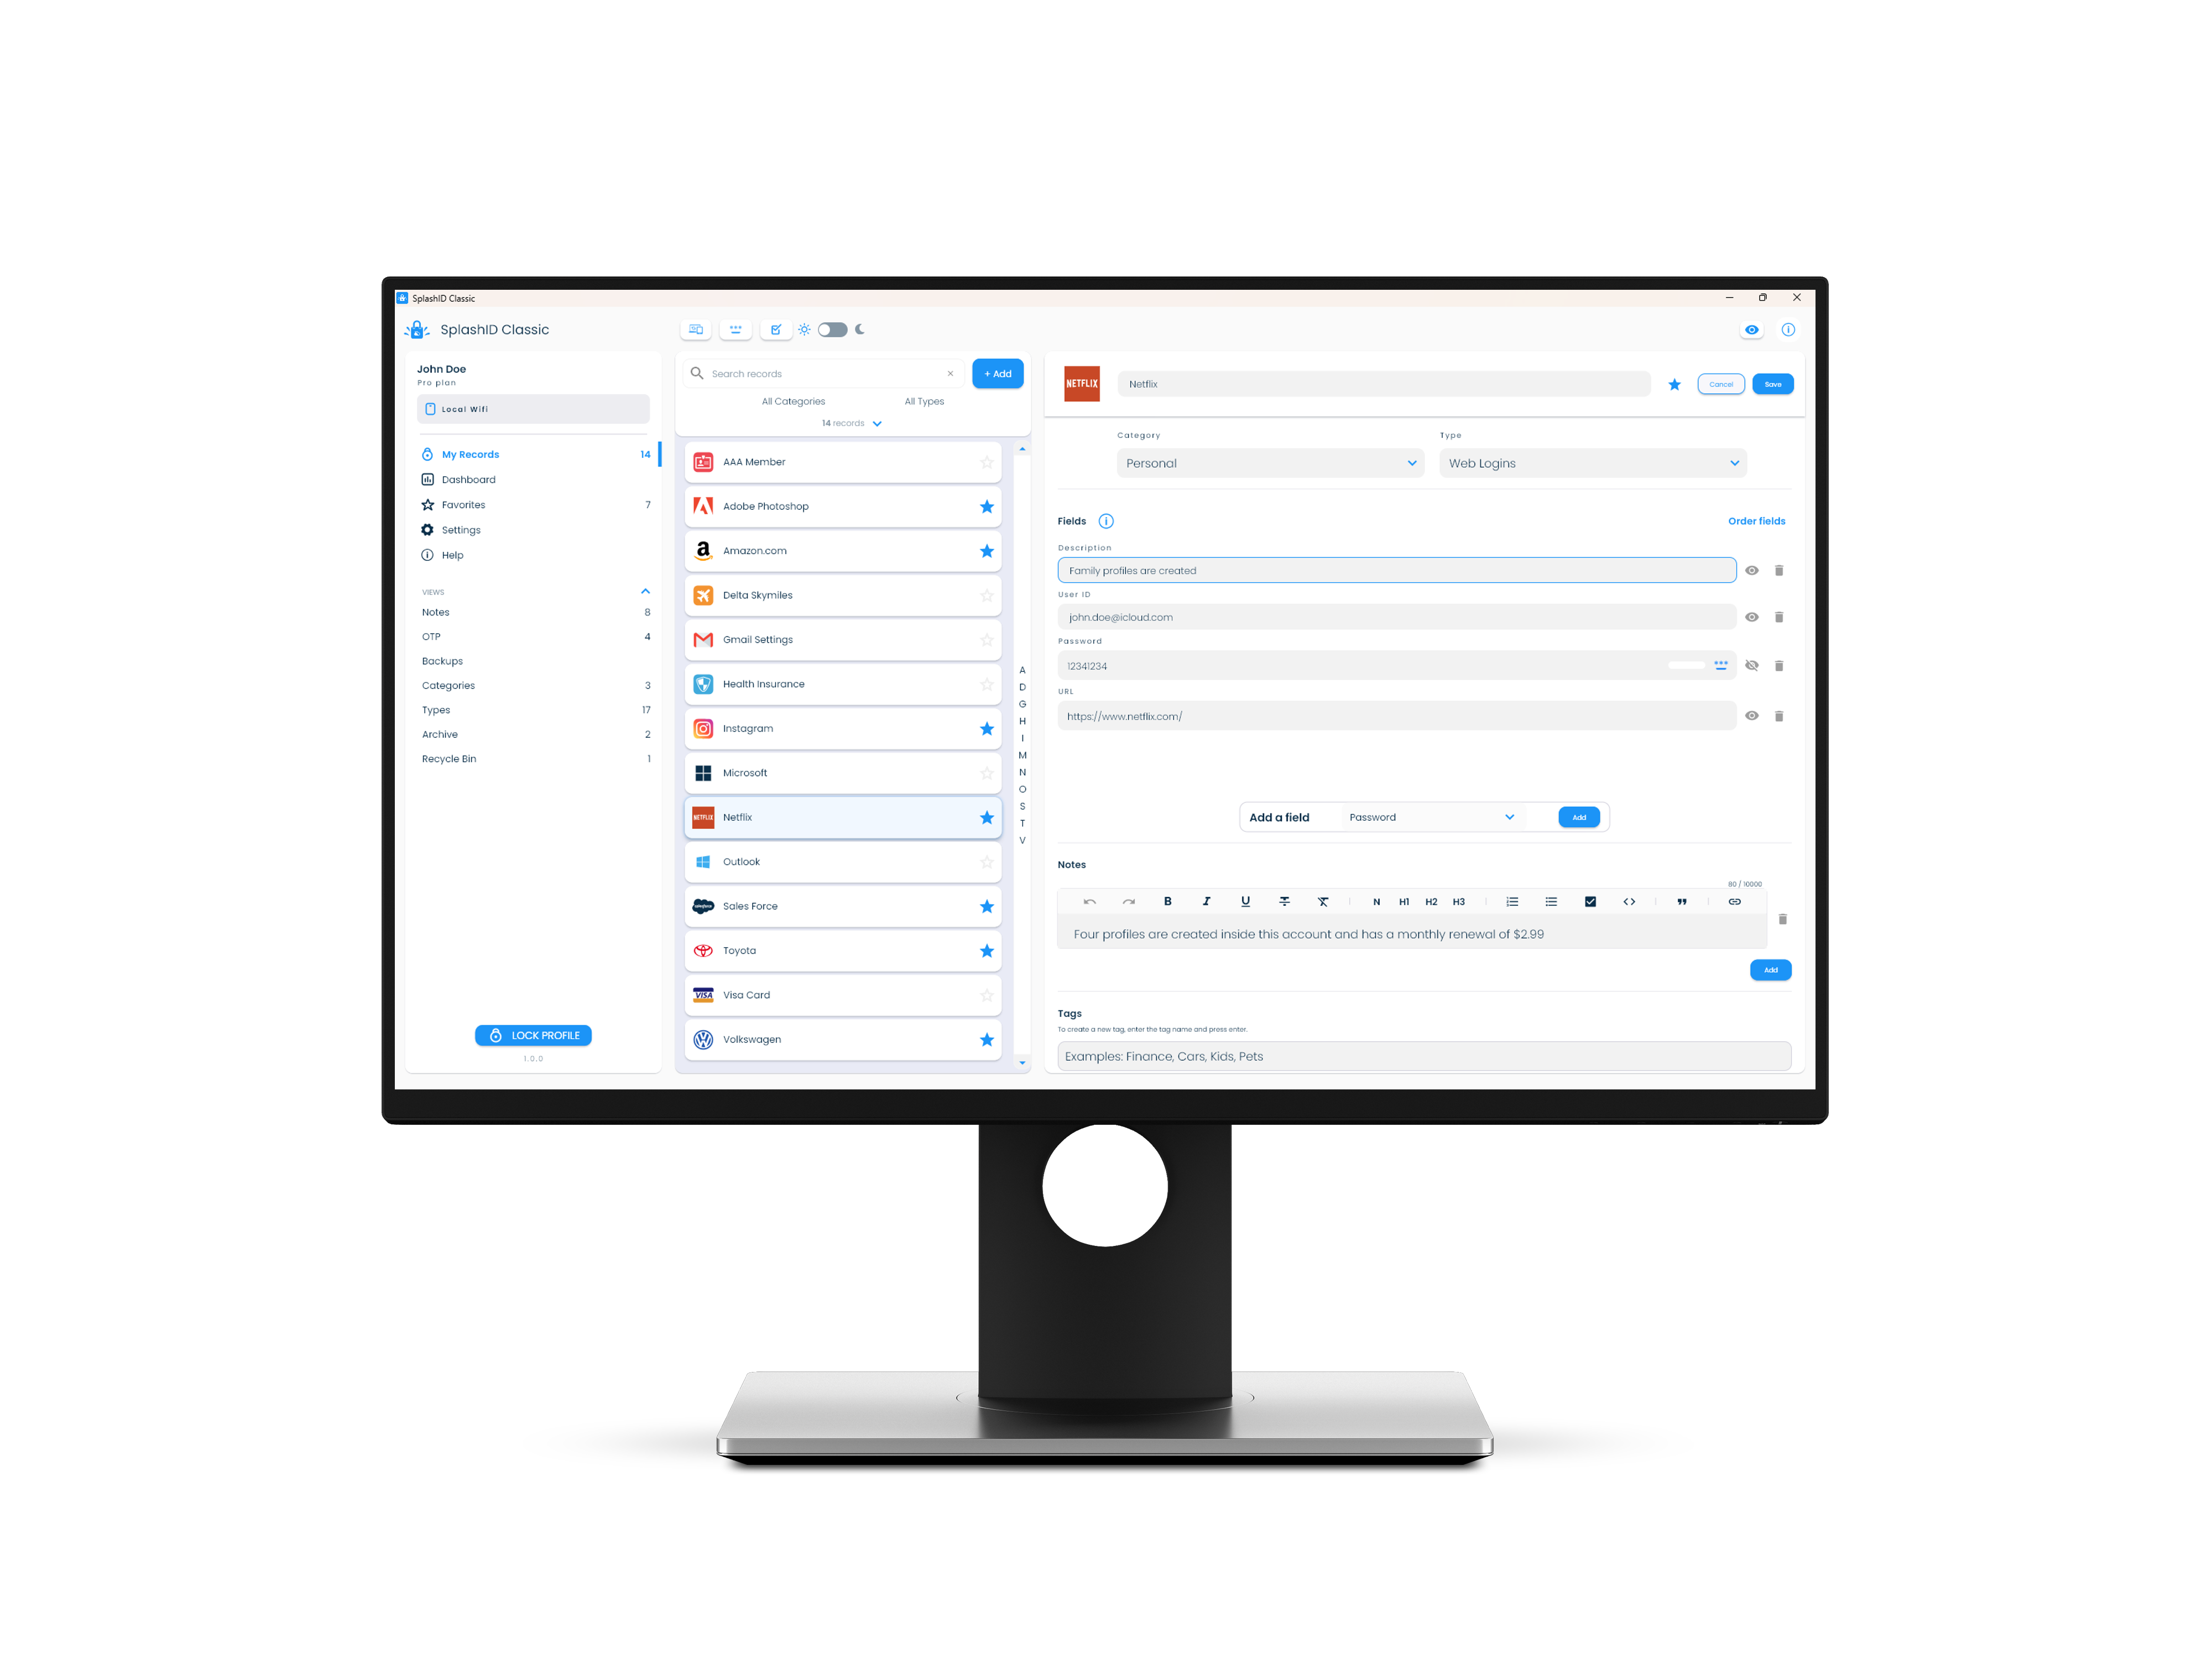
In a desktop, the view consists of 3 parts.
- The application menu in the leftmost panel.
- A list of records displayed in the middle panel.
- Details of a selected record displayed in the right panel.
| Mac | Windows |
|---|---|
 |
 |
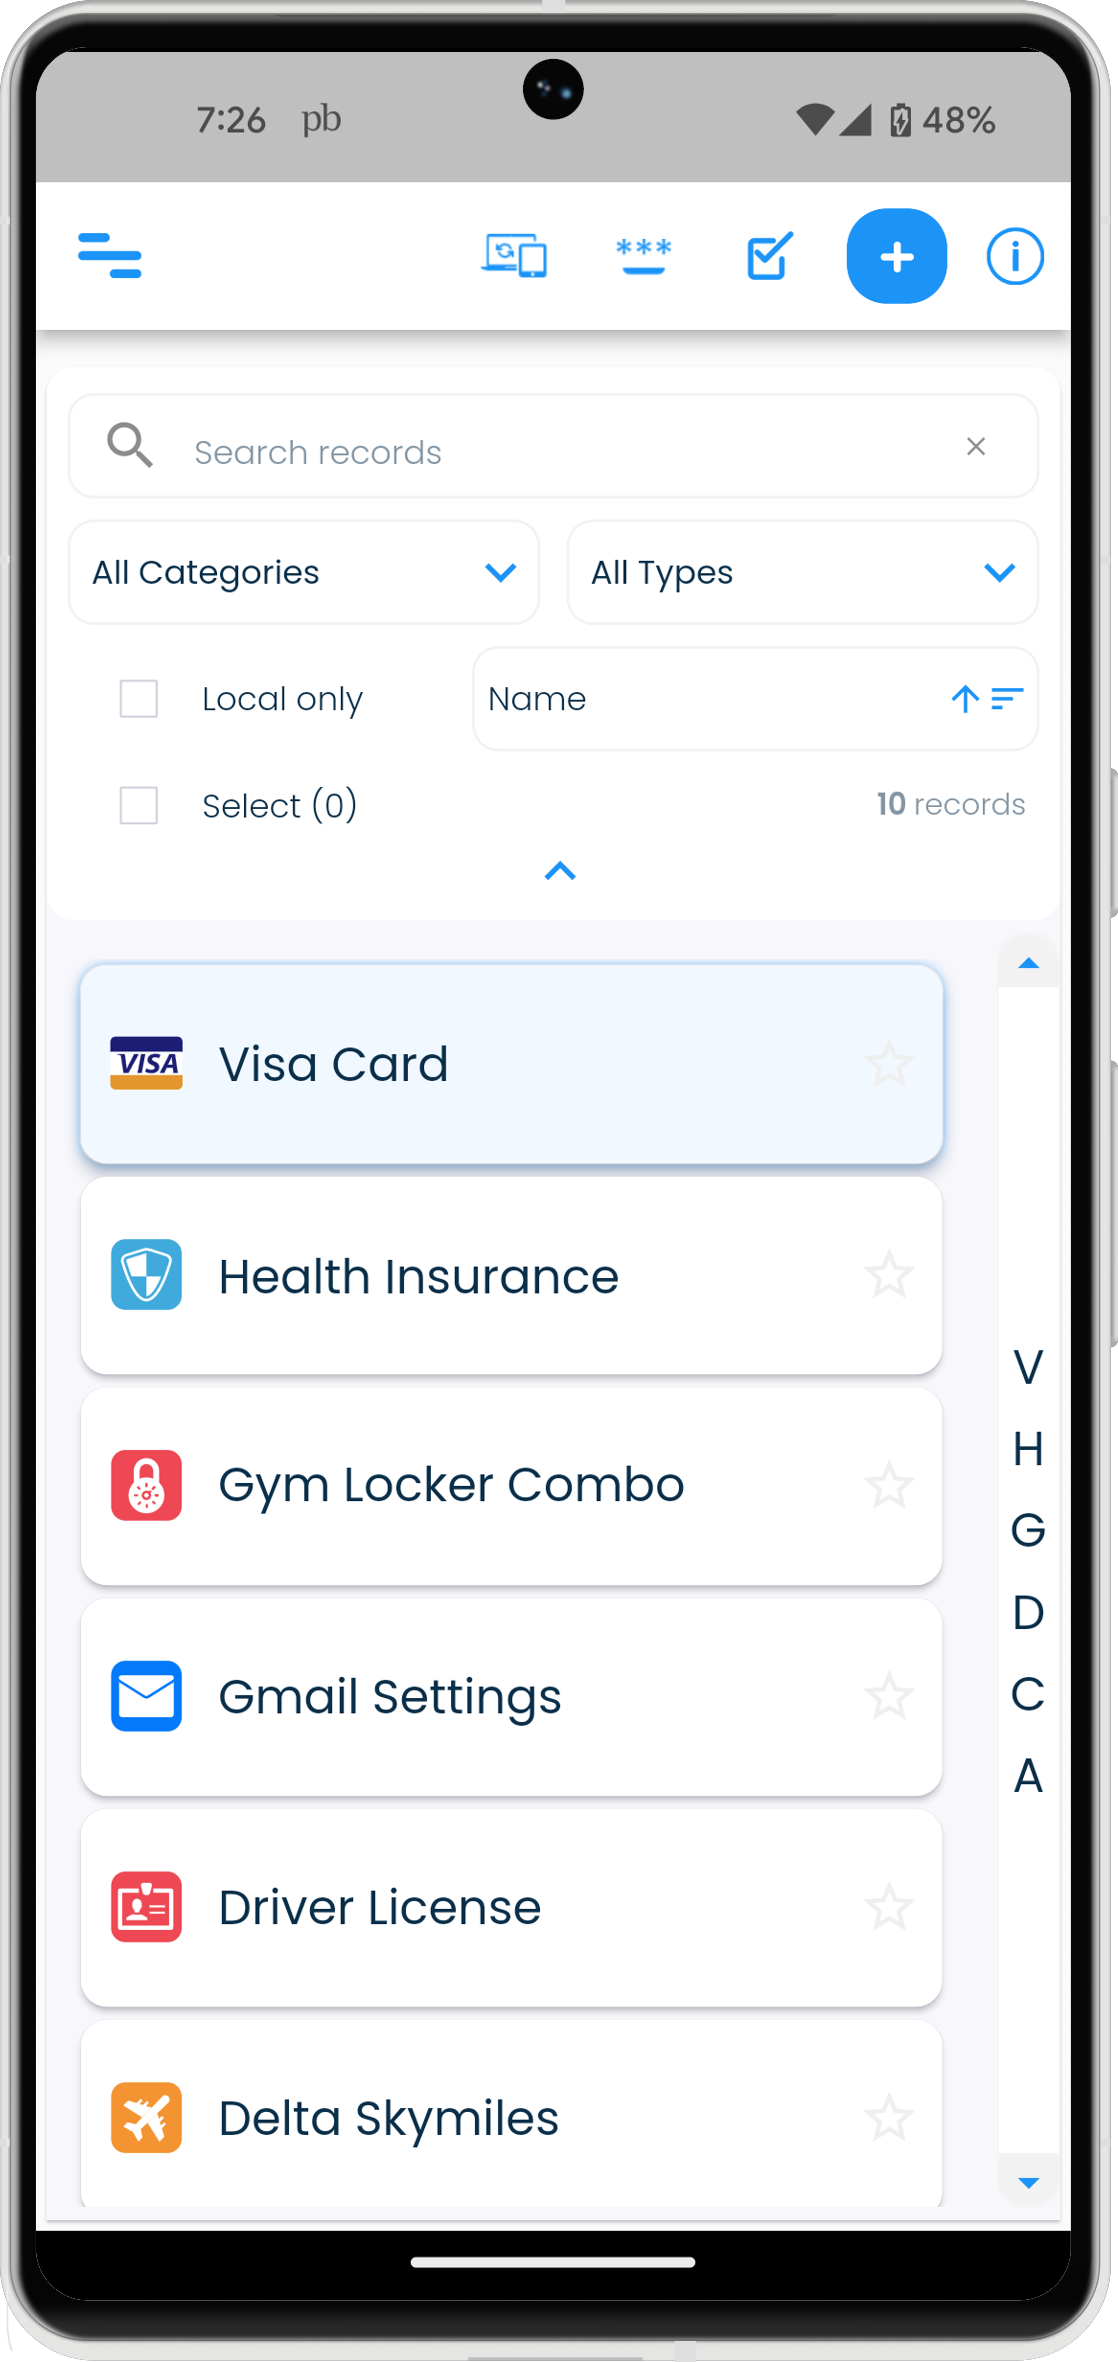
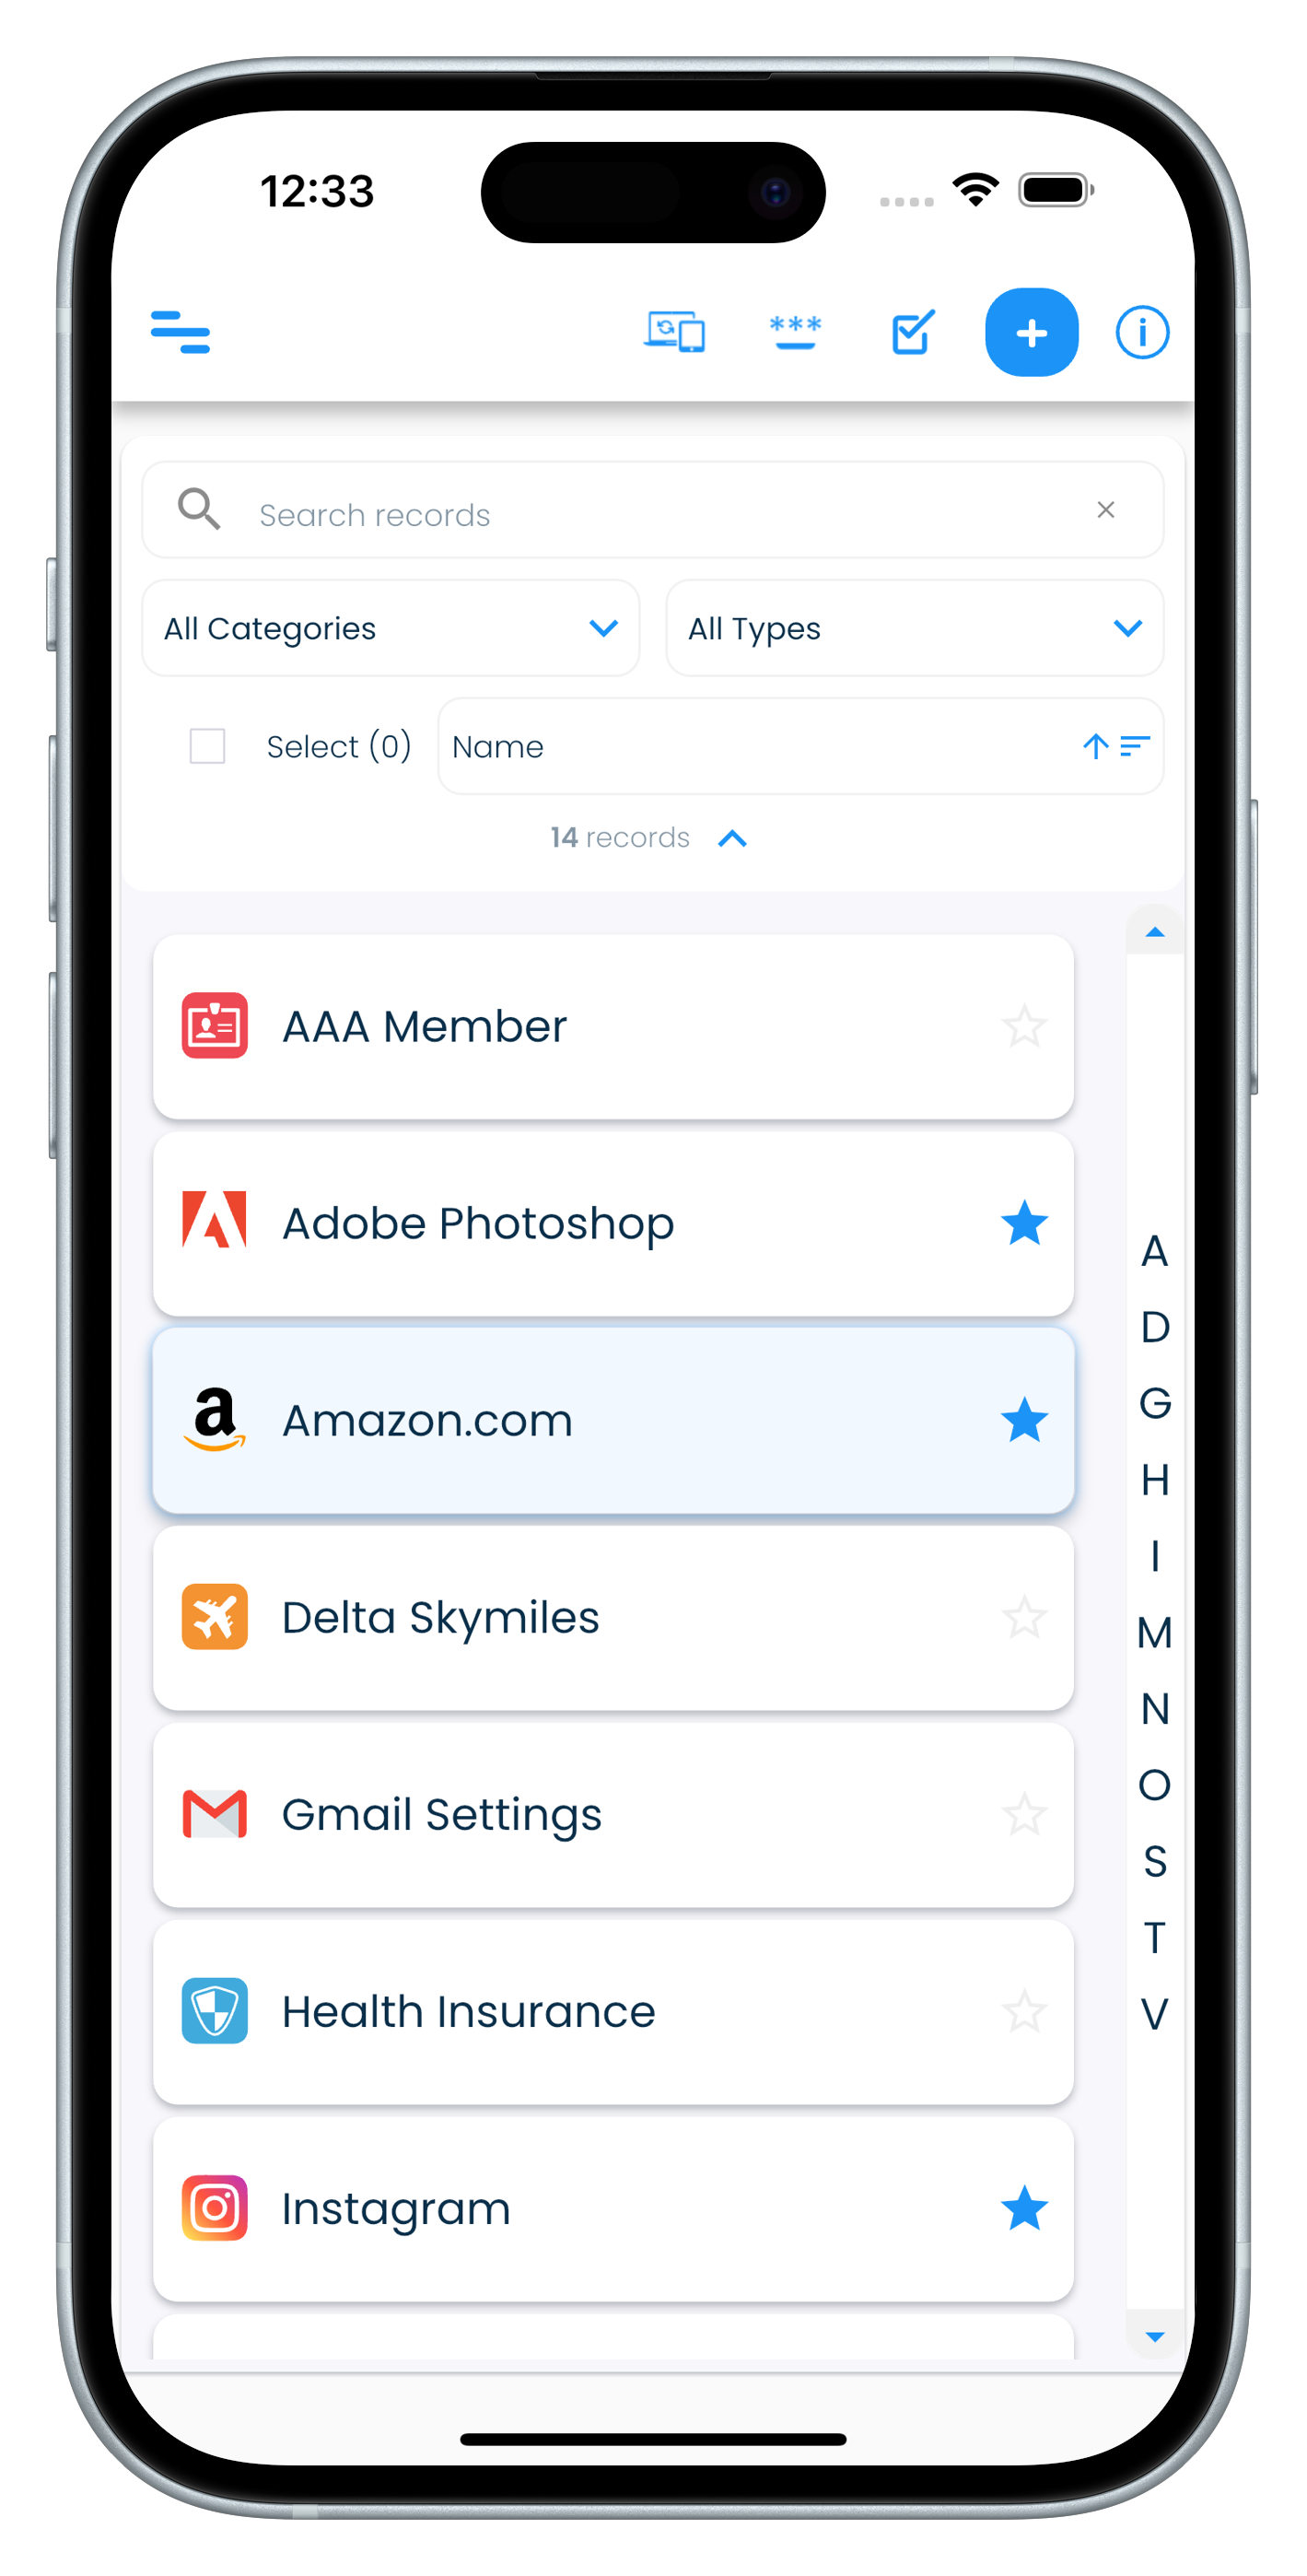
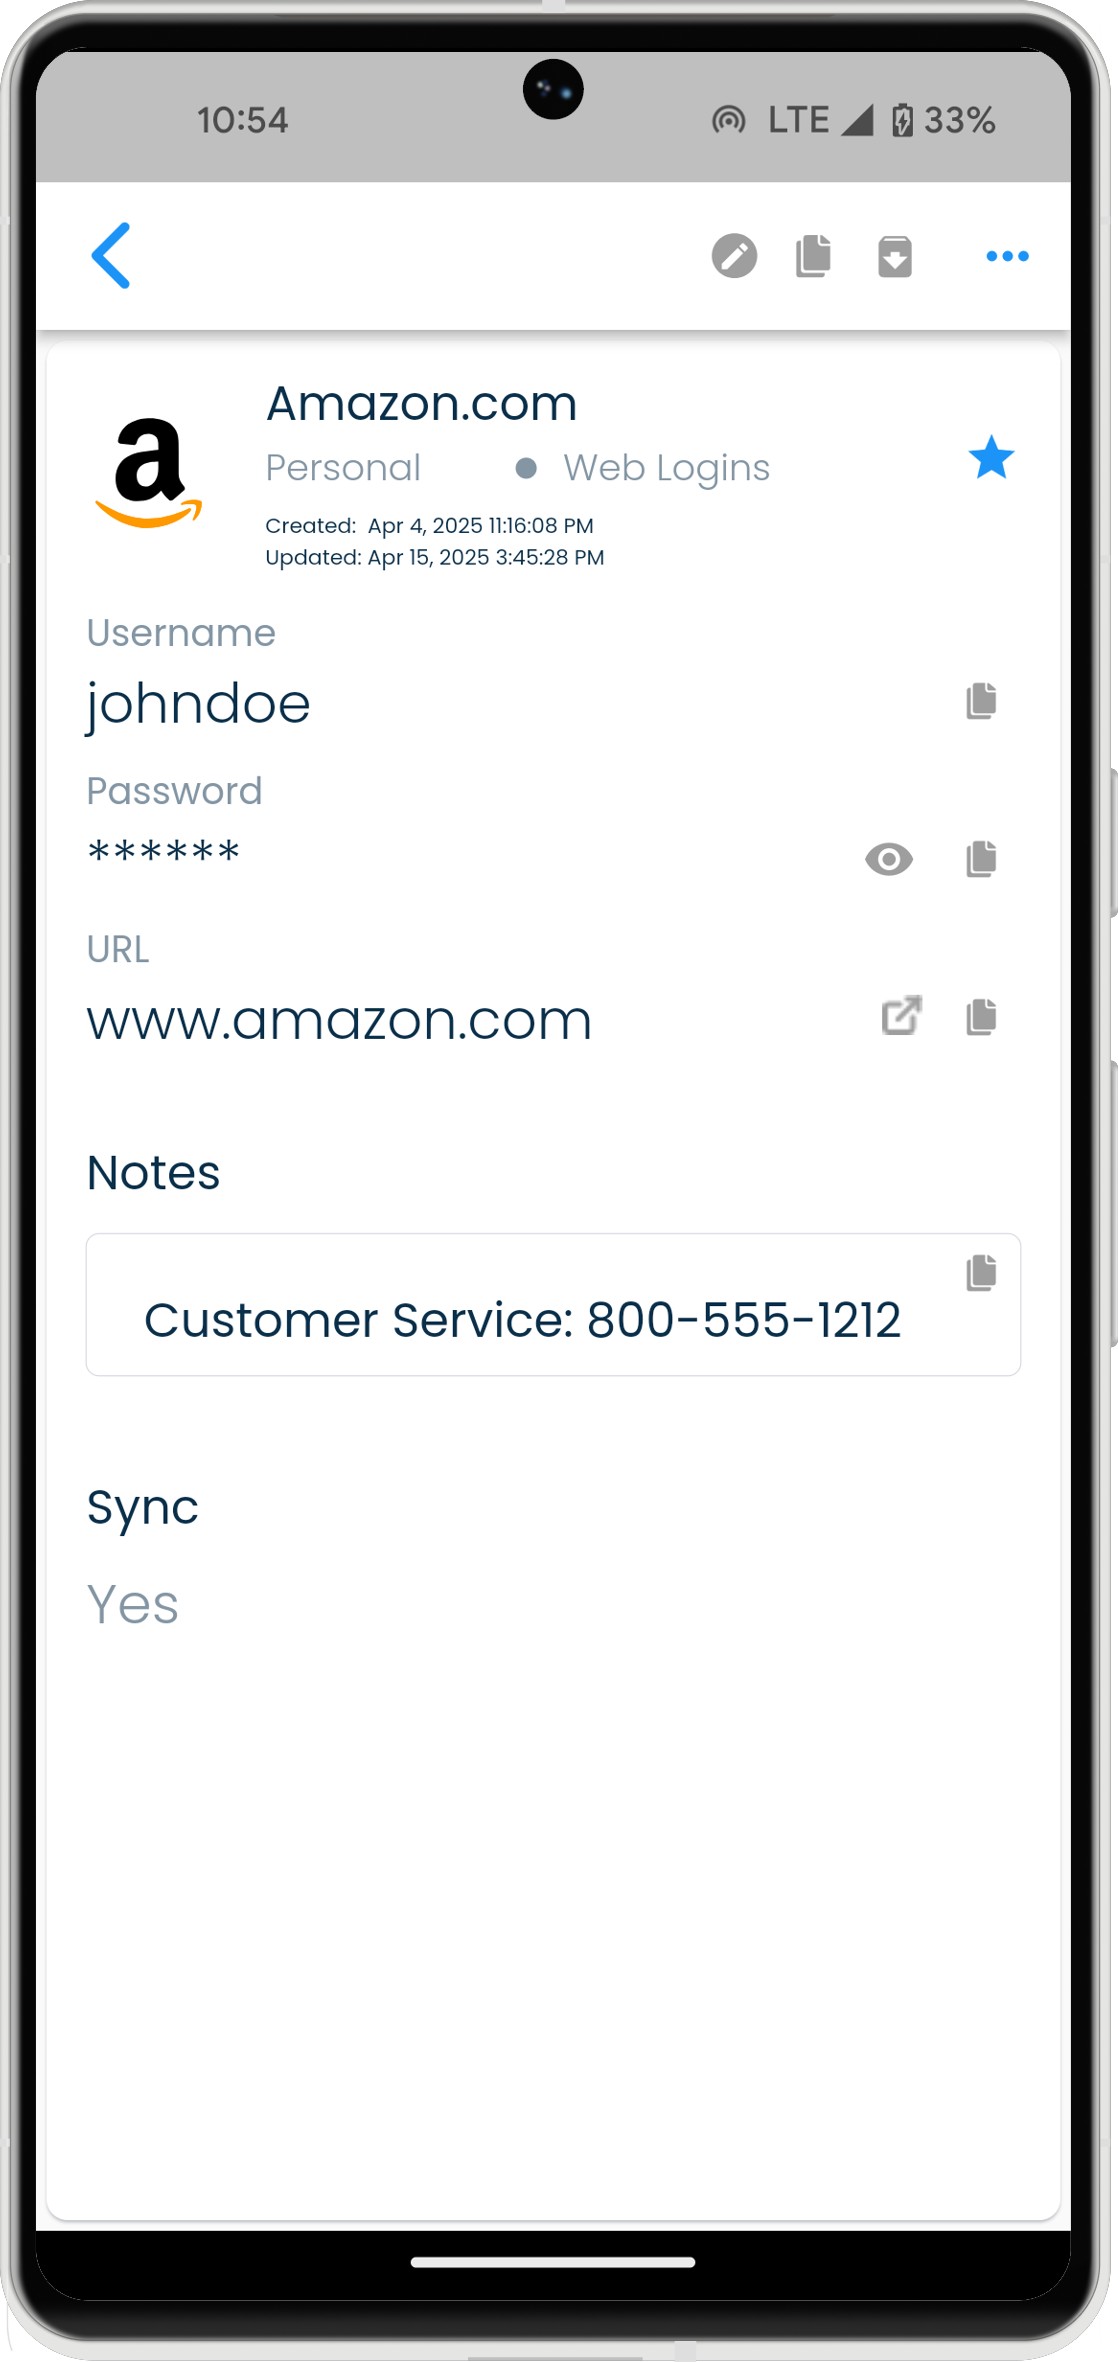
In mobiles, the view is split into individual screens that are displayed one at a time.
- A list of records.
- A view of a selected record's details.
| Android | iPhone |
|---|---|
  |
 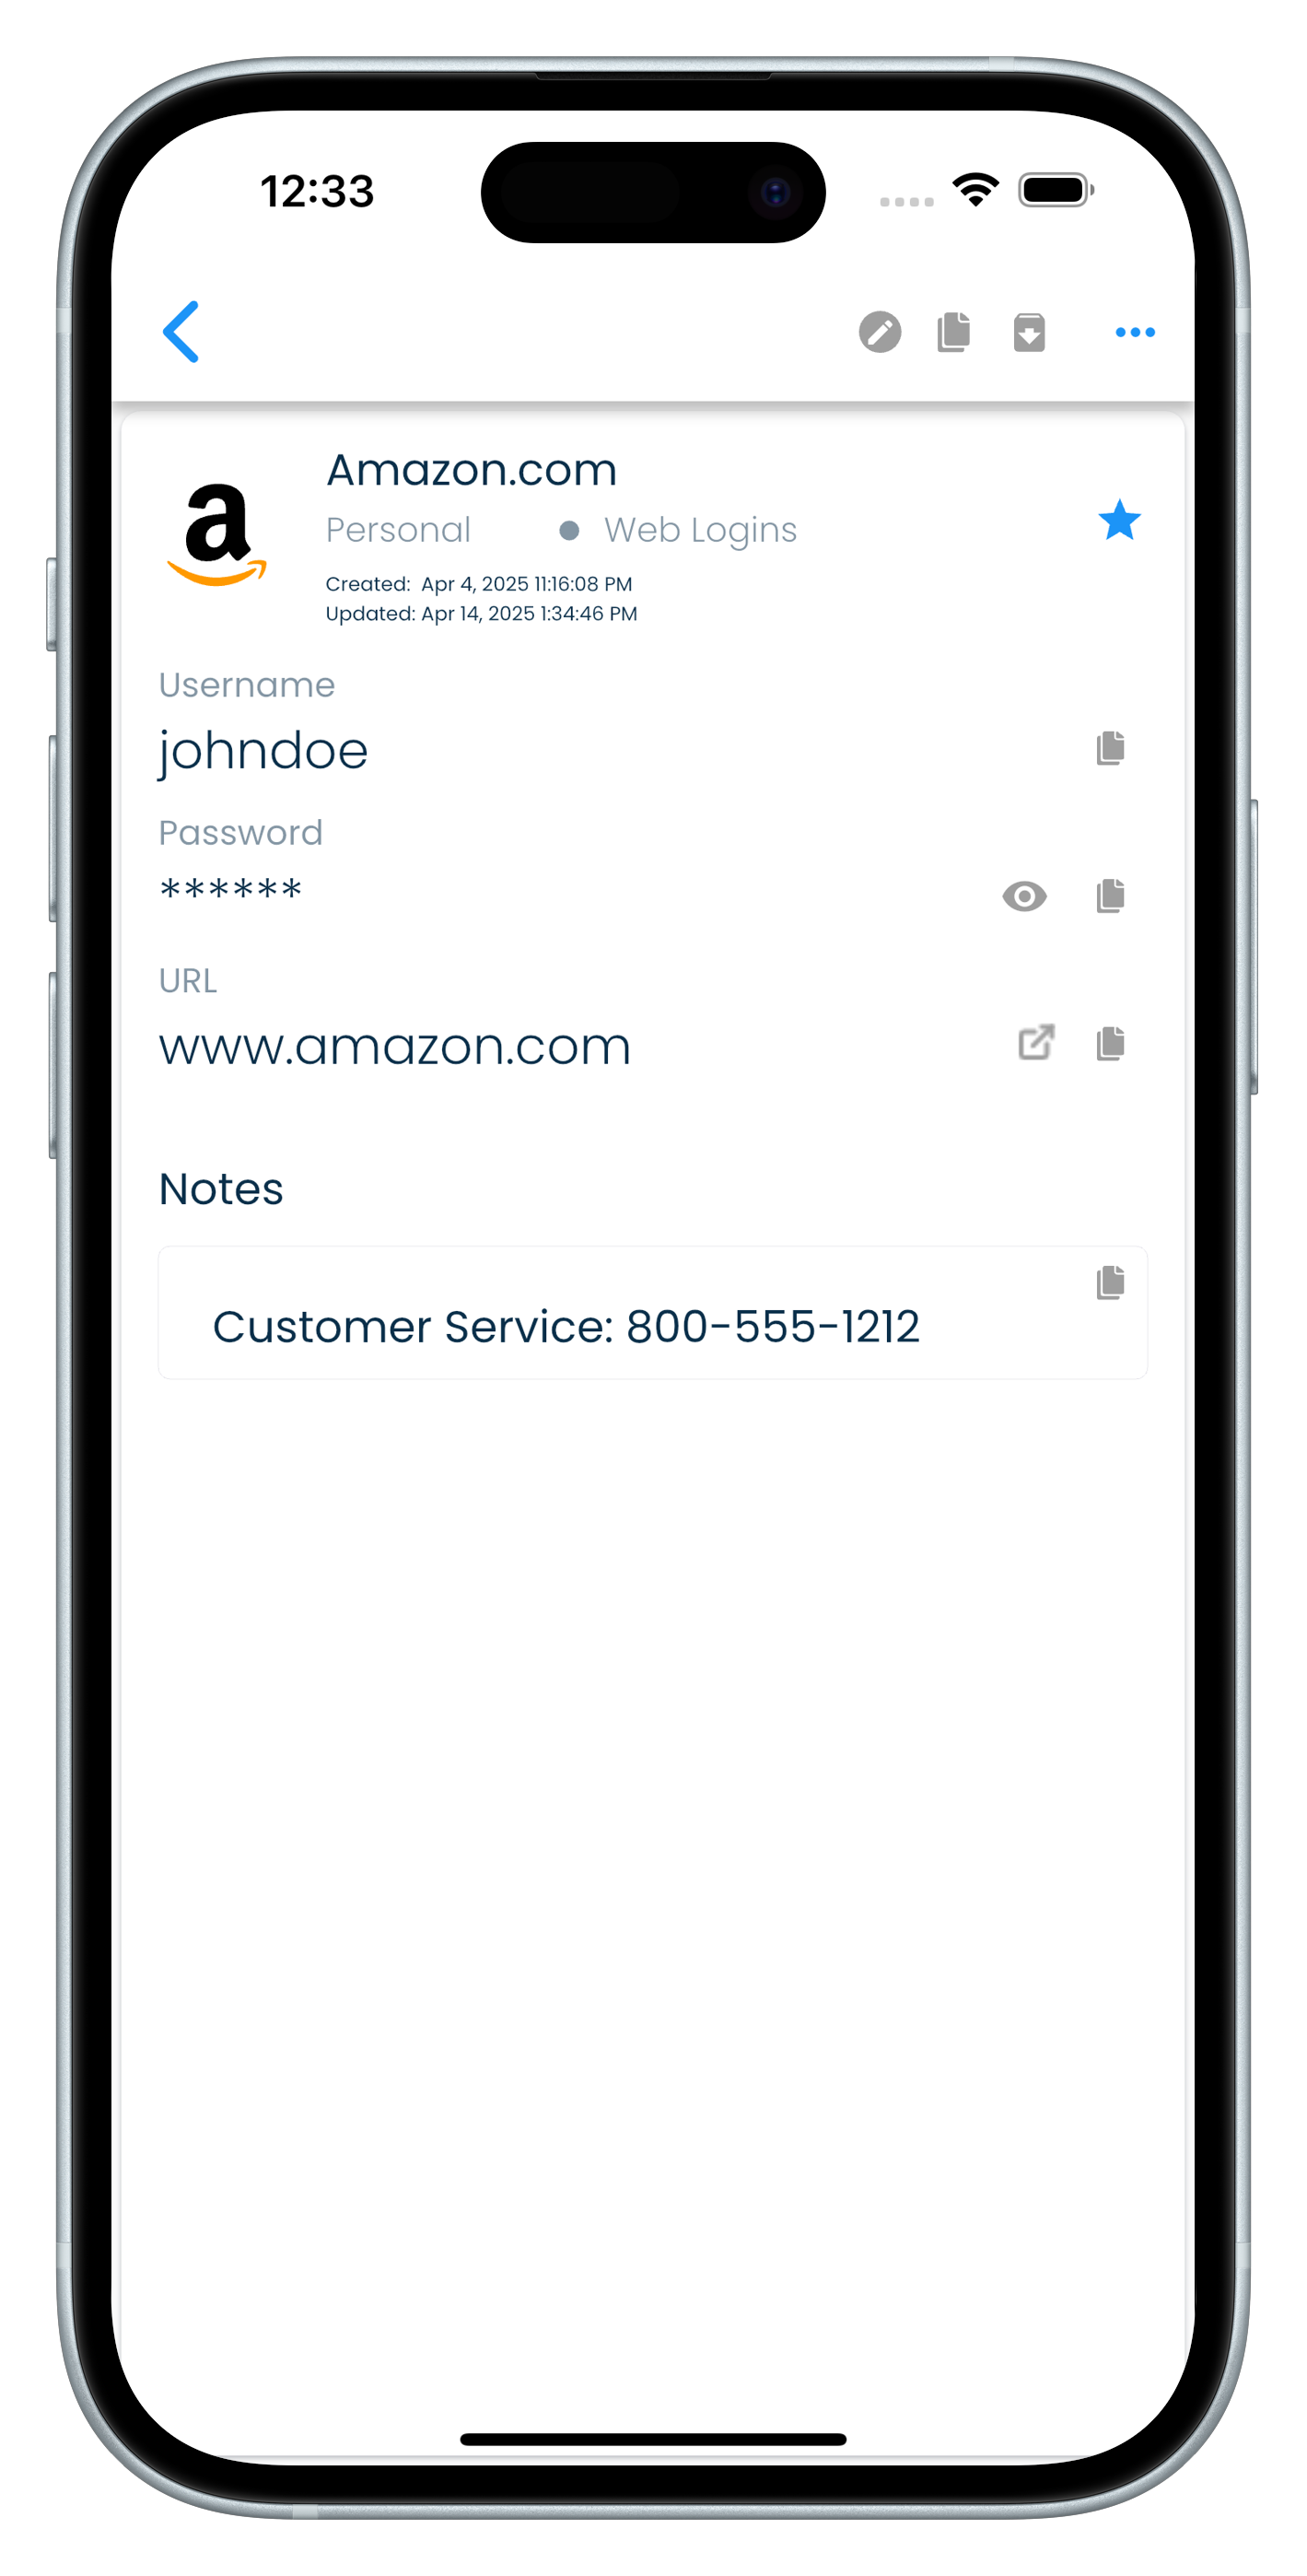 |
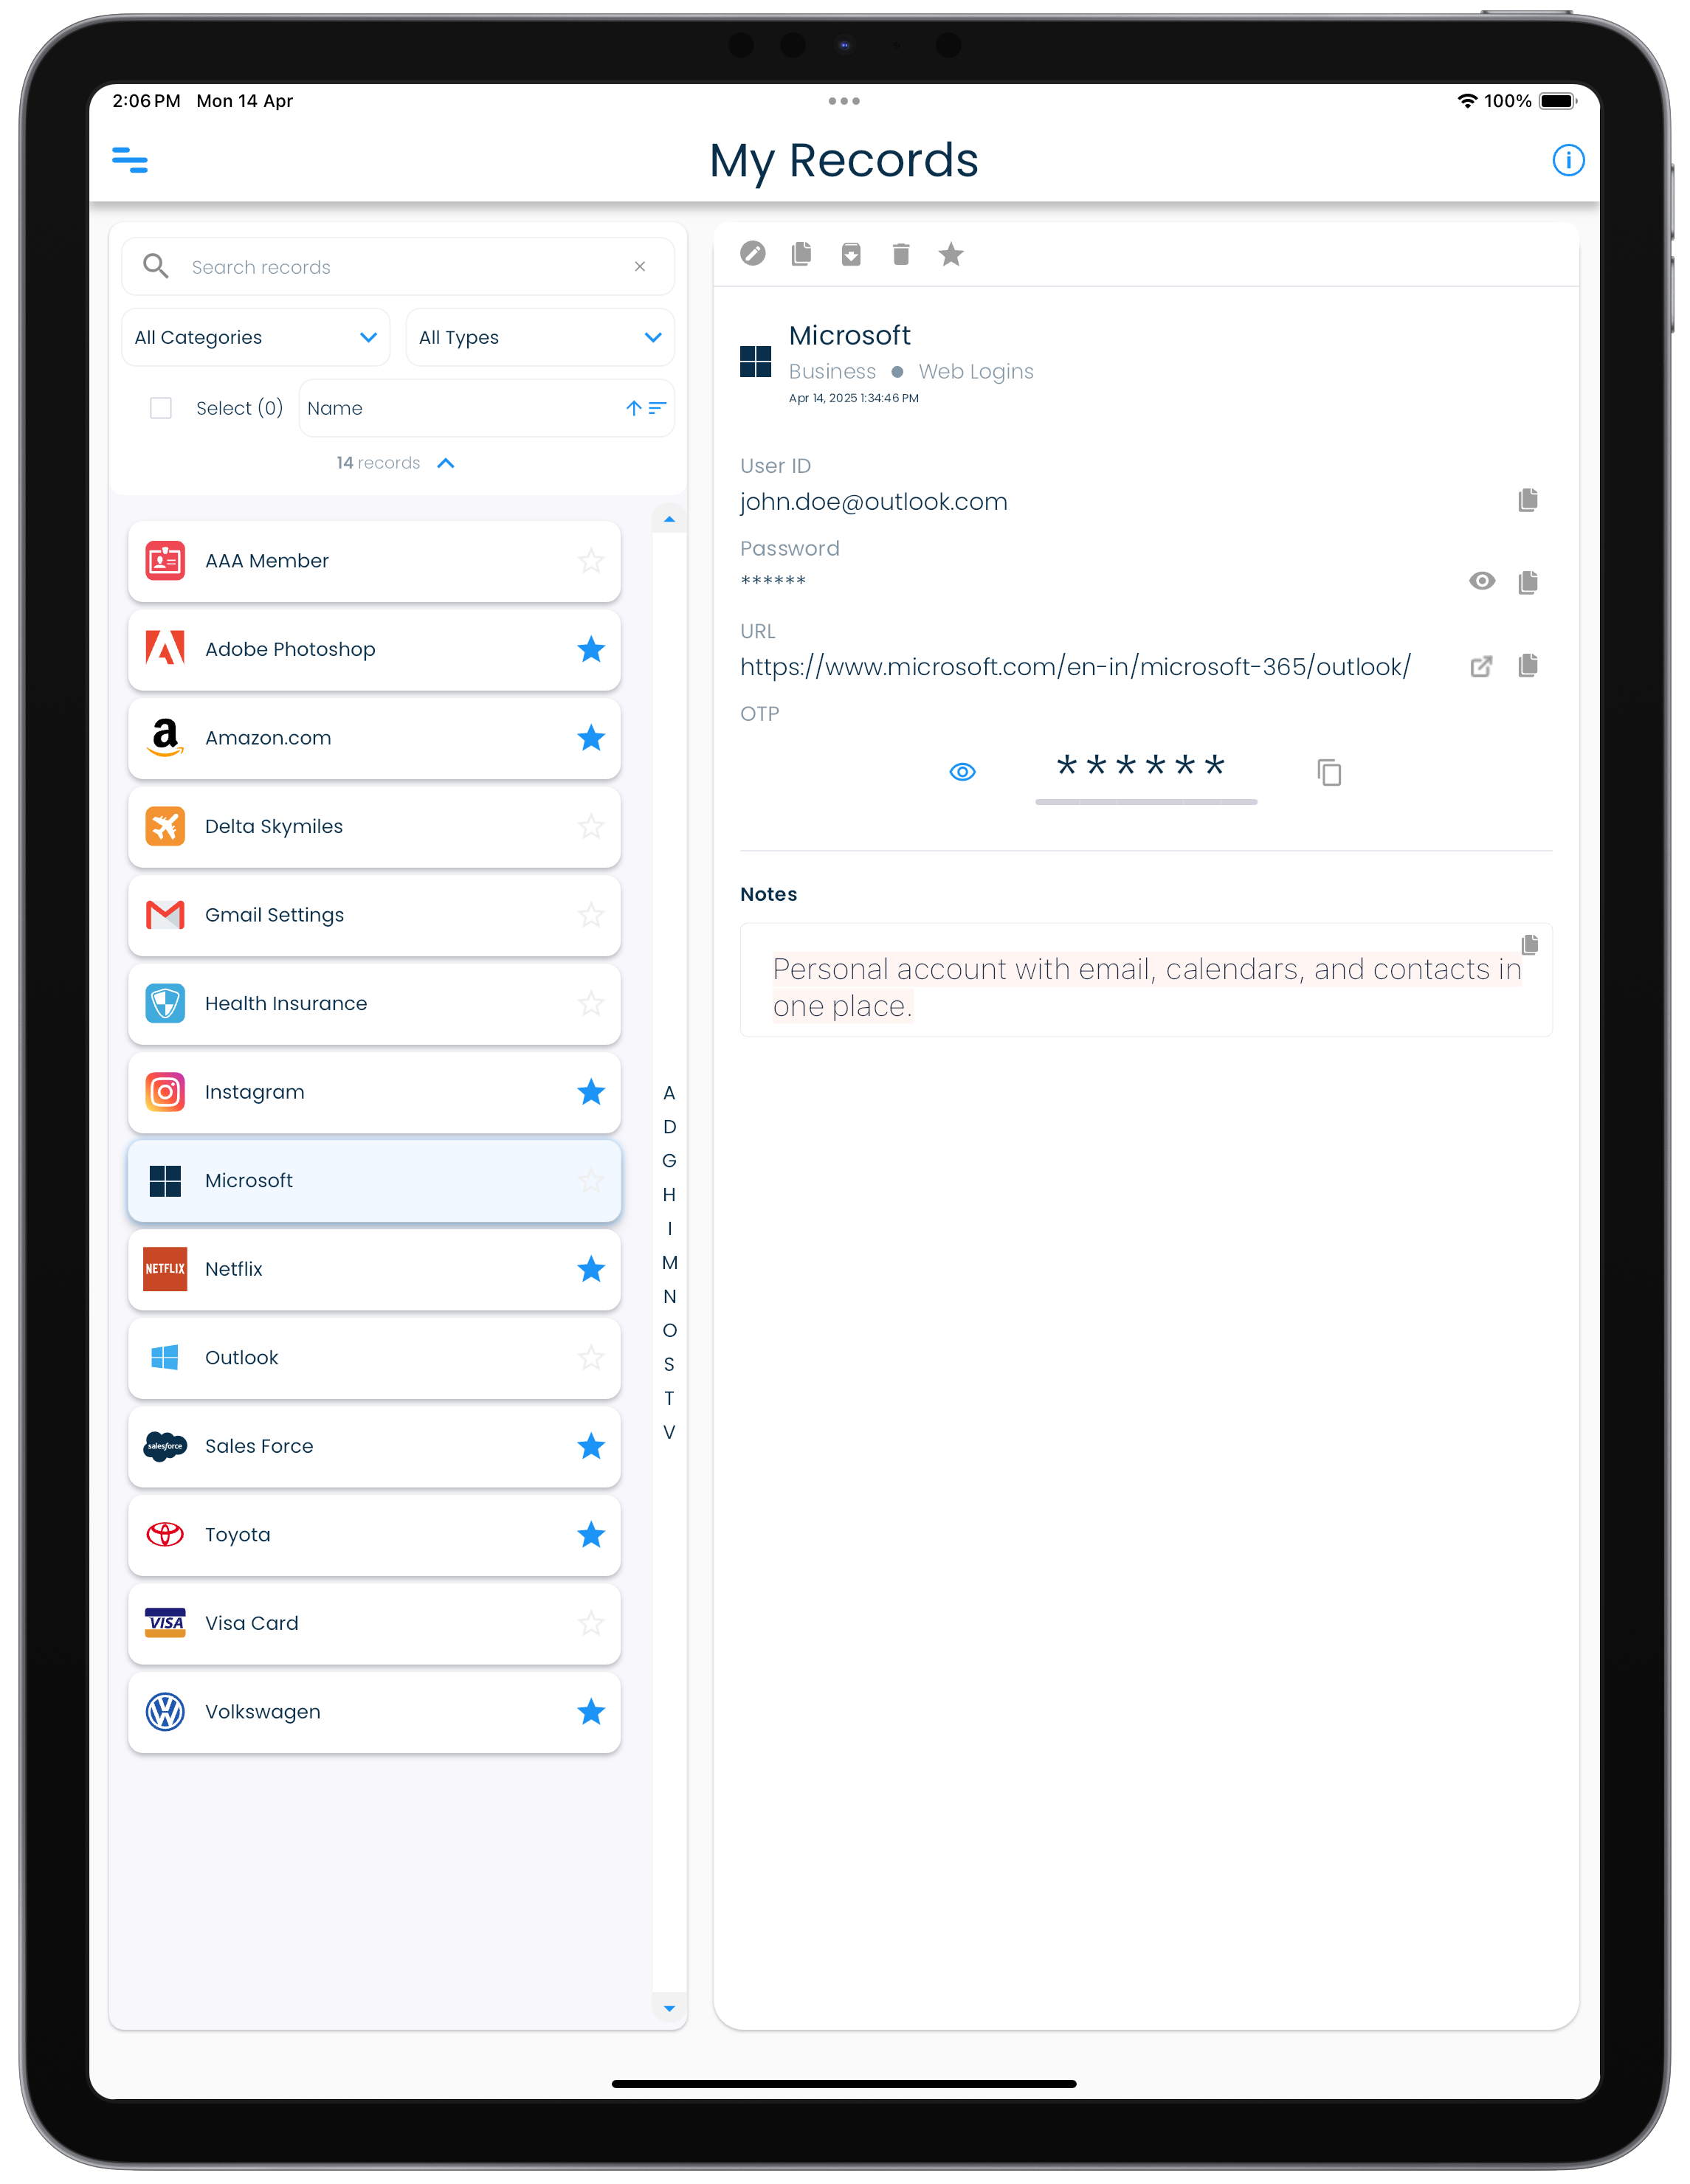
In tablets, the view is split into 2 parts.
- A list of records.
- A view of a selected record's details.
| iPad |
|---|
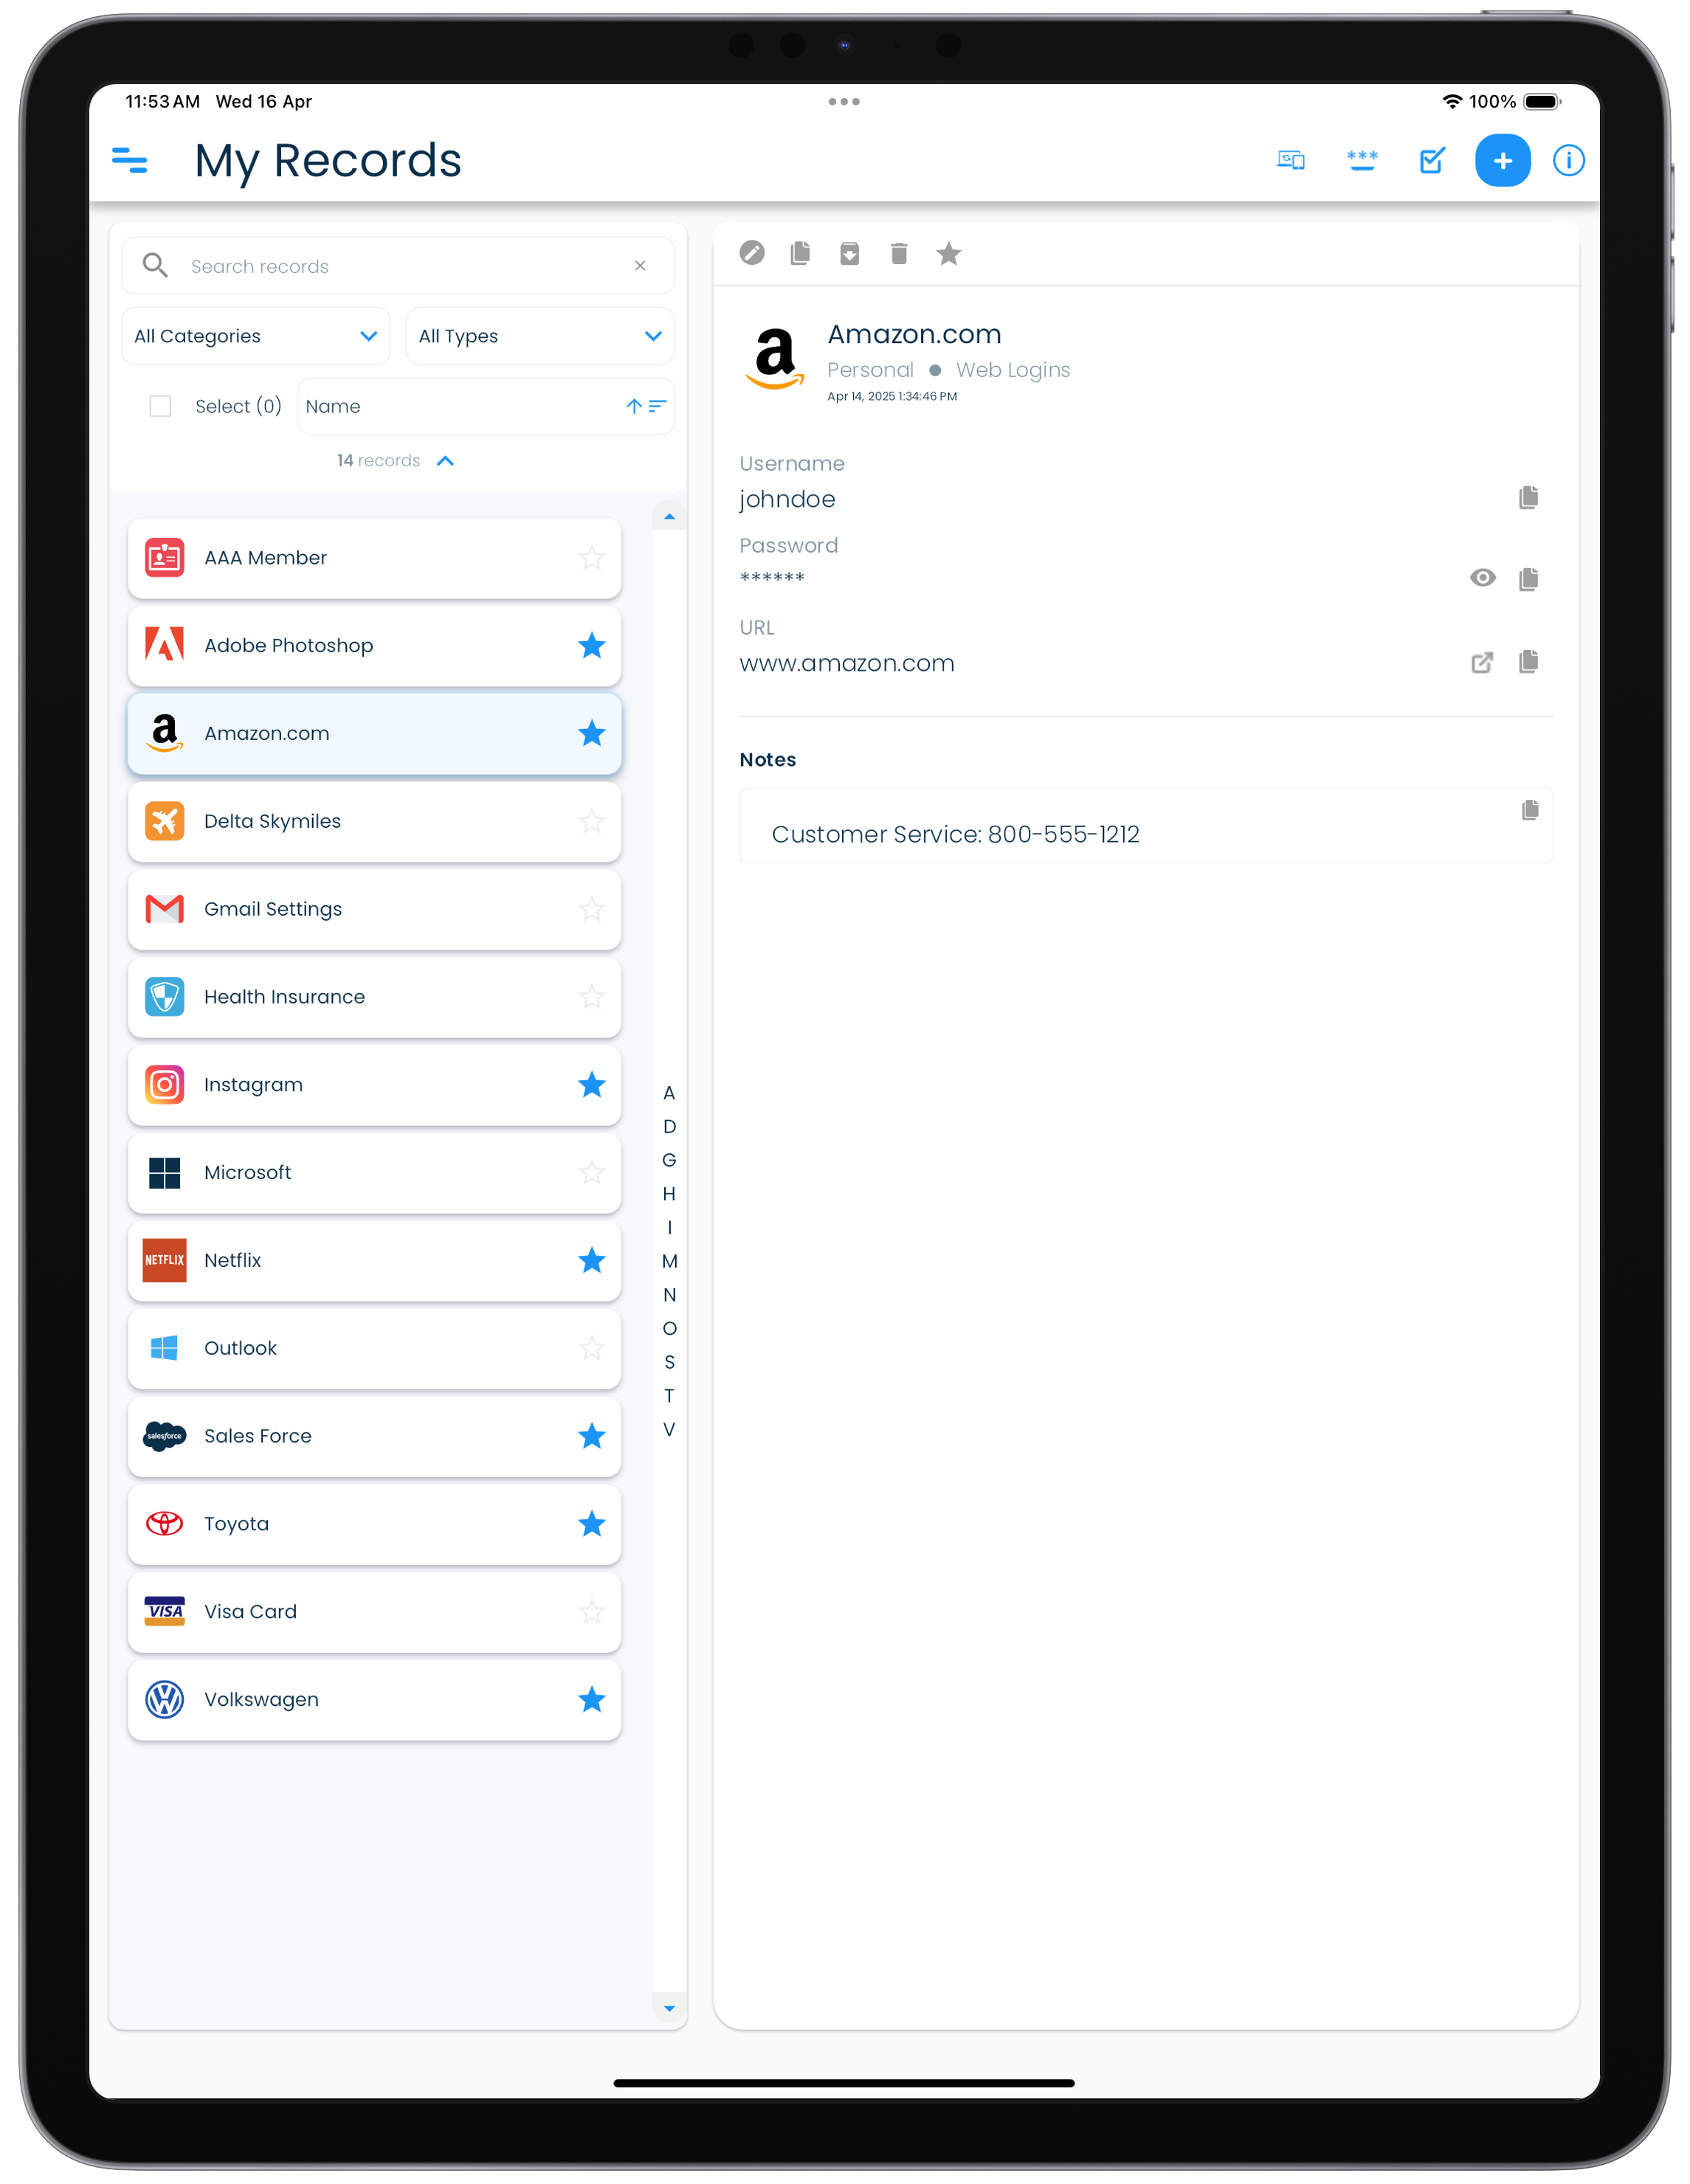 |
Application menu in mobiles and tablets
In mobiles and tablets, the application menu can be opened by tapping on the list menu icon in the top left part of the screen.
Record fields
A record contains one or more fields that allow you to store information of different types. These can be simple text, pin codes, email addreses, web site addresses, OTP code generators, and passwords among others.
Label and value
Each record field is a pair of values. It contains a label and a value. The field label helps you identify what is the value contained in the field. The labels and values can be edited as per your needs.
Managing fields
When you add a new record, you can select a type for the record. The type is like a template with predefined fields that will be included in the record.
Type template on record addition
Once a record is added, changing the type will not change the fields in it. The type is then used as an indicator of the record contents.
You can also delete individual fields, or add more fields to the record. There is no limit on the number of fields you can have in a record.
Record fields also have actions associated with them that are useful while accessing the information in them.
Record fields can be ordered in the way you want. By default, when you add a new field it gets added to the end of the list of fields.
Copy to clipboard
Most of the record fields will have a copy to clipboard button that is displayed to the right of the field when the record is being viewed. Click or tap on the copy to clipboard button to copy the field content to the clipboard on the device.
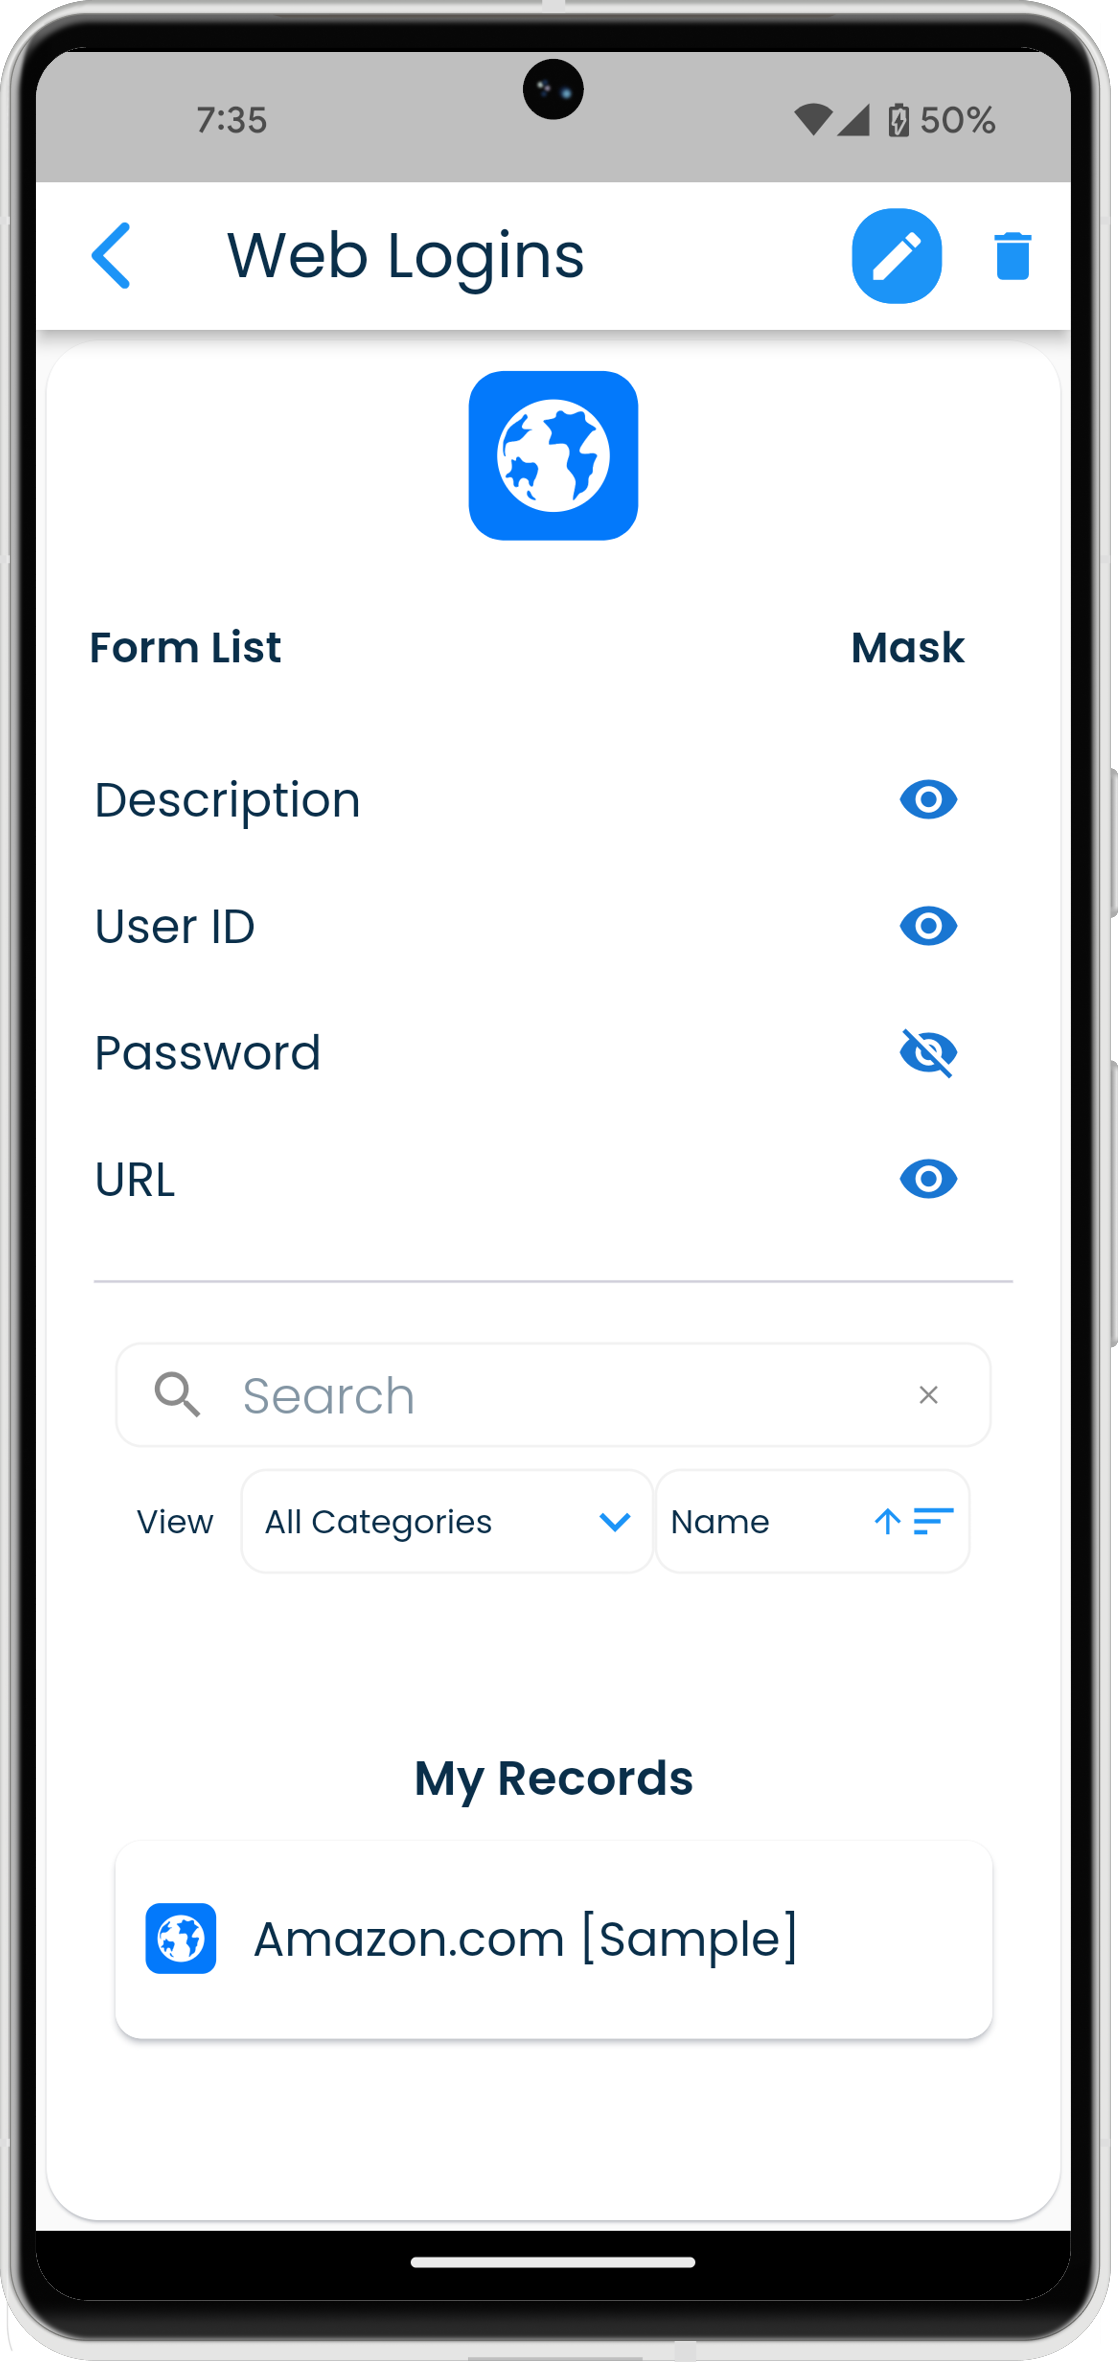
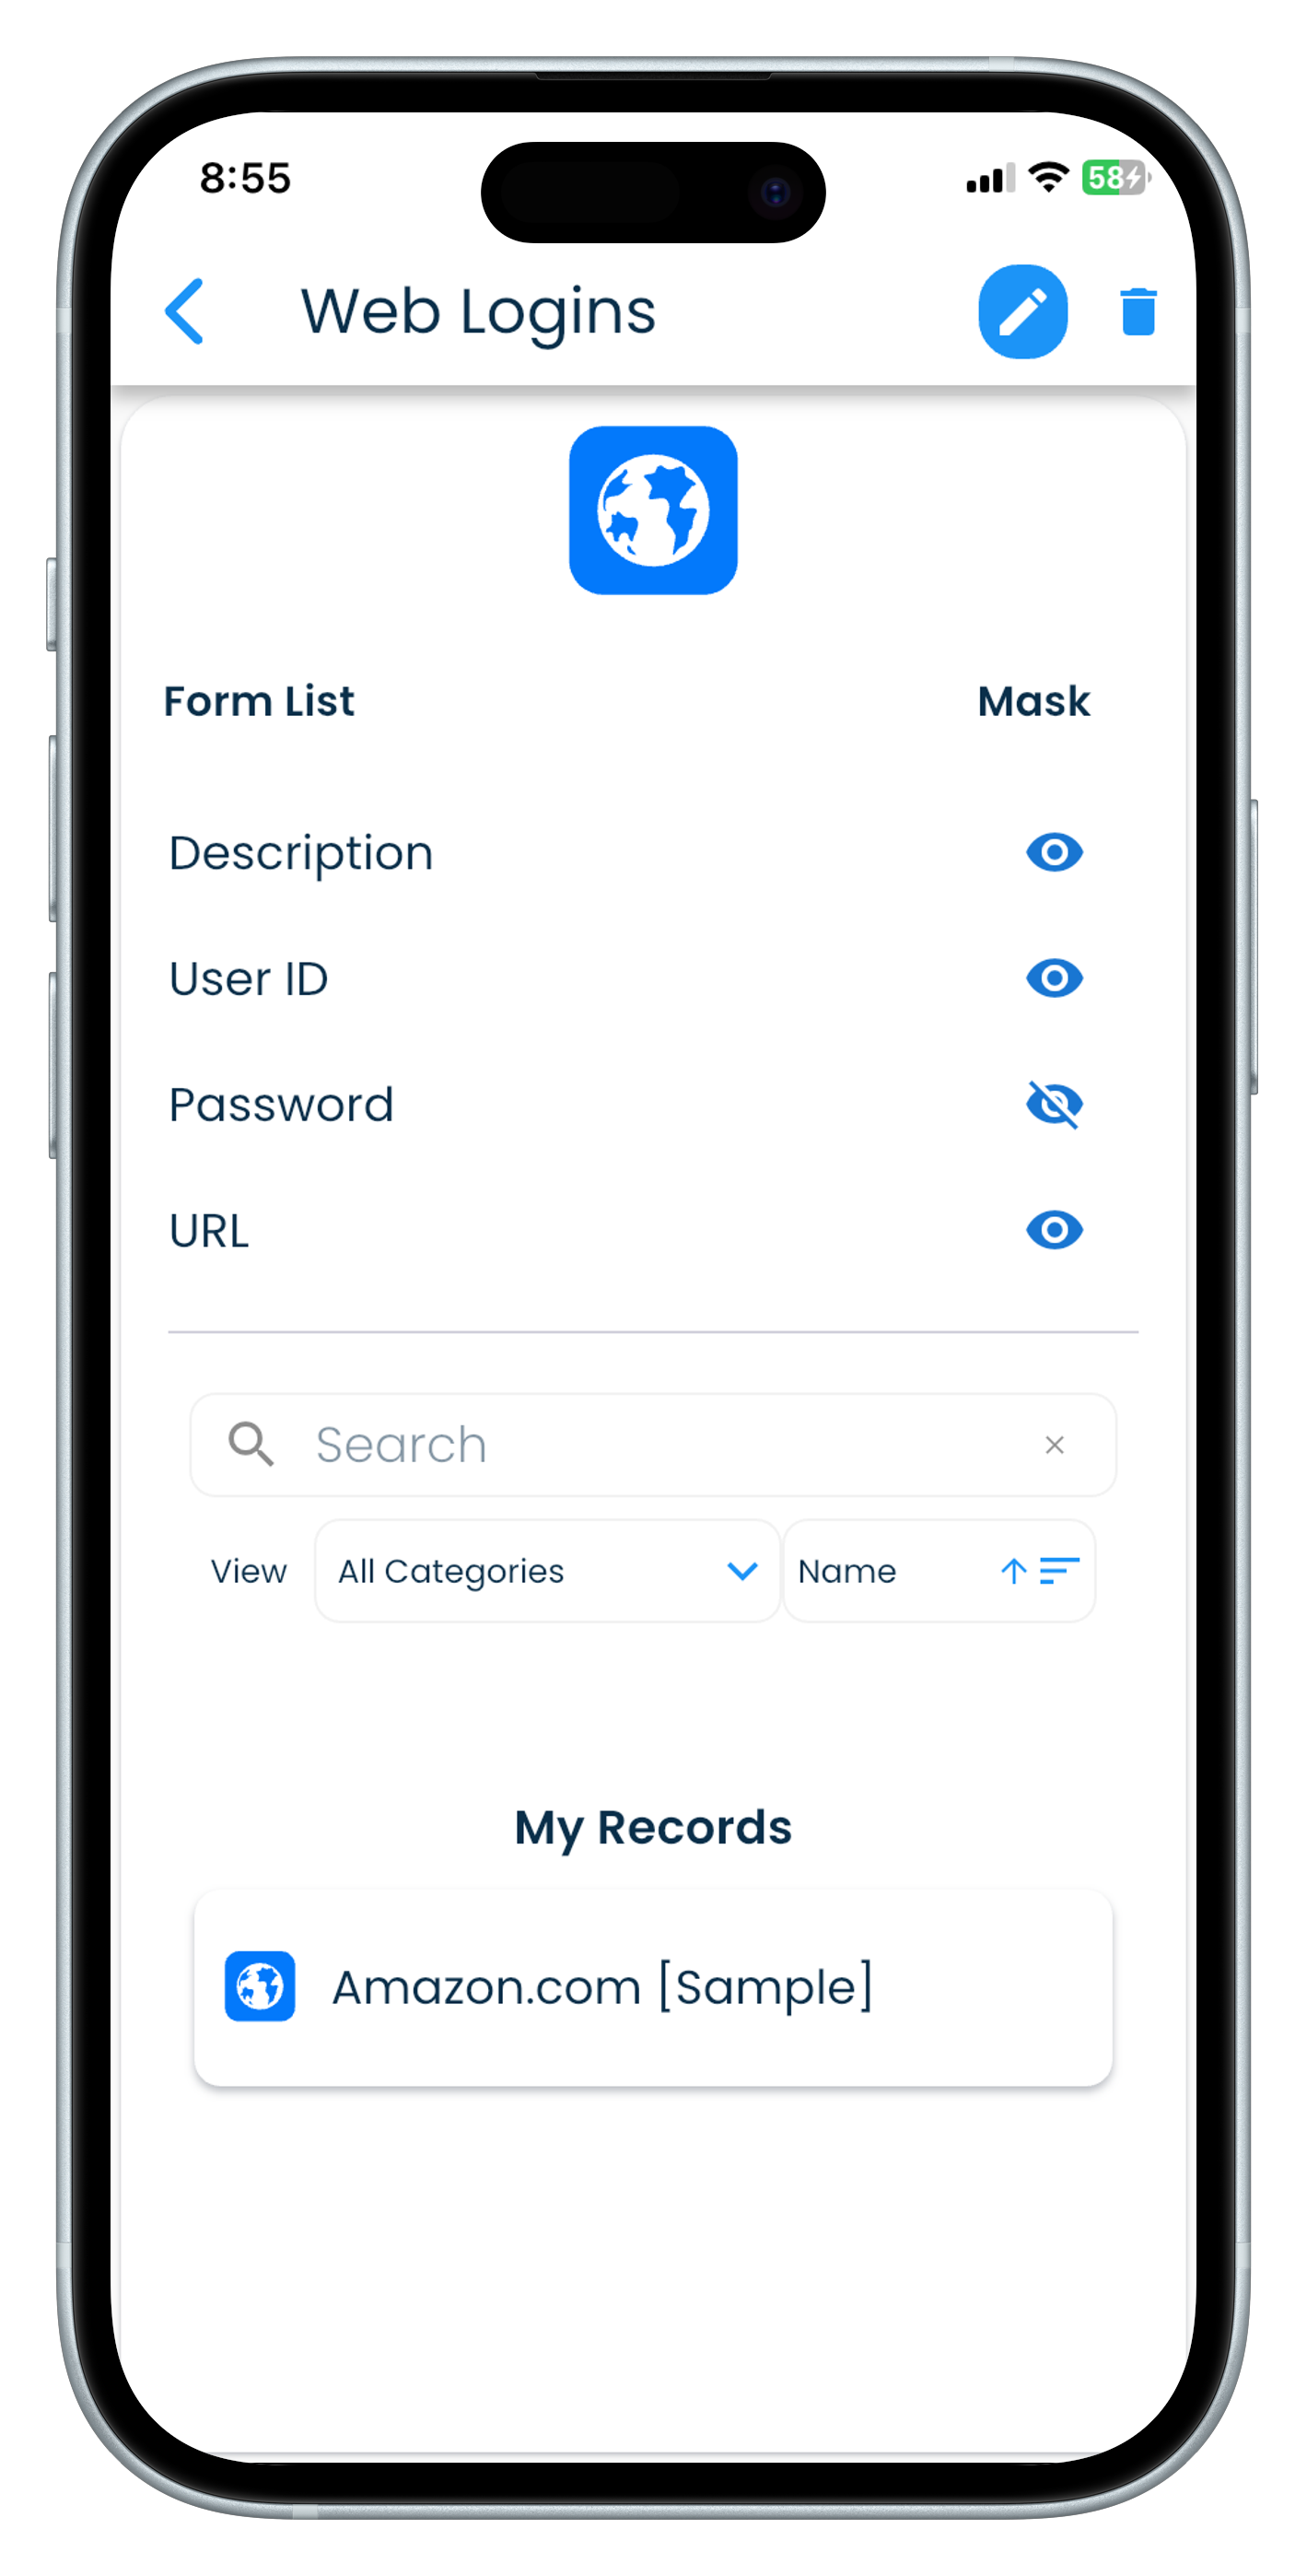
Masked fields
Masking hides the display of the field content in the record views for fields that need to be secure. You can unmask the field and see the actual content by clicking or tapping on the eye icon to the right of the masked field.
Password fields are masked by default when records are viewed.
You can also mask any other fields that you want to. To do this, edit a record, and click or tap on the eye icon to the right of the field to mask or unmask it.
URL fields
These fields can contain web site addresses. They display an Open link button to the right of the field that will open the web site in your browser.
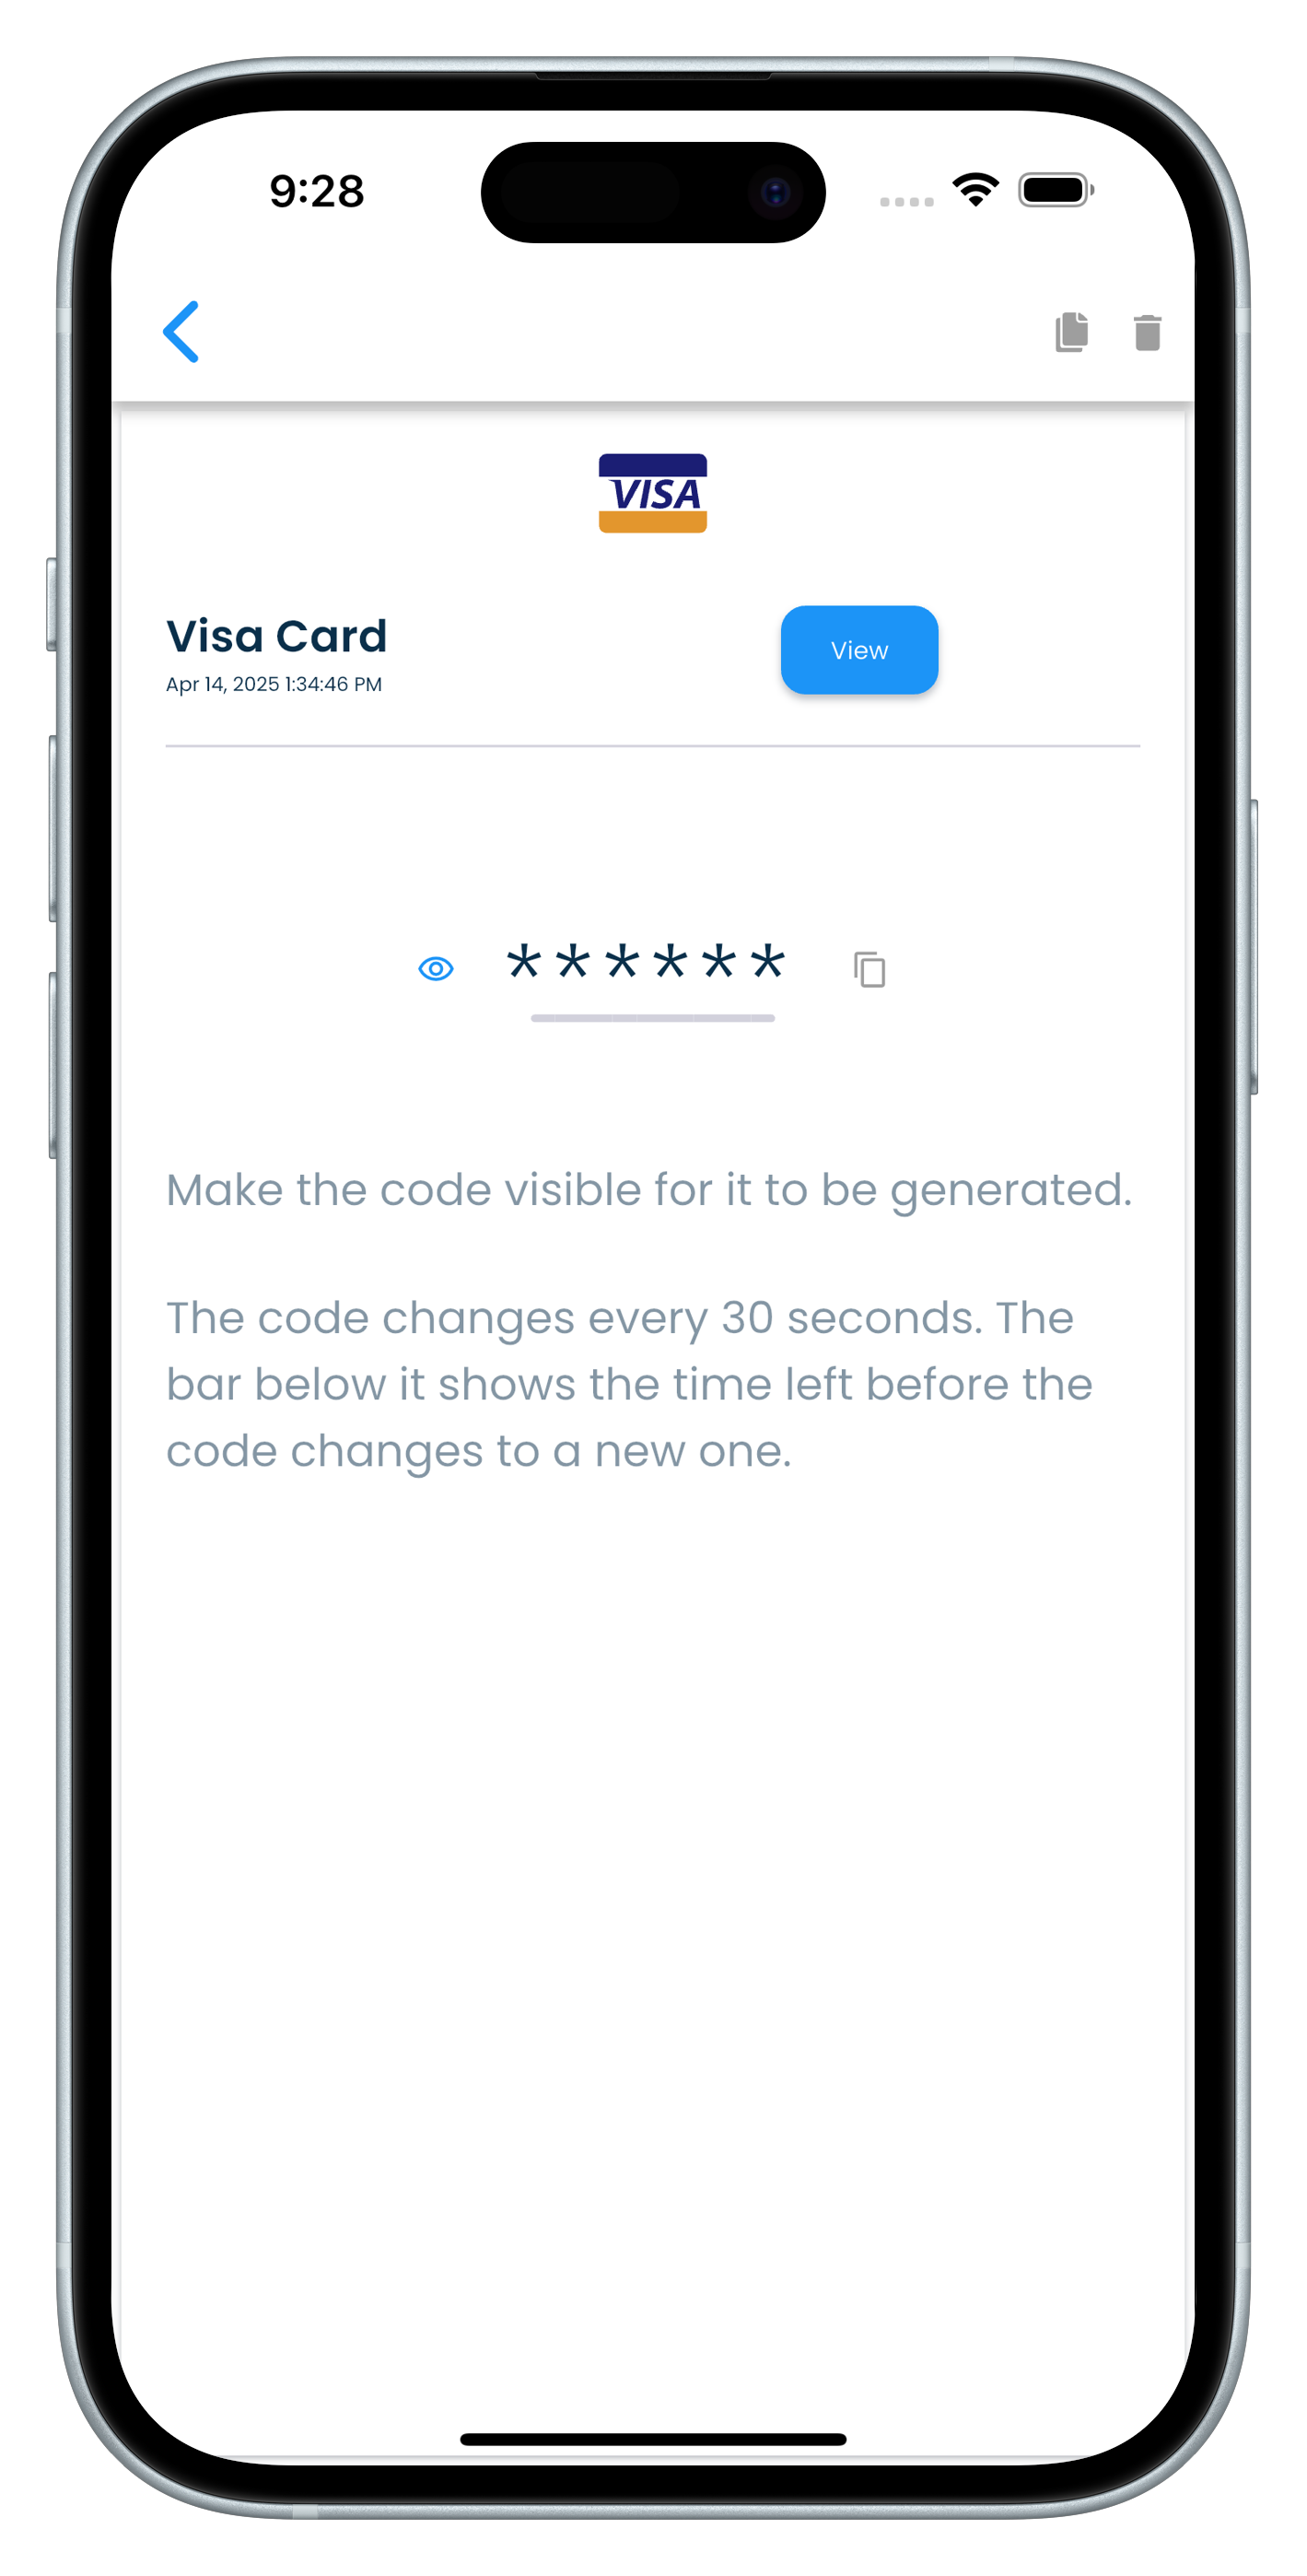
OTP fields
OTP fields can hold one time code generators. They display a 6 digit code when unmasked in the record details view. These fields can be used to add authenticator keys that generate codes for second factor verification in other websites and applications.
Records
You can manage your records by performing the following operations.
Adding a record
Click on the + Add button in the record list panel to open up the record addition view.
| Mac | Windows |
|---|---|
 |
 |
Tap on the + button in the record list screen to open up the record addition screen.
| Android | iPhone |
|---|---|
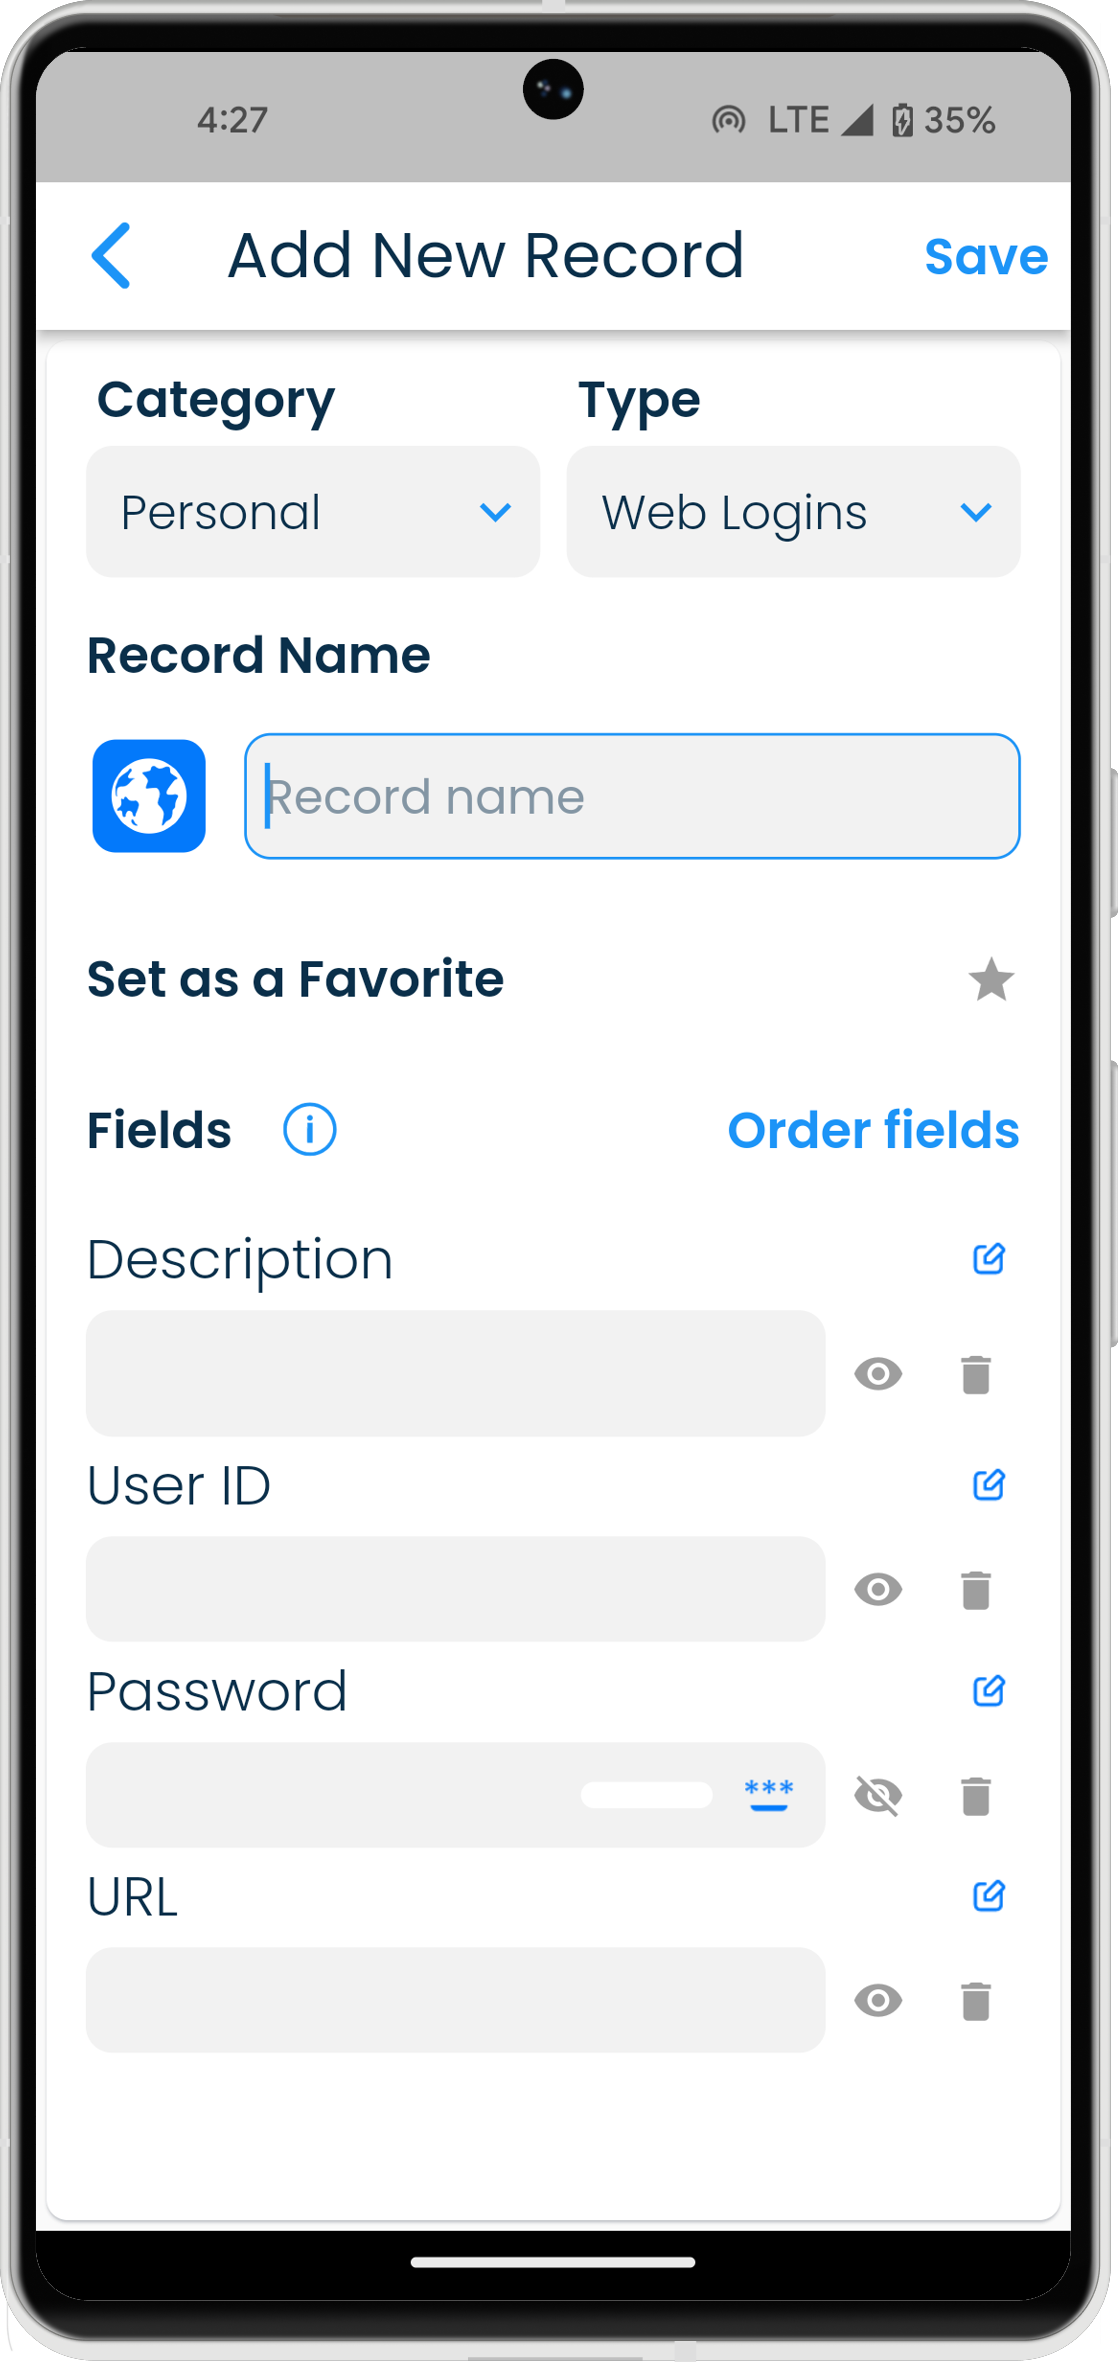 |
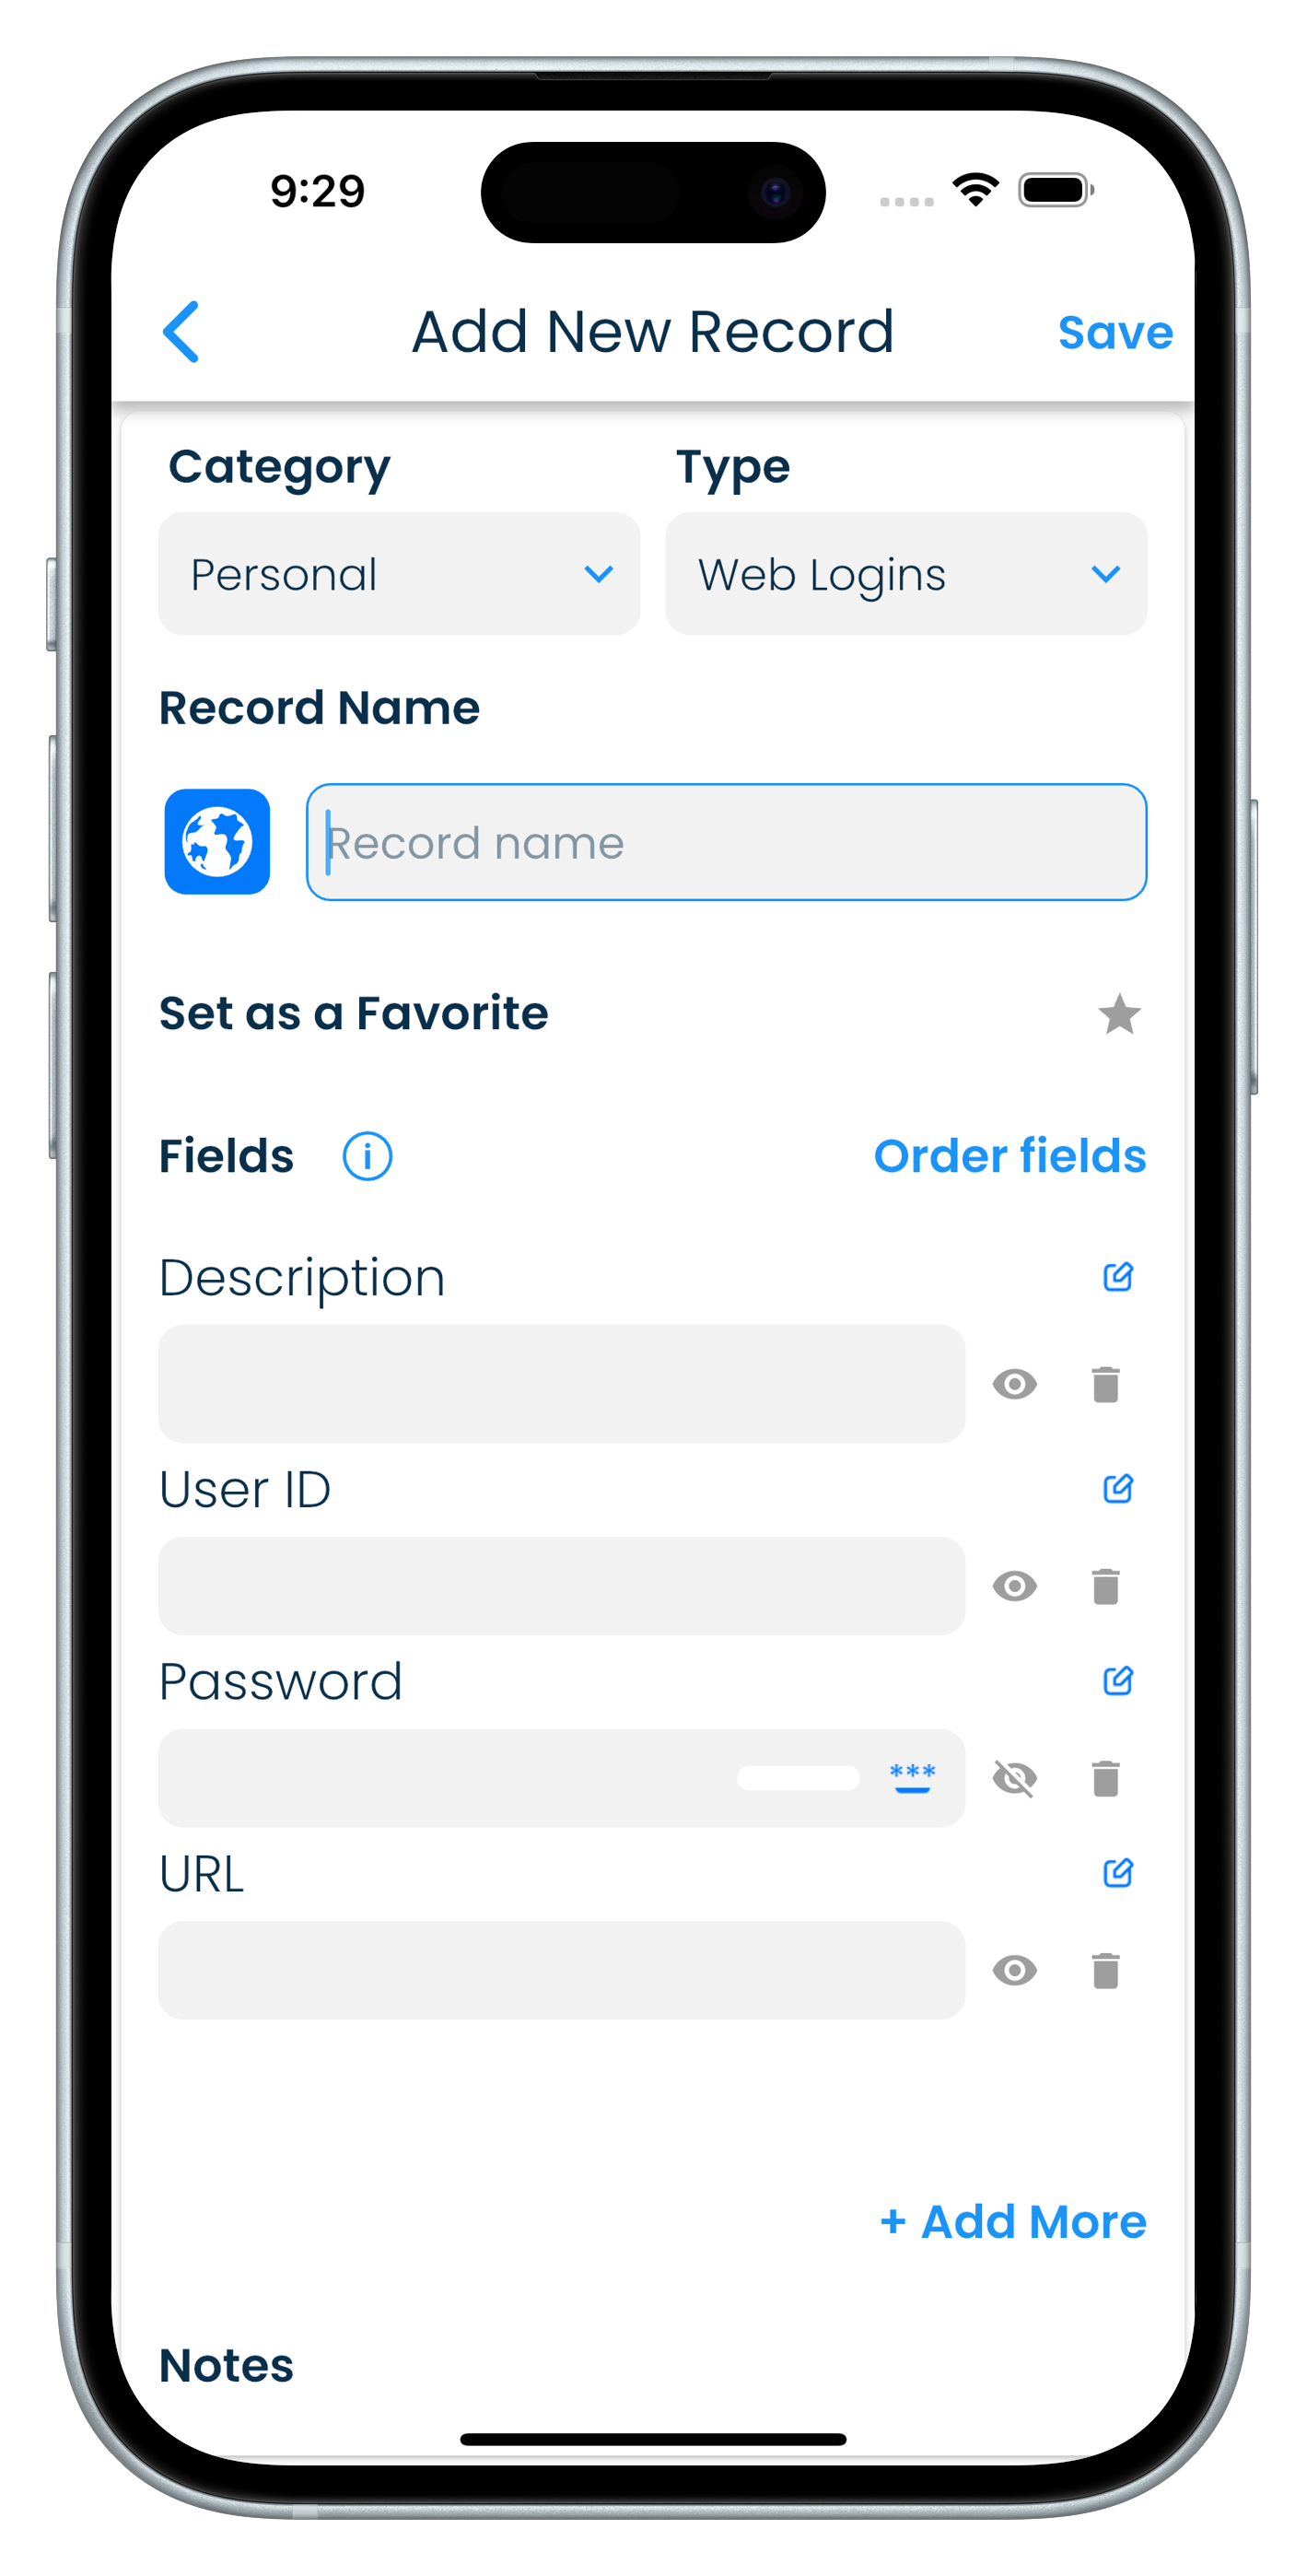 |
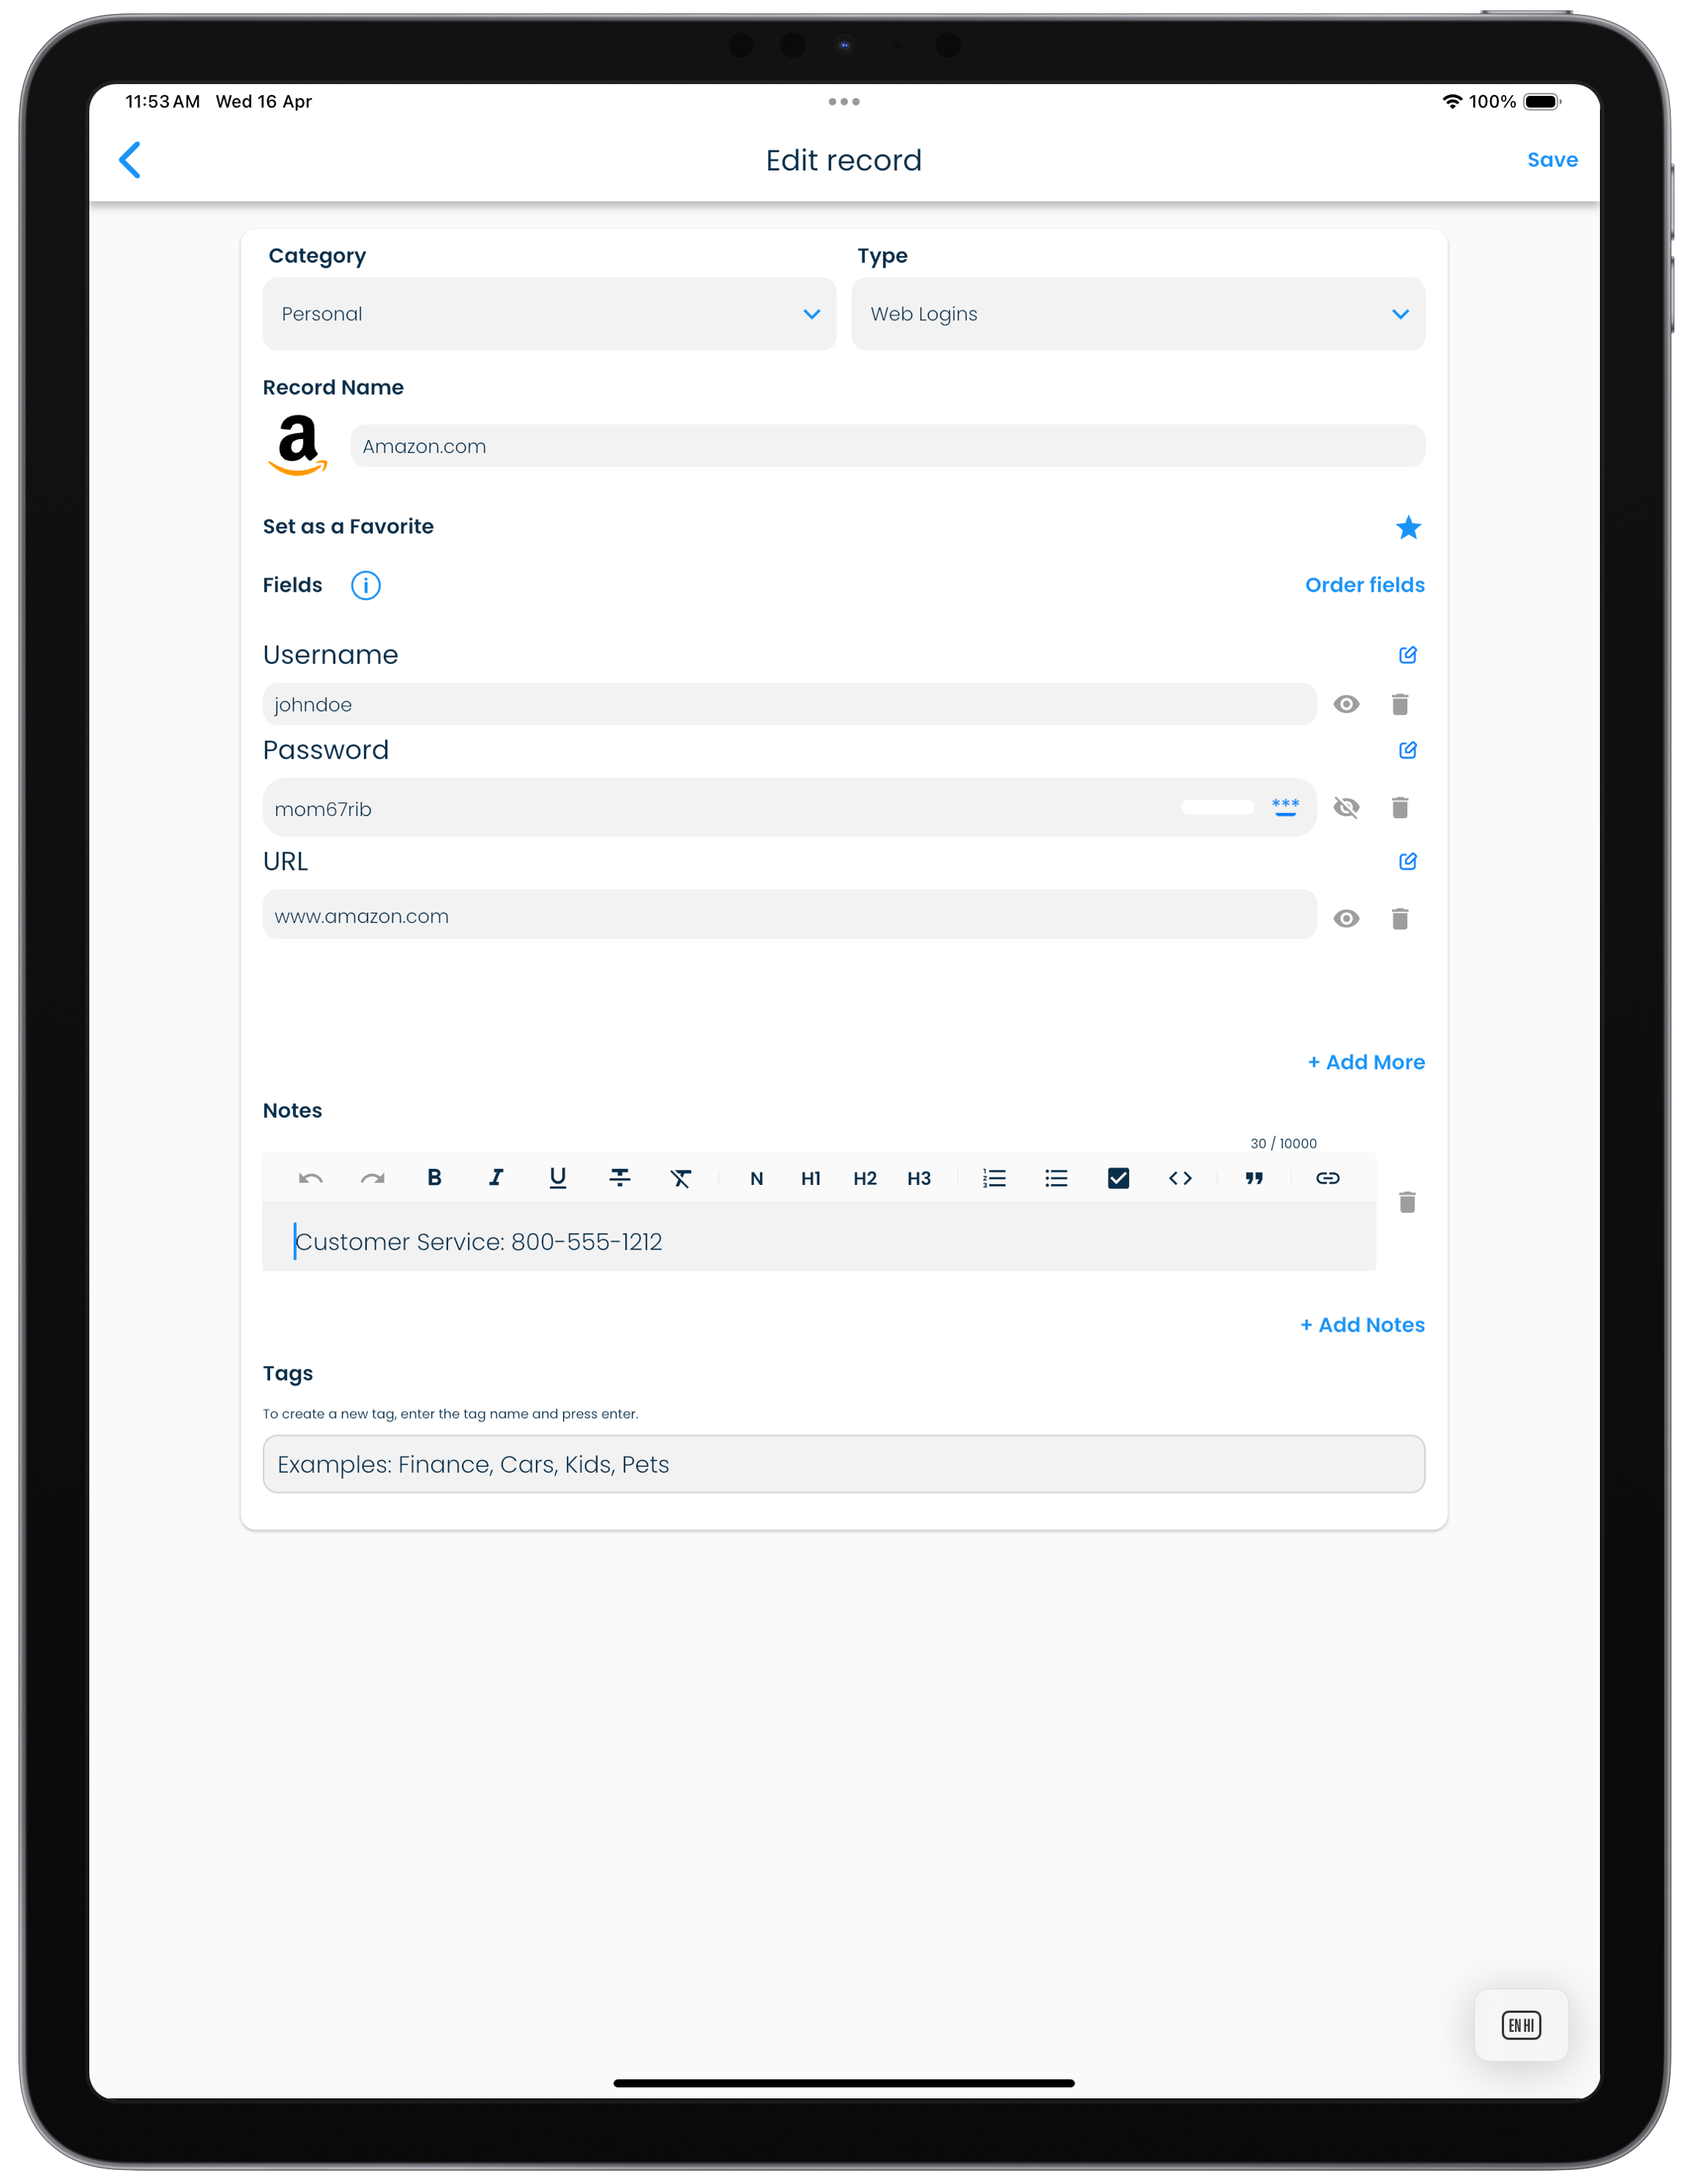
Tap on the + button in the header in the record list screen to open up the record addition screen.
| iPad |
|---|
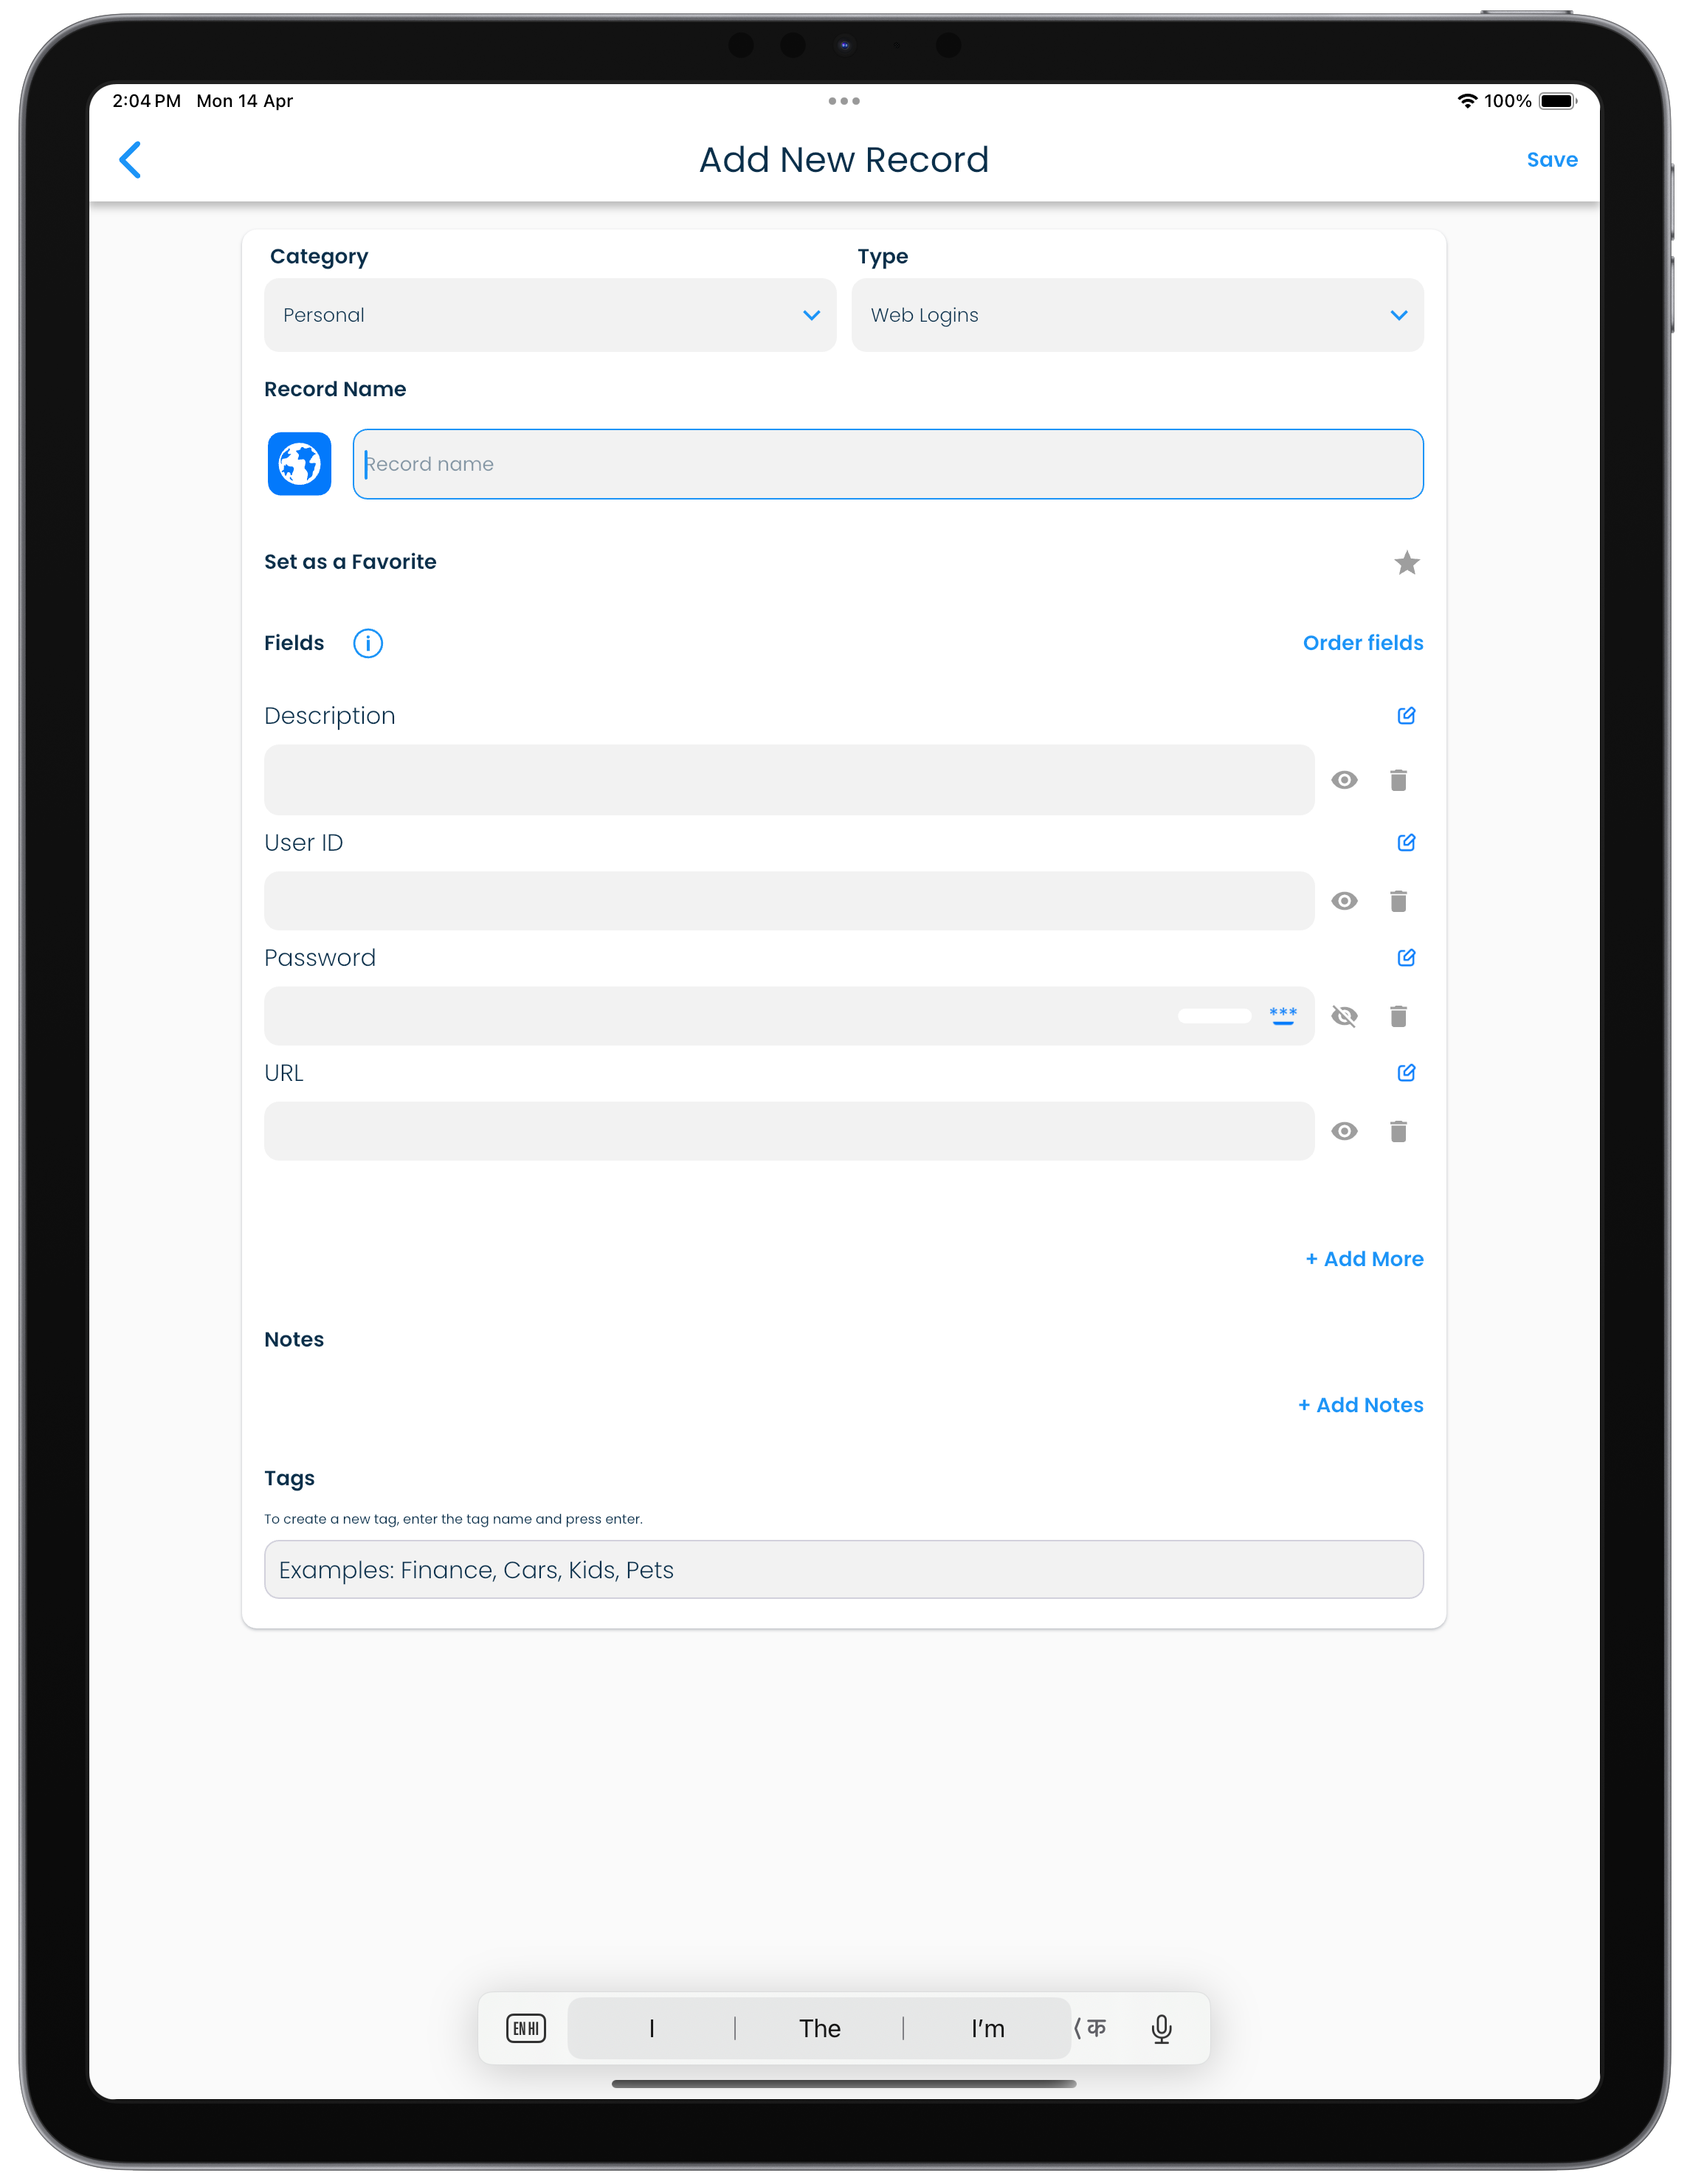 |
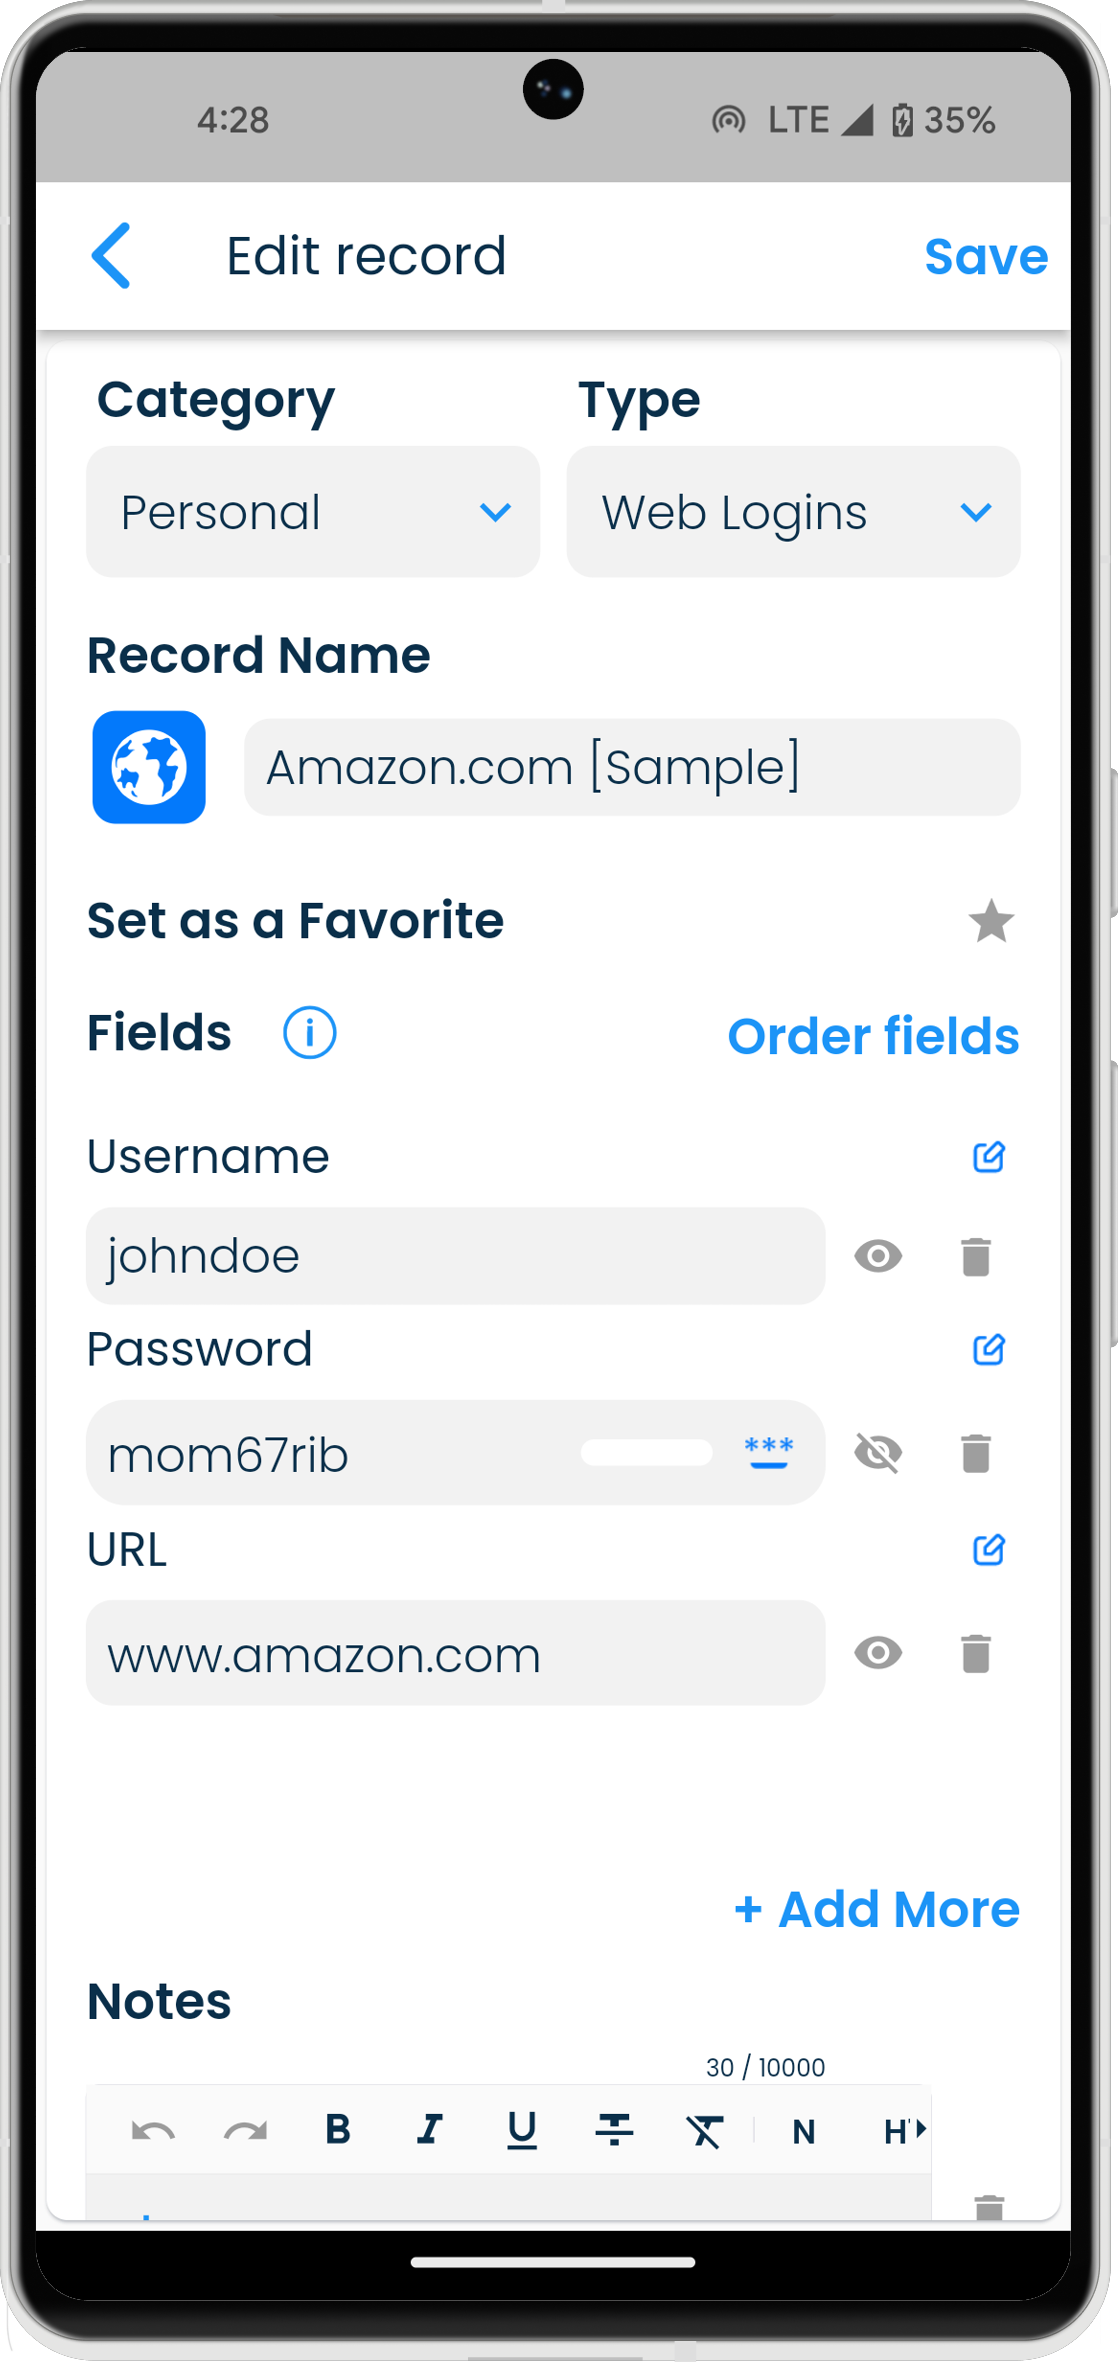
Editing a record
Click on the edit button in the record header to open the record for updating it.
| Mac | Windows |
|---|---|
  |
  |
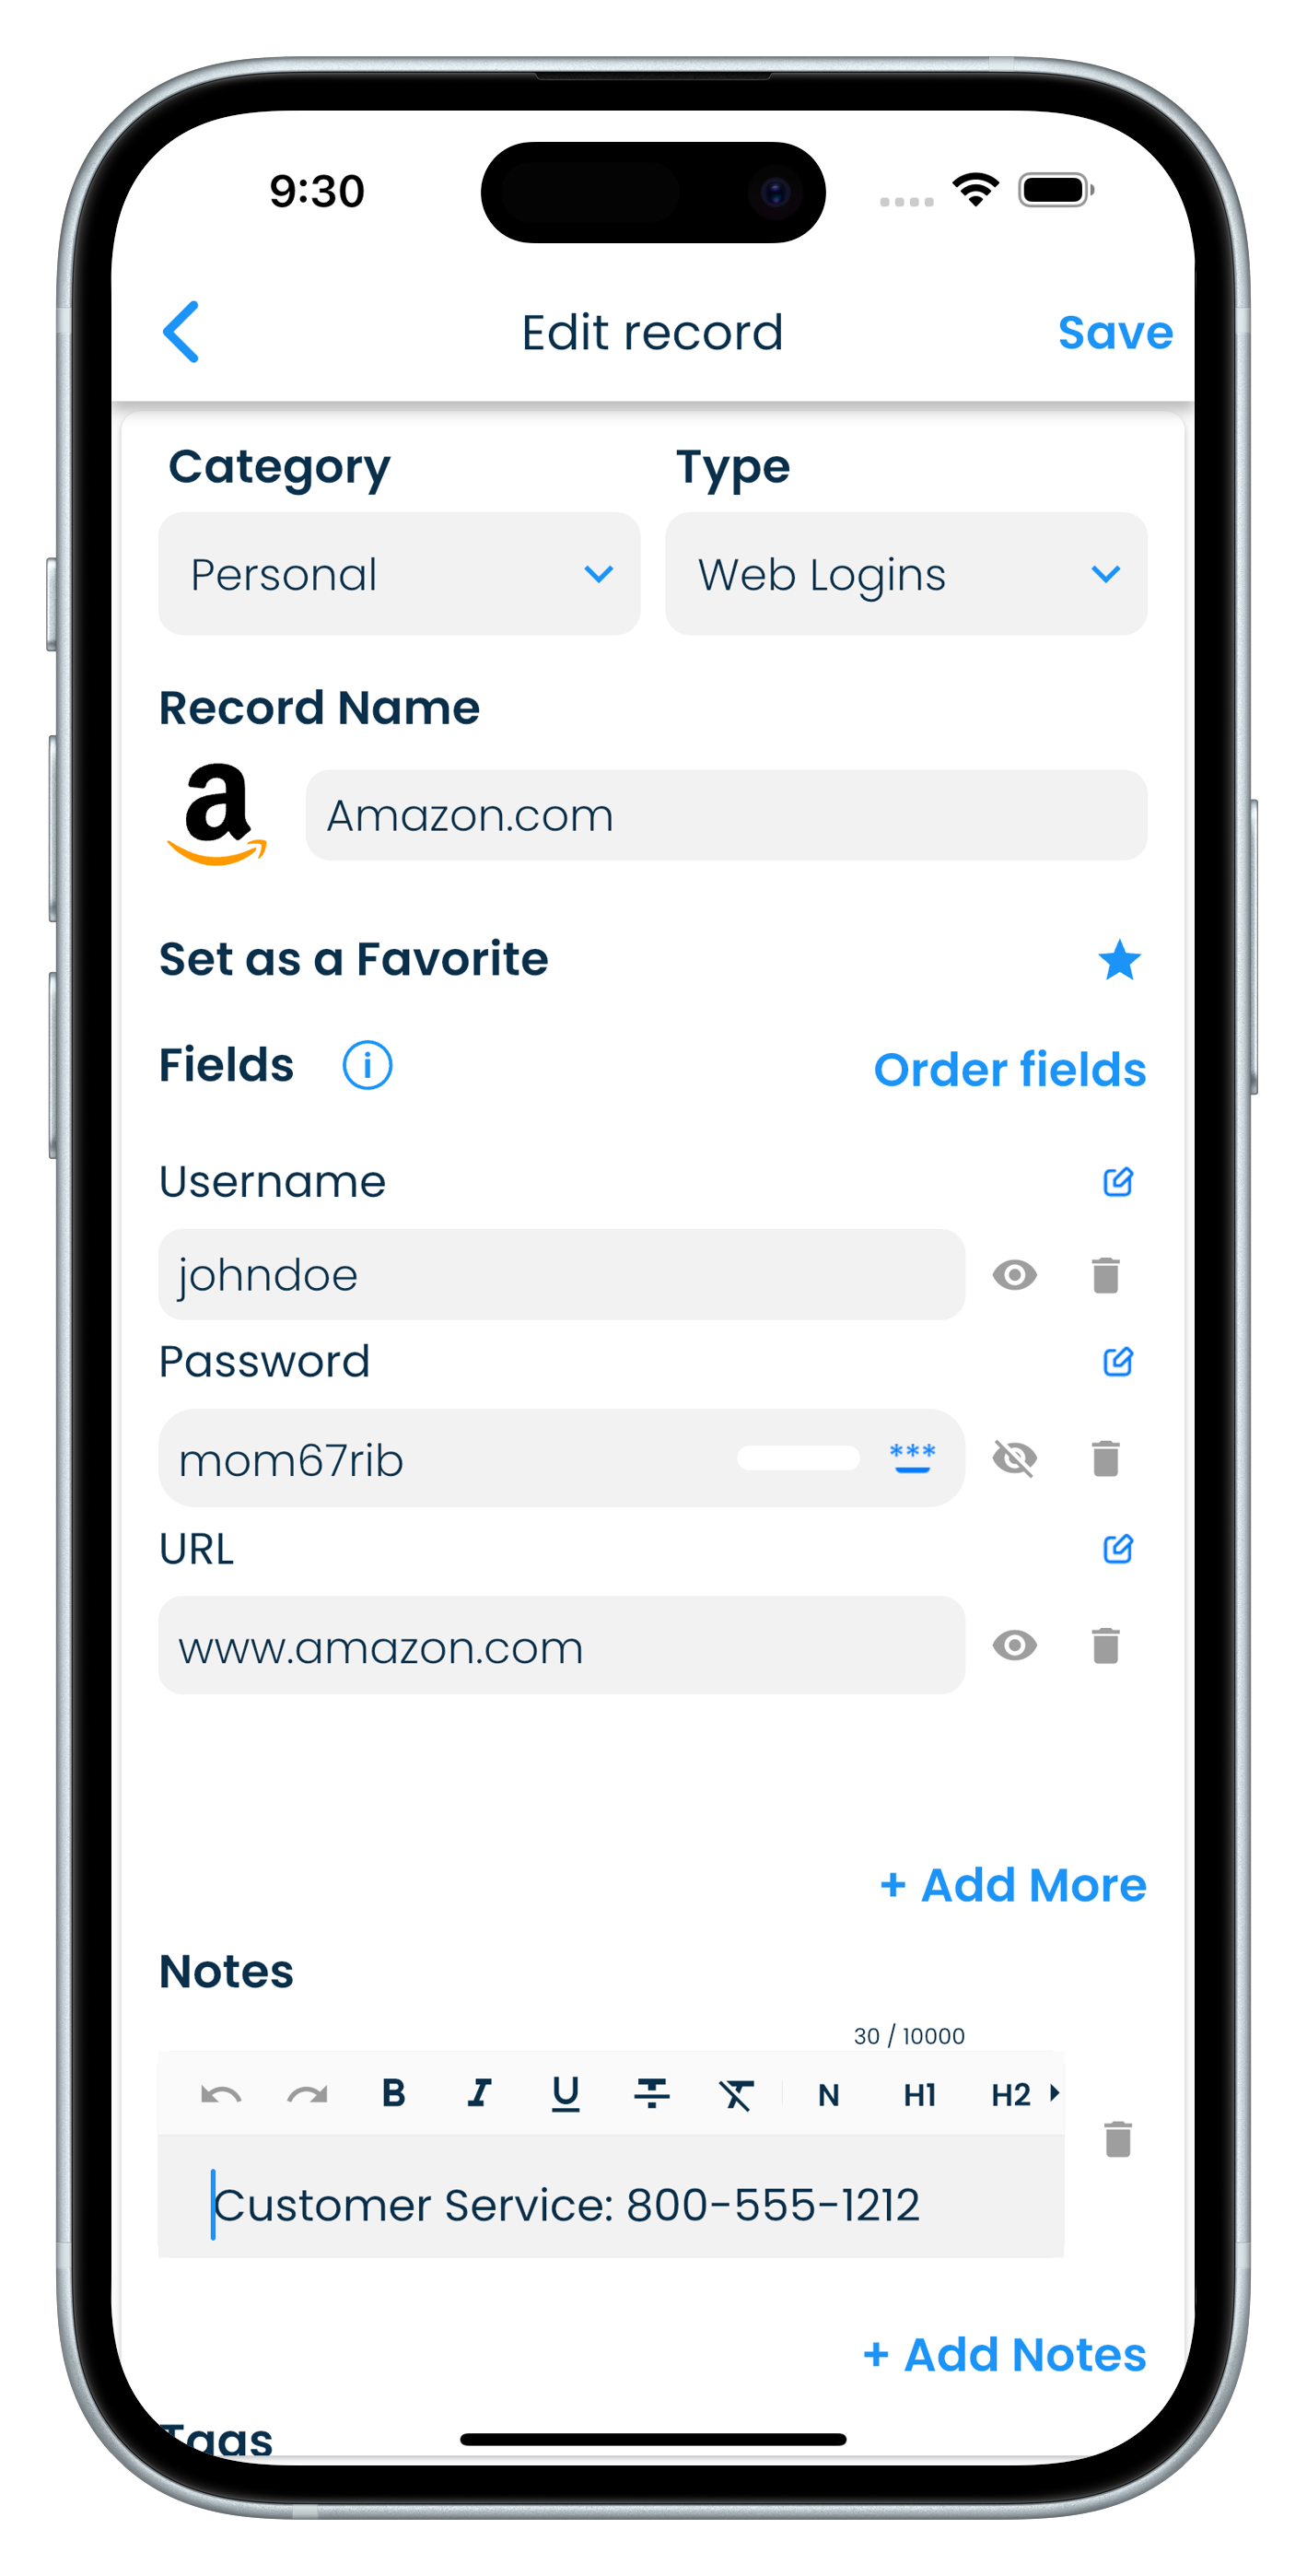
Click on the edit button in the record header to open the record for updating it.
| Android | iPhone |
|---|---|
 |
 |
Click on the edit button in the record header to open the record for updating it.
| iPad |
|---|
  |
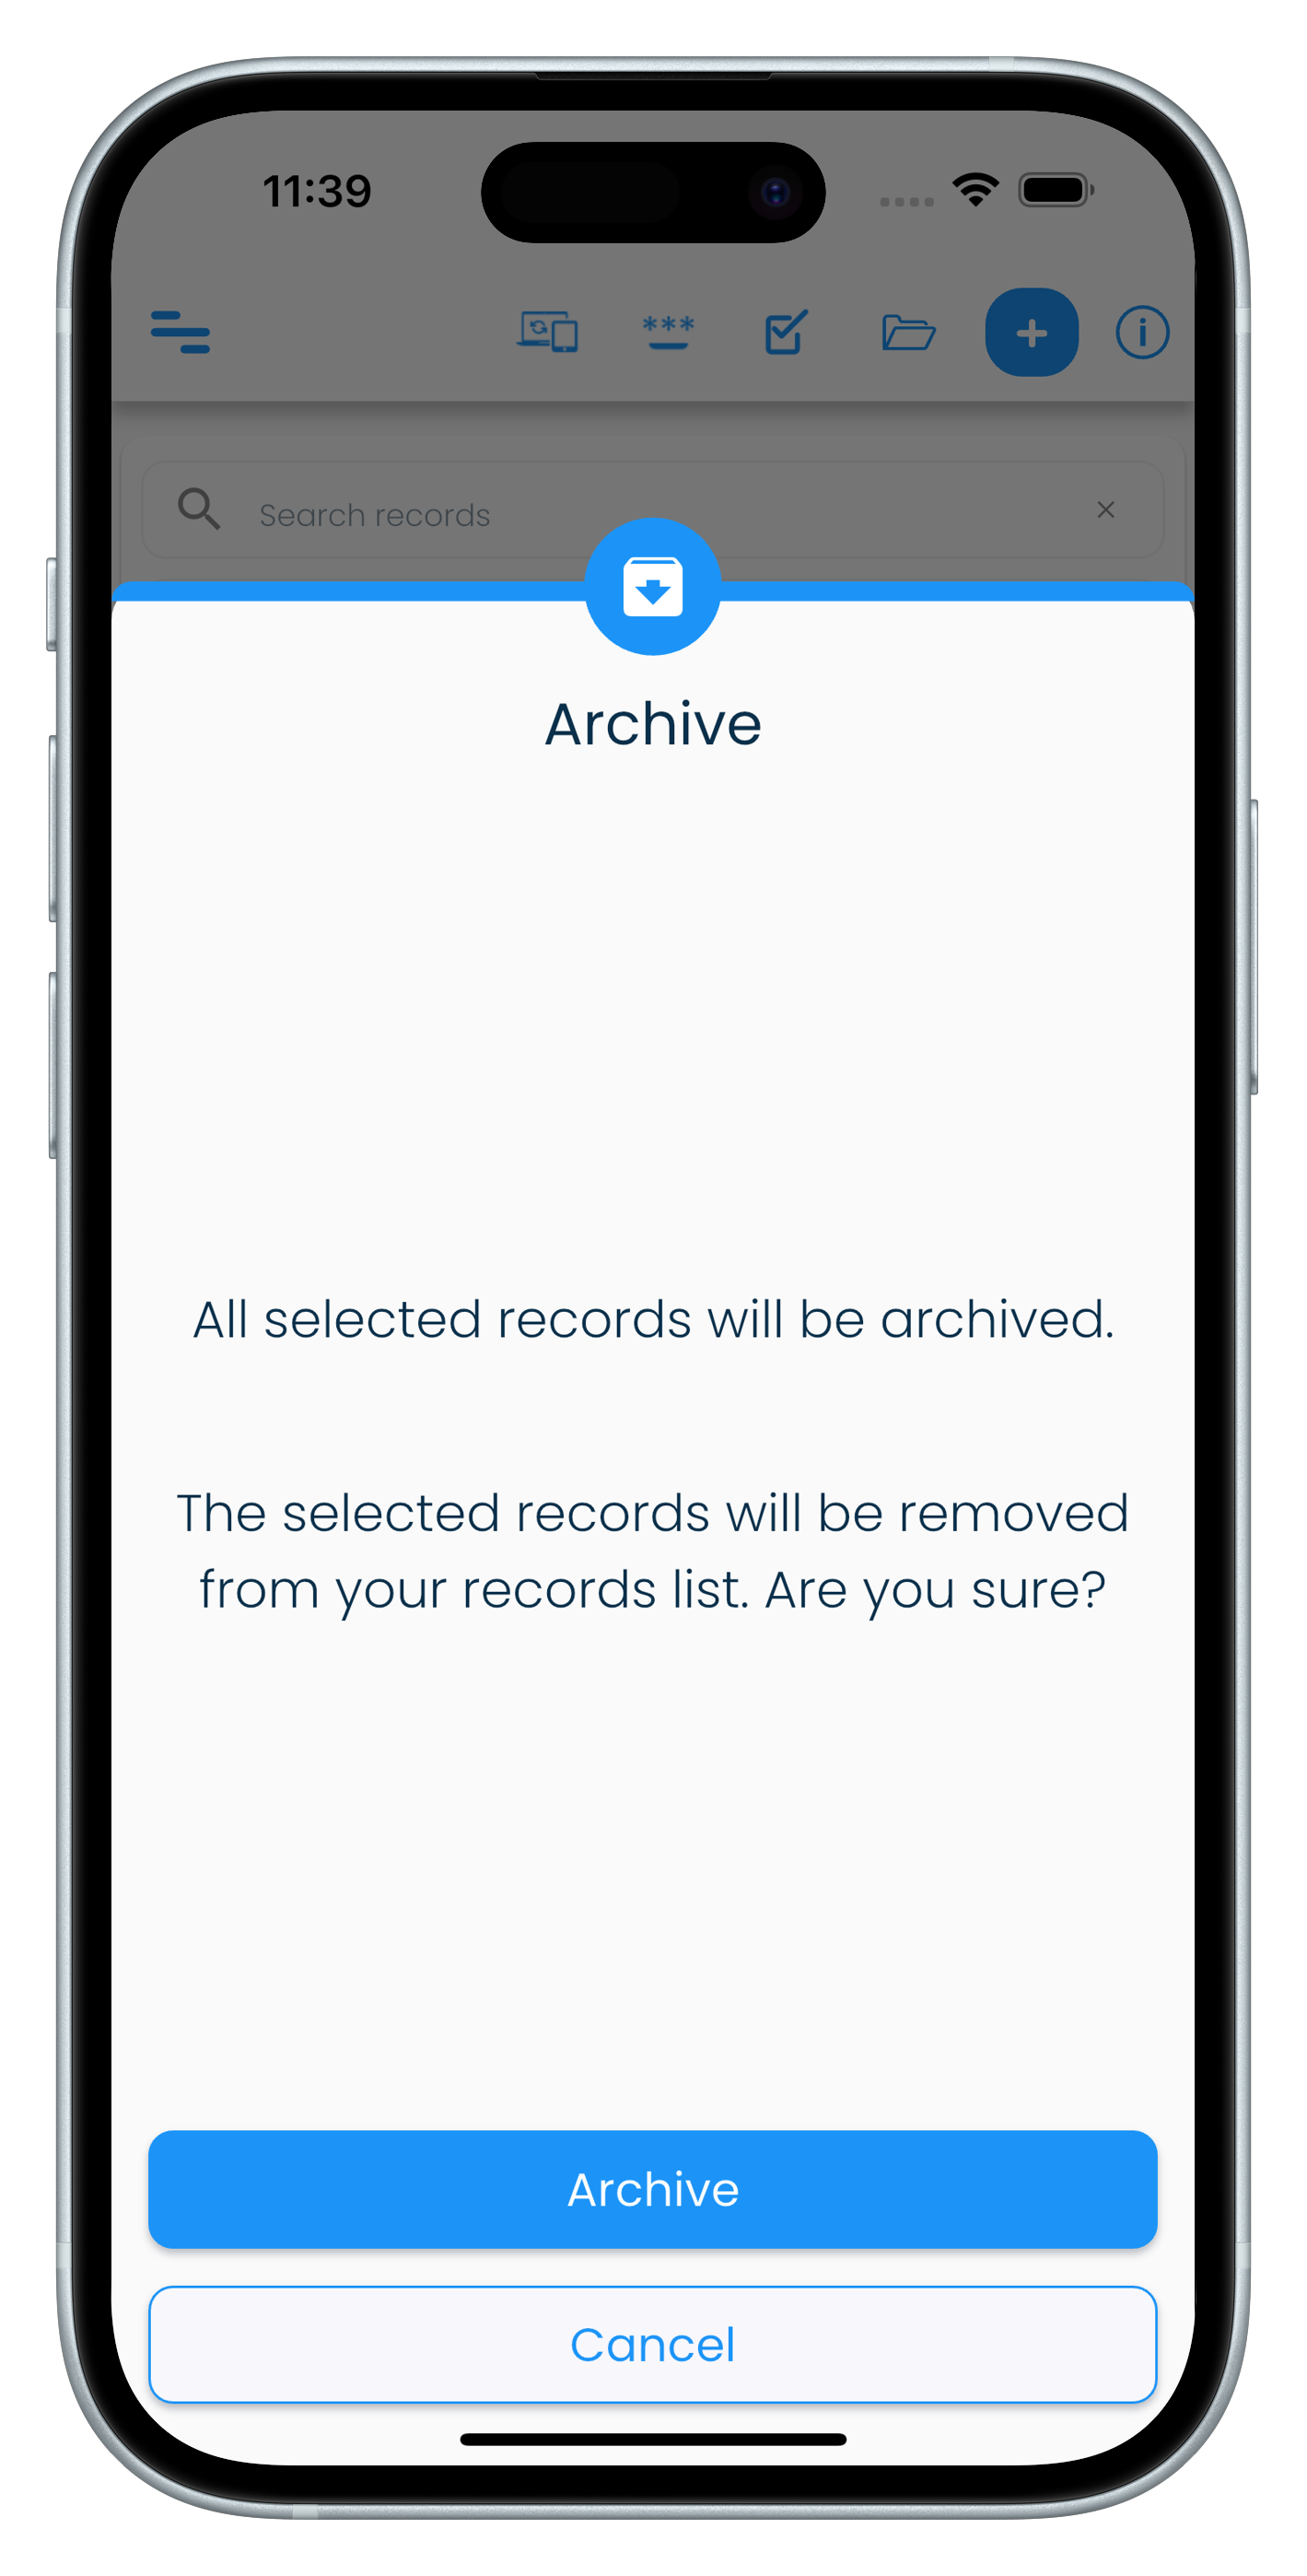
Archiving a record
Archiving a record can be used to organize infrequently accessed records. It moves the archived records to a different view that can be accessed from the application menu.
Archived records can also be unarchived back to the personal record list.
Click on the Archive icon in the record details header to archive a record.
| Mac | Windows |
|---|---|
|
|
Tap on the Archive icon in the record details header to archive a record.
| Android | iPhone |
|---|---|
|
|
Tap on the Archive icon in the record details header to archive a record.
| iPad |
|---|
|
Deleting a record
Deleting a record sends it to a Recycle Bin. You can permanently delete them from the Recycle Bin if you are sure that you no longer need them.
Alternatively, you can restore a deleted record in the Recycle Bin to the personal record list.
Click on the Delete icon in the record details header to send a record to the Recycle Bin.
| Mac | Windows |
|---|---|
|
|
Tap on the Delete icon in the record details header to send a record to the Recycle Bin.
| Android | iPhone |
|---|---|
|
|
Tap on the Delete icon in the record details header to send a record to the Recycle Bin.
| iPad |
|---|
|
Mark a record as a Favorite
You can mark frequently accessed or important records as favorites. All the favorite records can be viewed in the Favorites view from the side menu.
Click on the Favorite icon in the record details header to mark a record as a Favorite.
| Mac | Windows |
|---|---|
|
|
Tap on the Favorite icon in the record details header to mark a record as a Favorite.
| Android | iPhone |
|---|---|
|
|
Tap on the Favorite icon in the record details header to mark a record as a Favorite.
| iPad |
|---|
|
Filtering and sorting
The records displayed in the list can be filtered using multiple criteria, and then sorted to suit your needs.
The filtering criteria available include
- Searching in record names and fields.
- By selecting specific categories and/or types assigned to records.
- Showing Local only records i.e. records that exist only on one device.
Sorting of the records can be done by
- Record name
- Recently modified time
- Recently added time
Filter panel
The filter panel is available in the top portion of the record list section in different views.
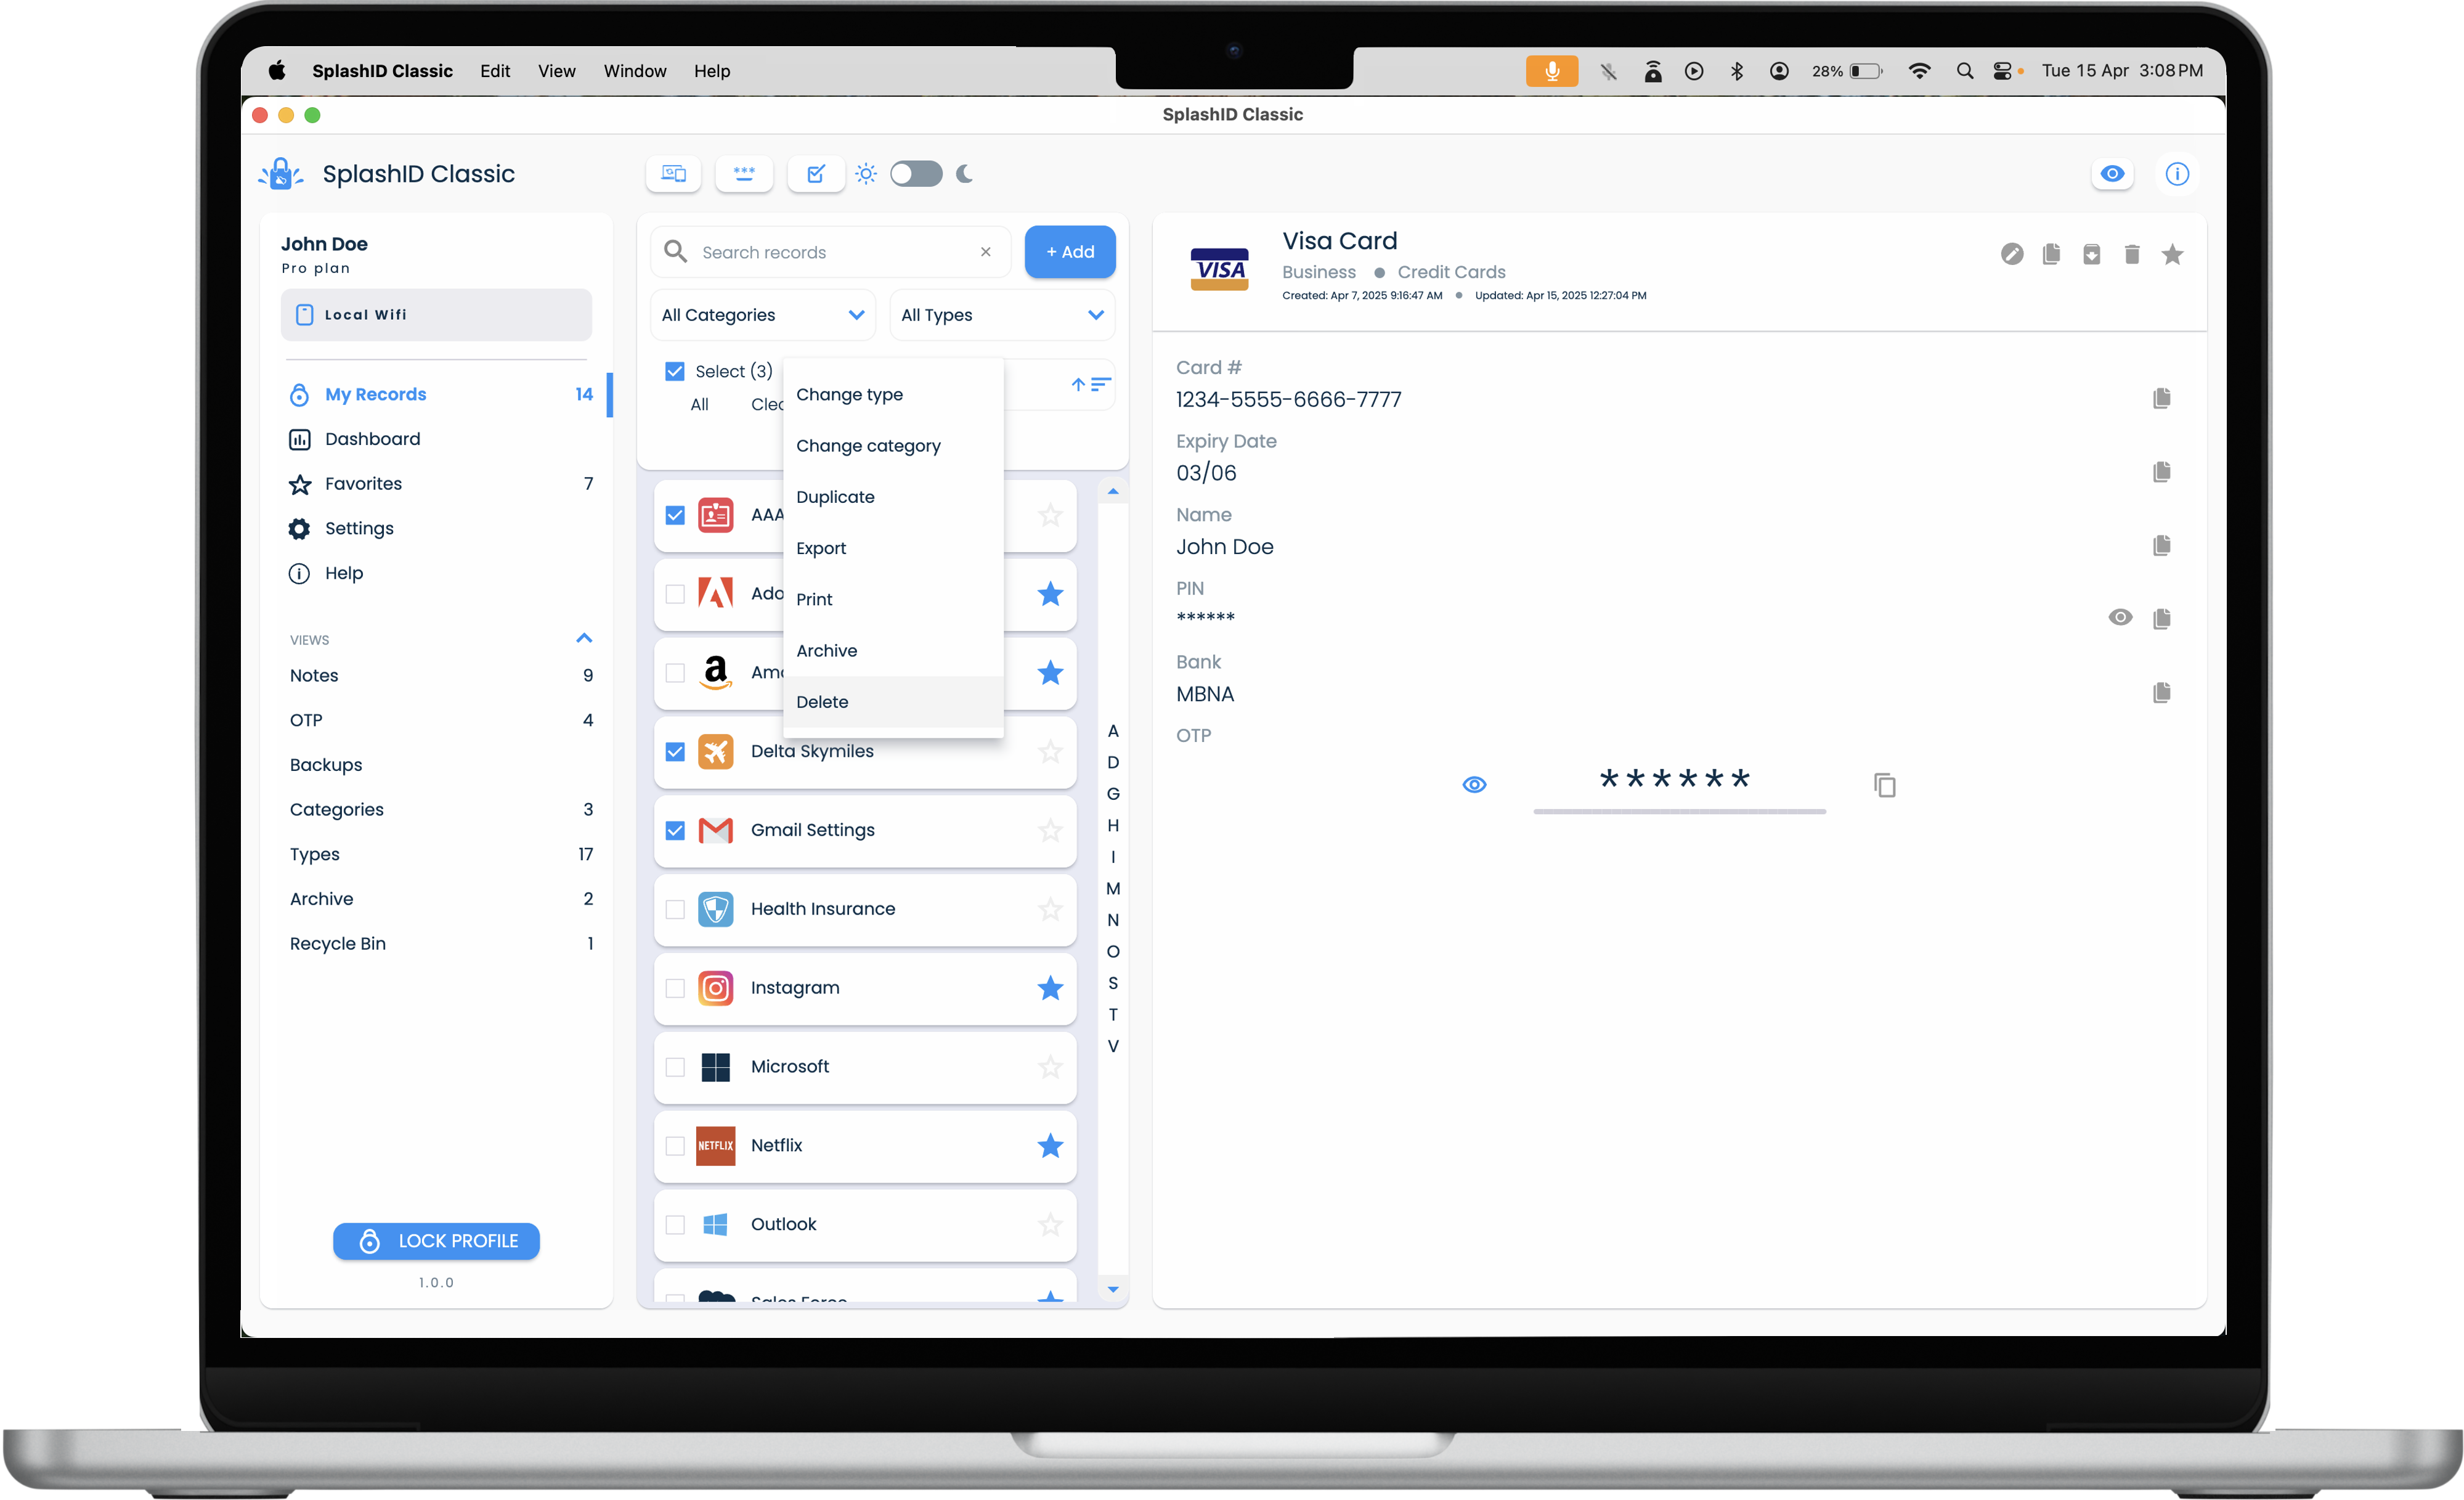
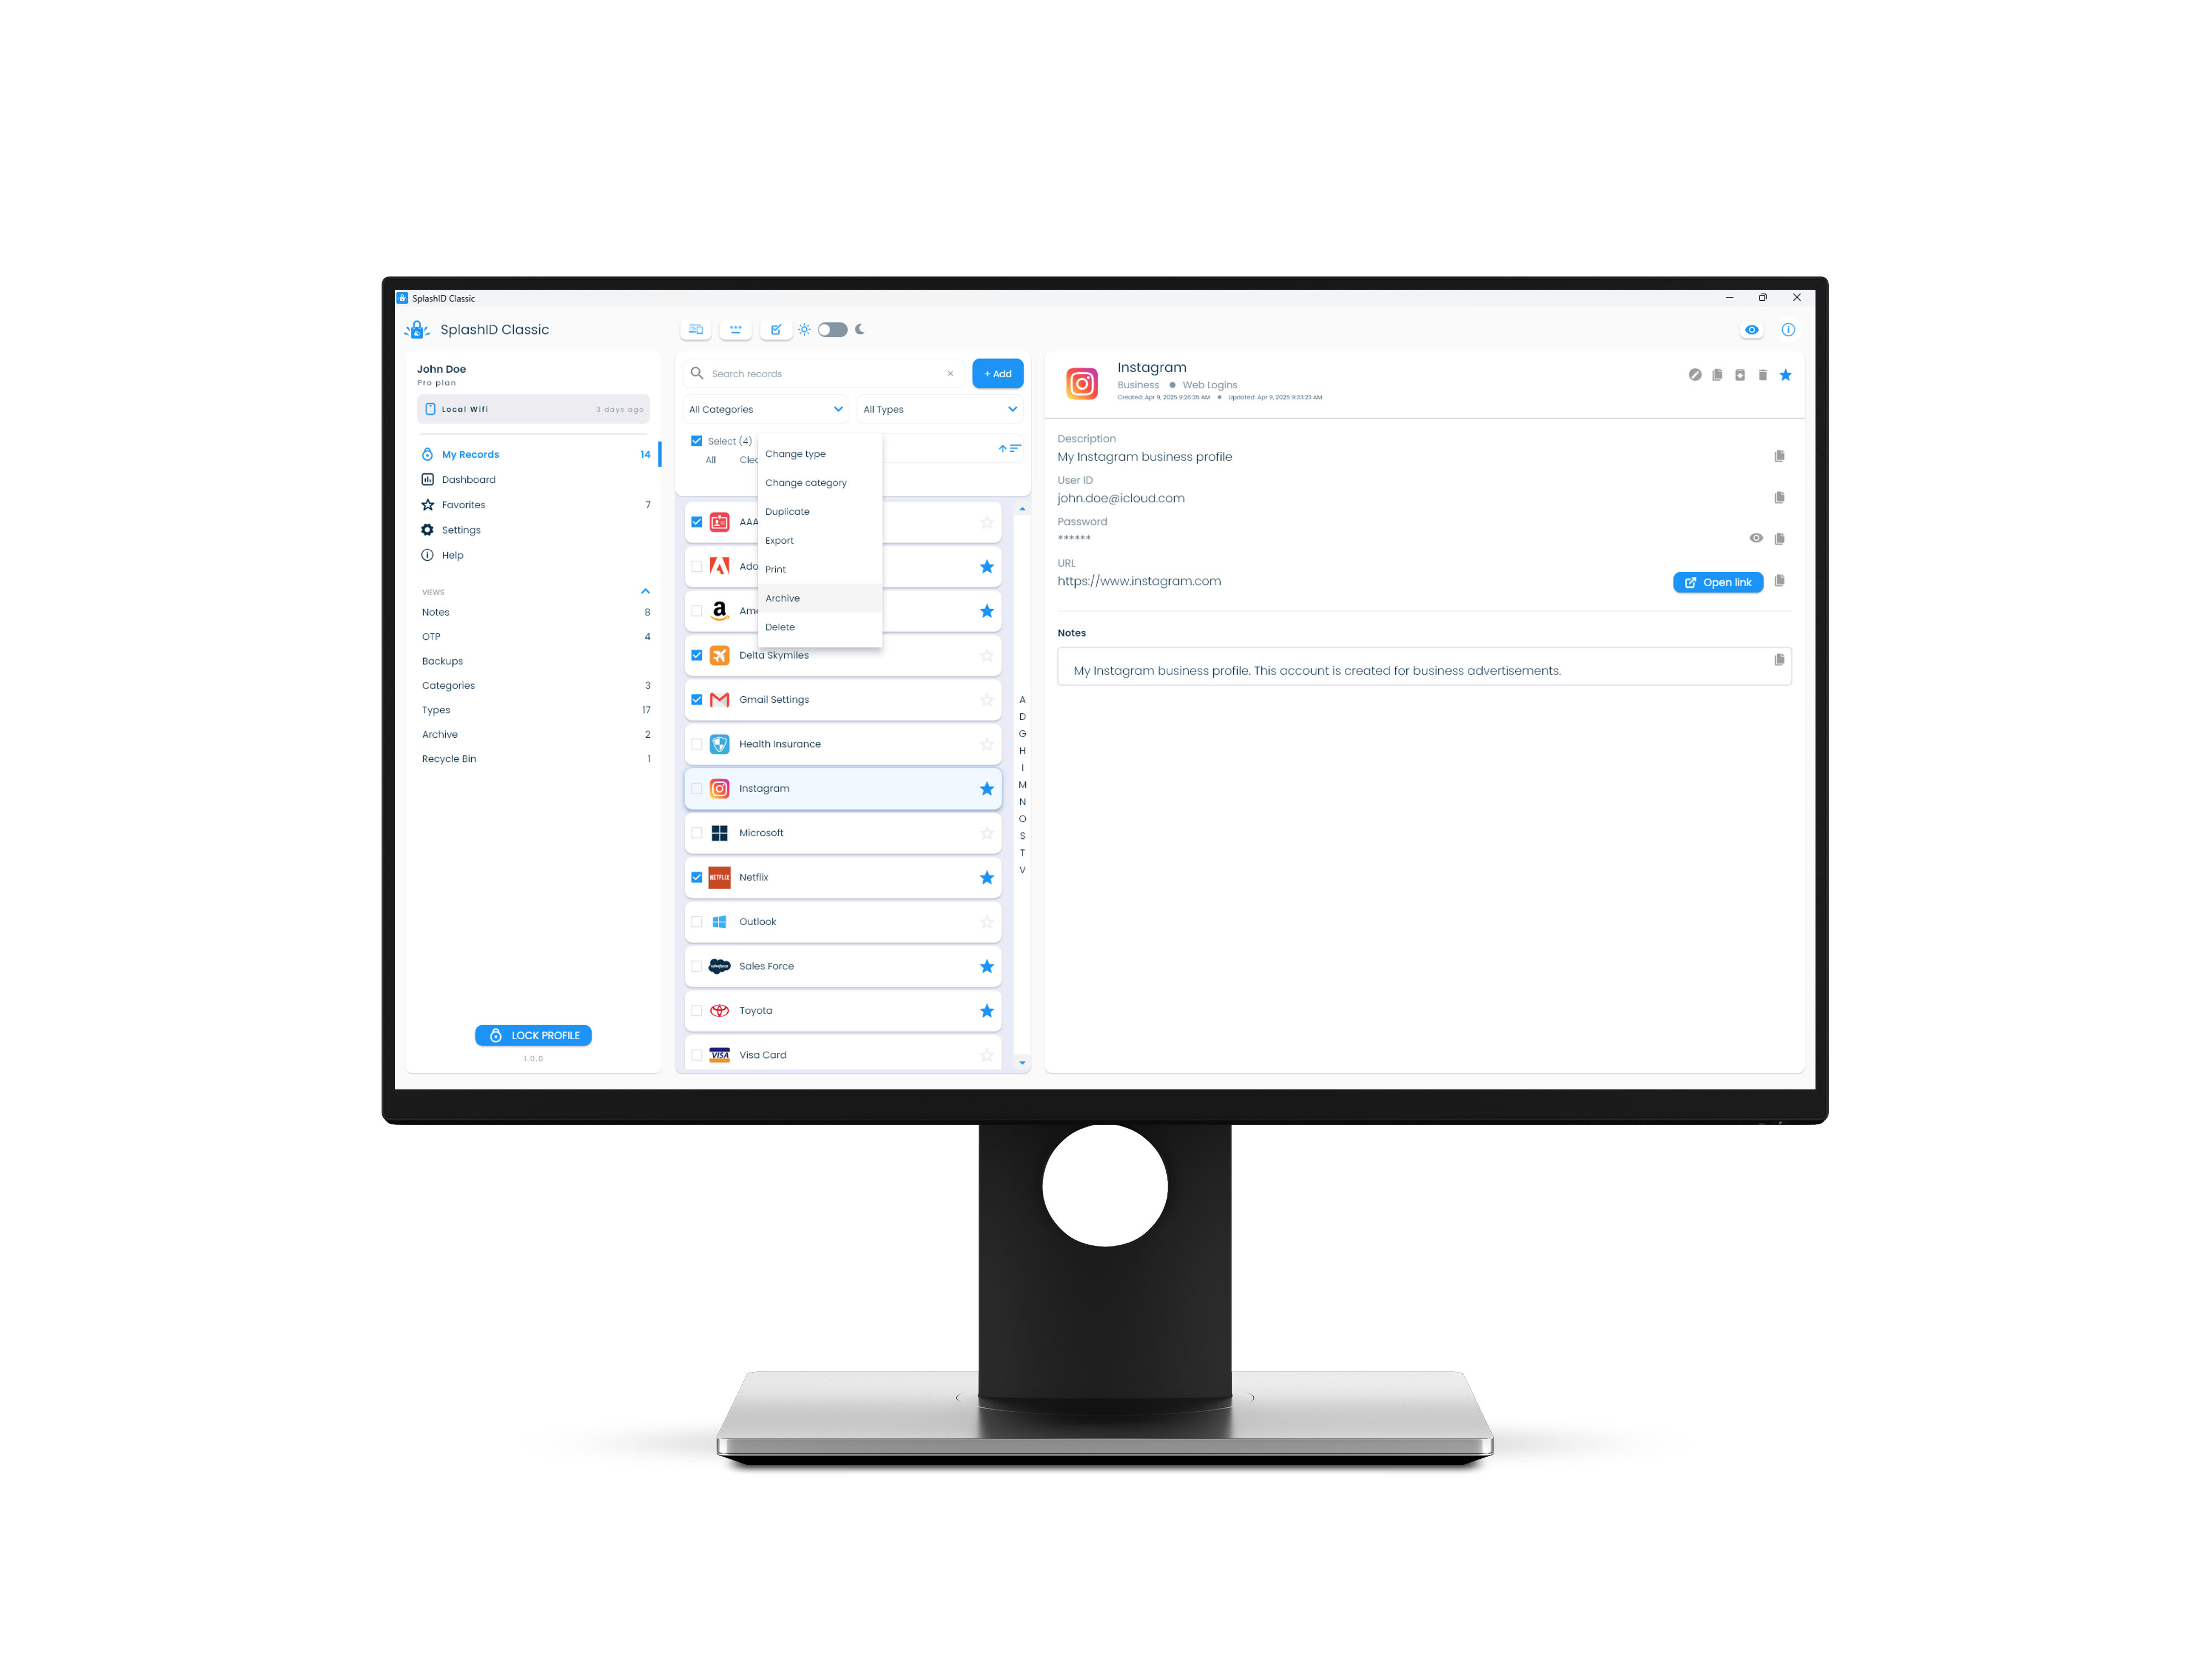
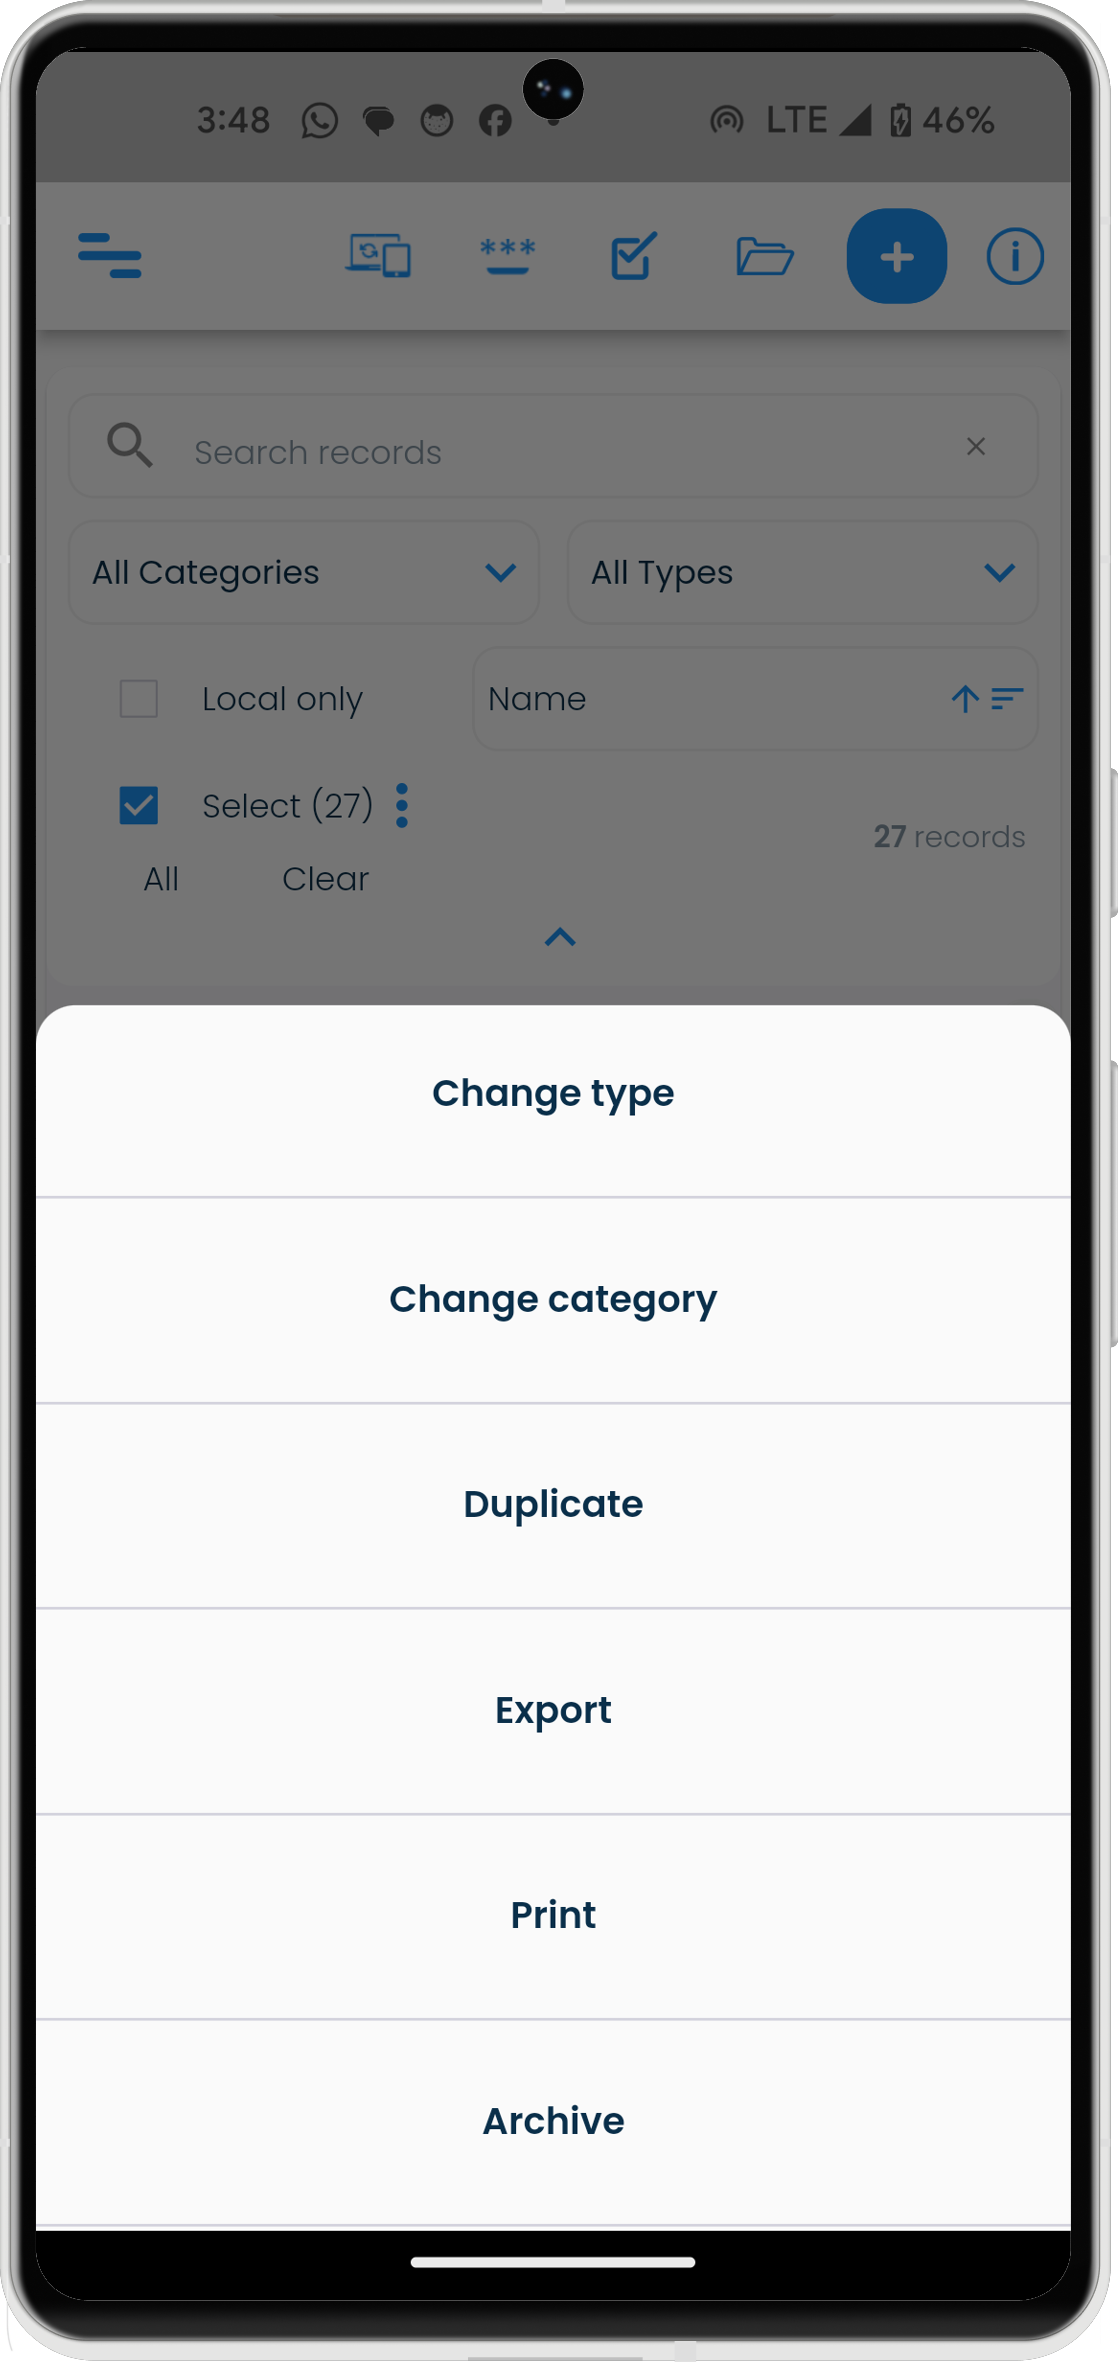
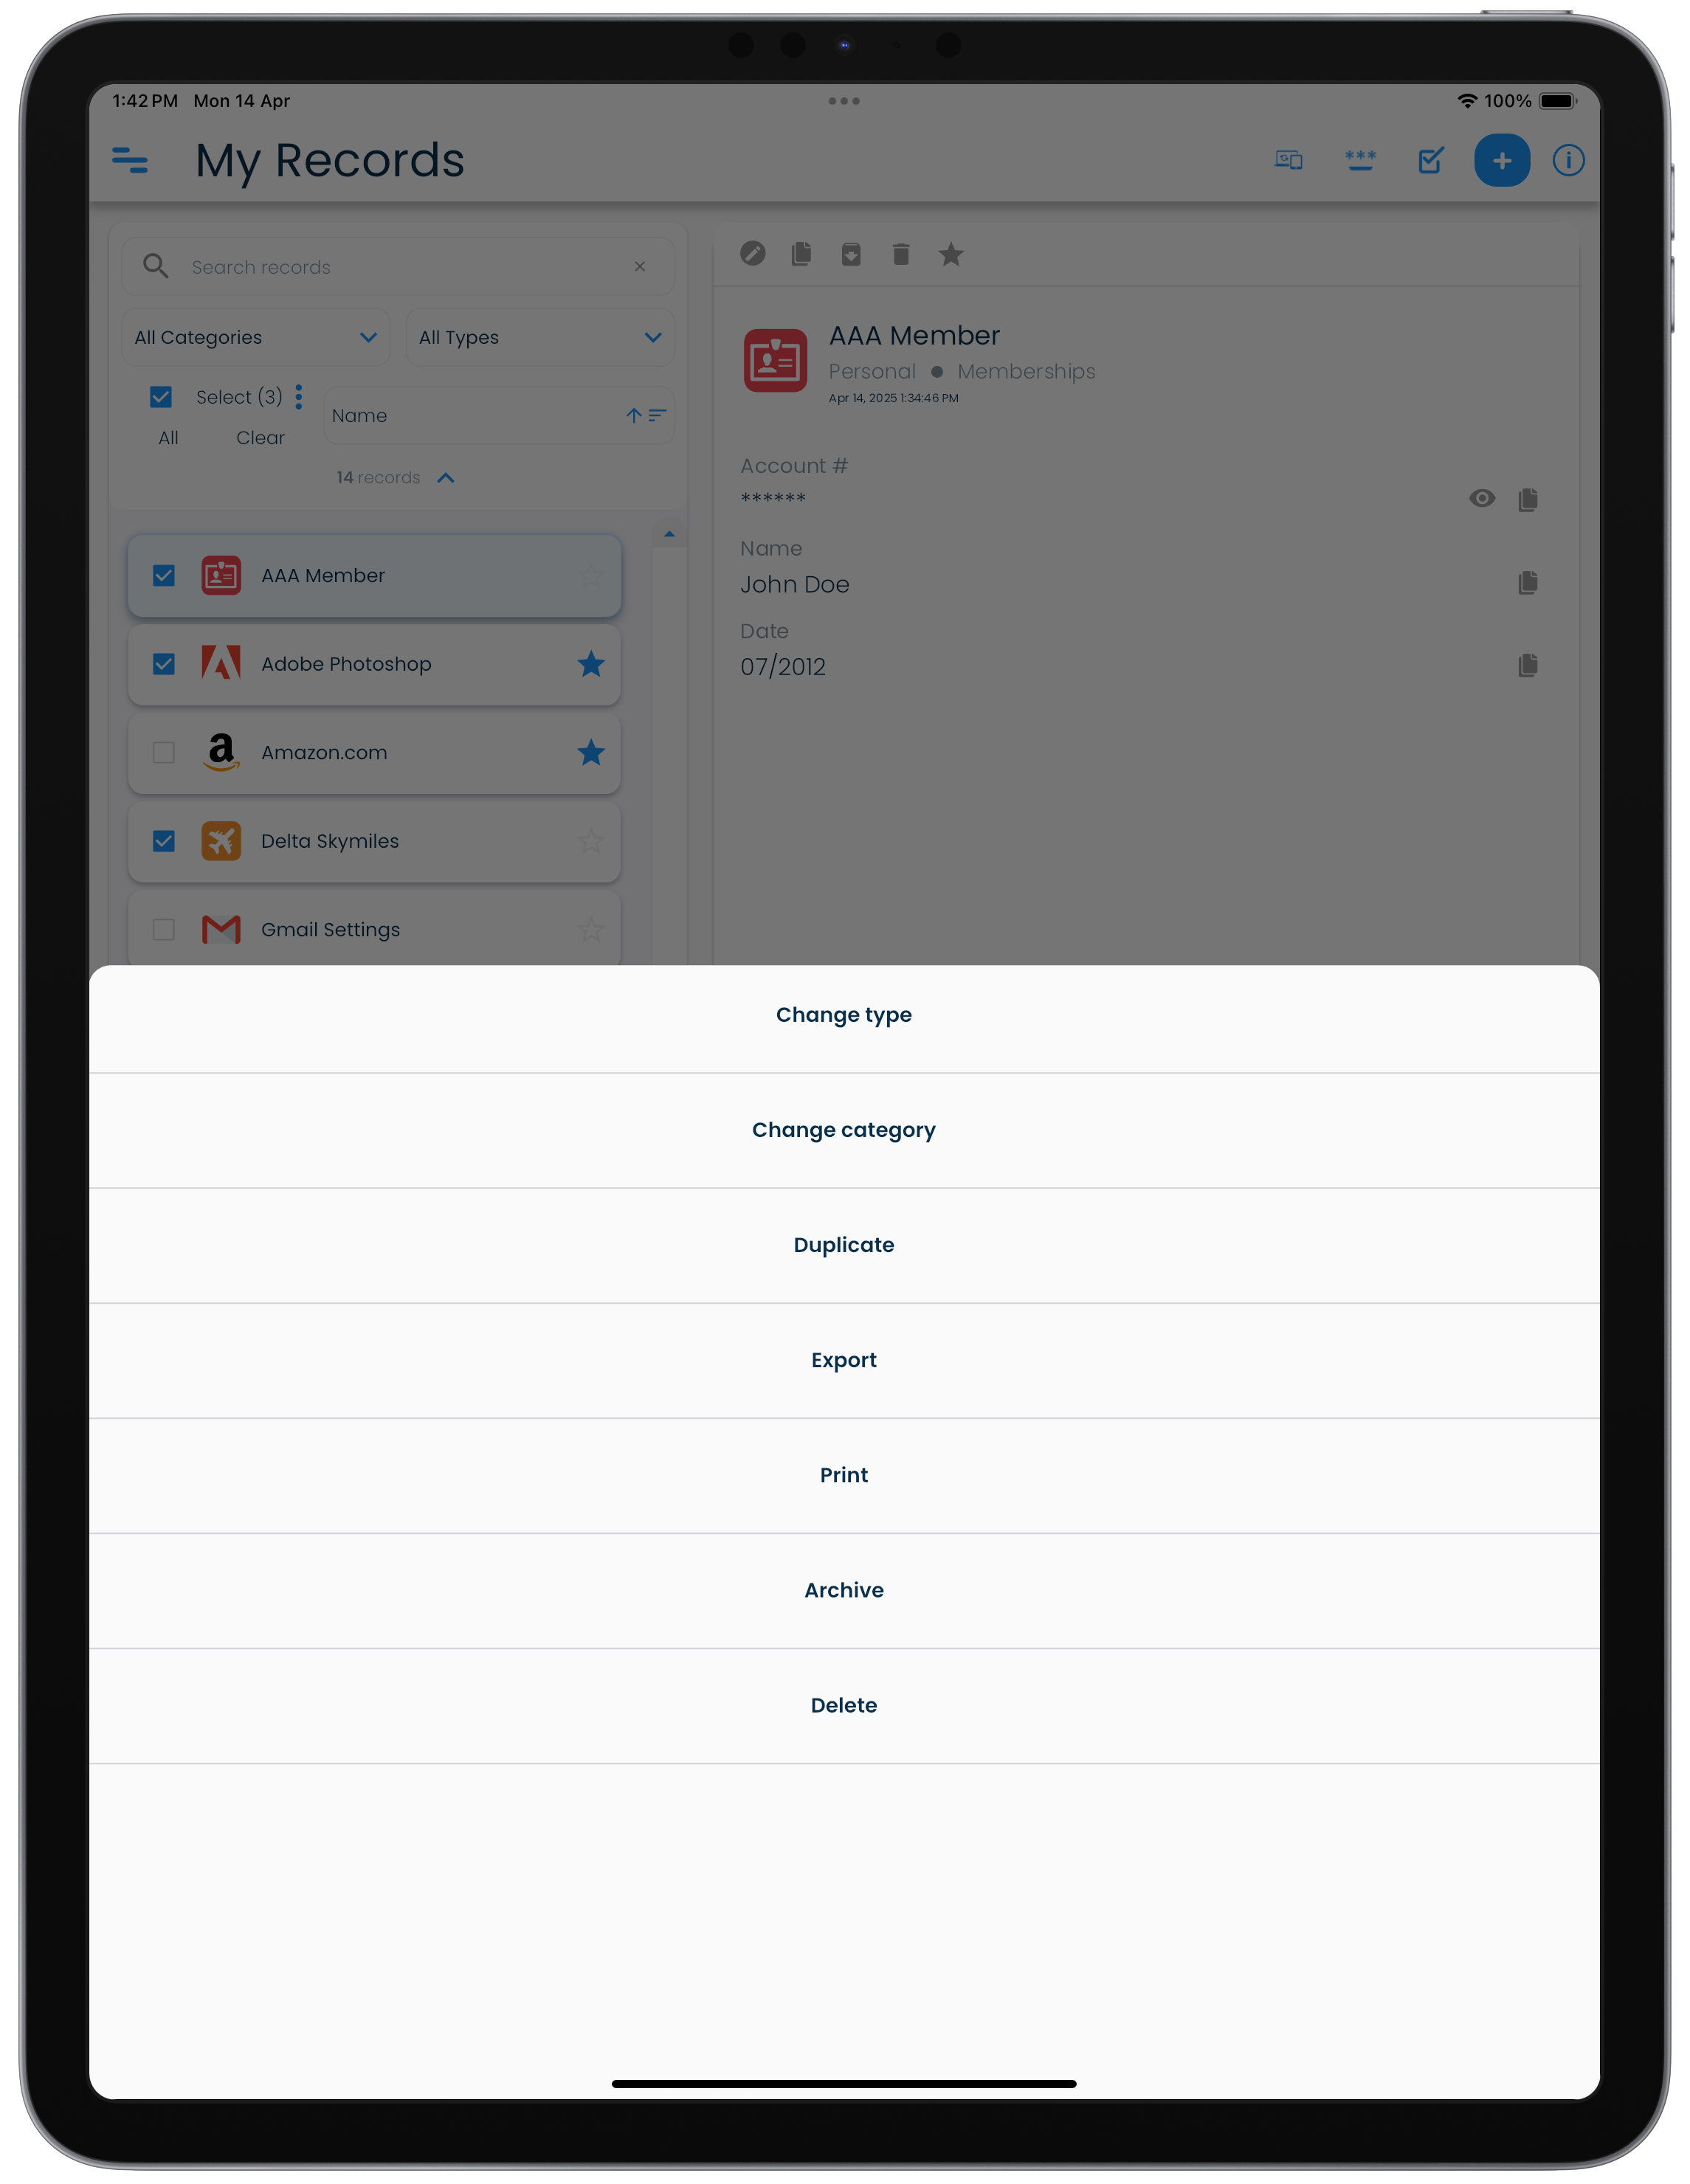
Multiple selection of records and actions
You can select multiple records by checking the Select check box, and then perform actions on them. These actions include
- Change Type
- Change Category
- Duplicate
- Export
- Archive
- Delete
| Mac | Windows |
|---|---|
 |
 |
| Android | iPhone |
|---|---|
 |
 |
| iPad |
|---|
 |
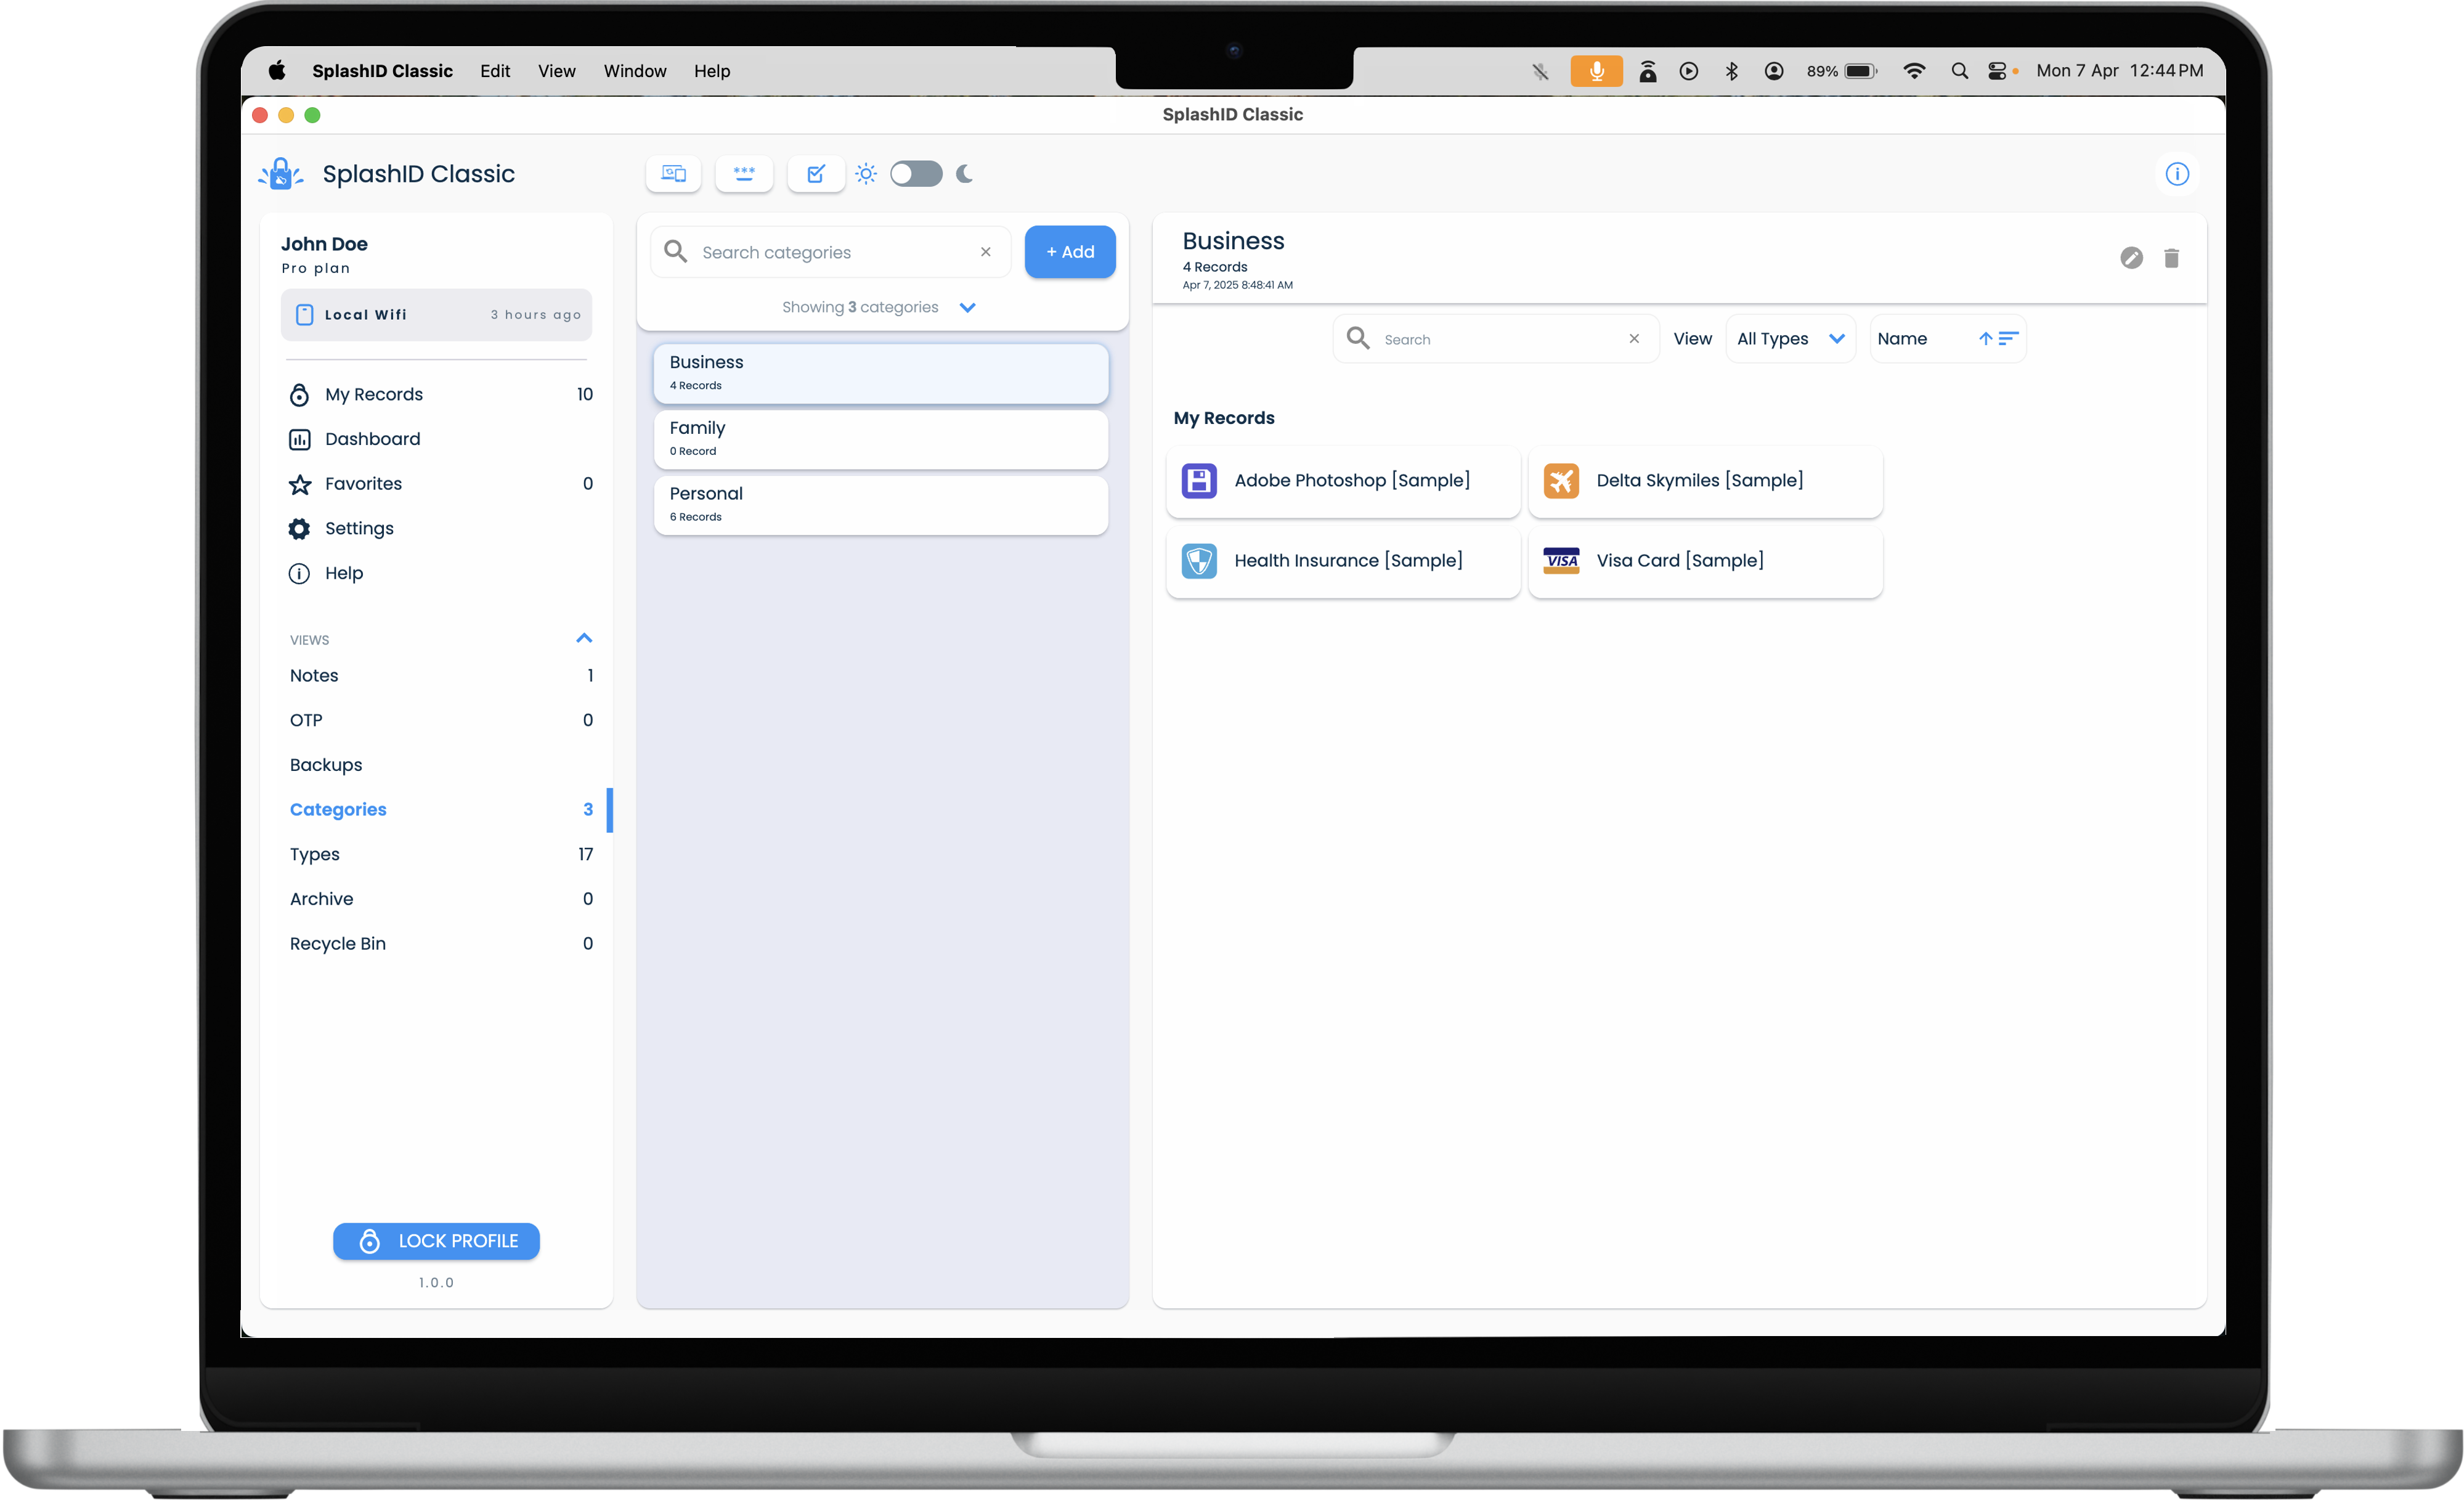
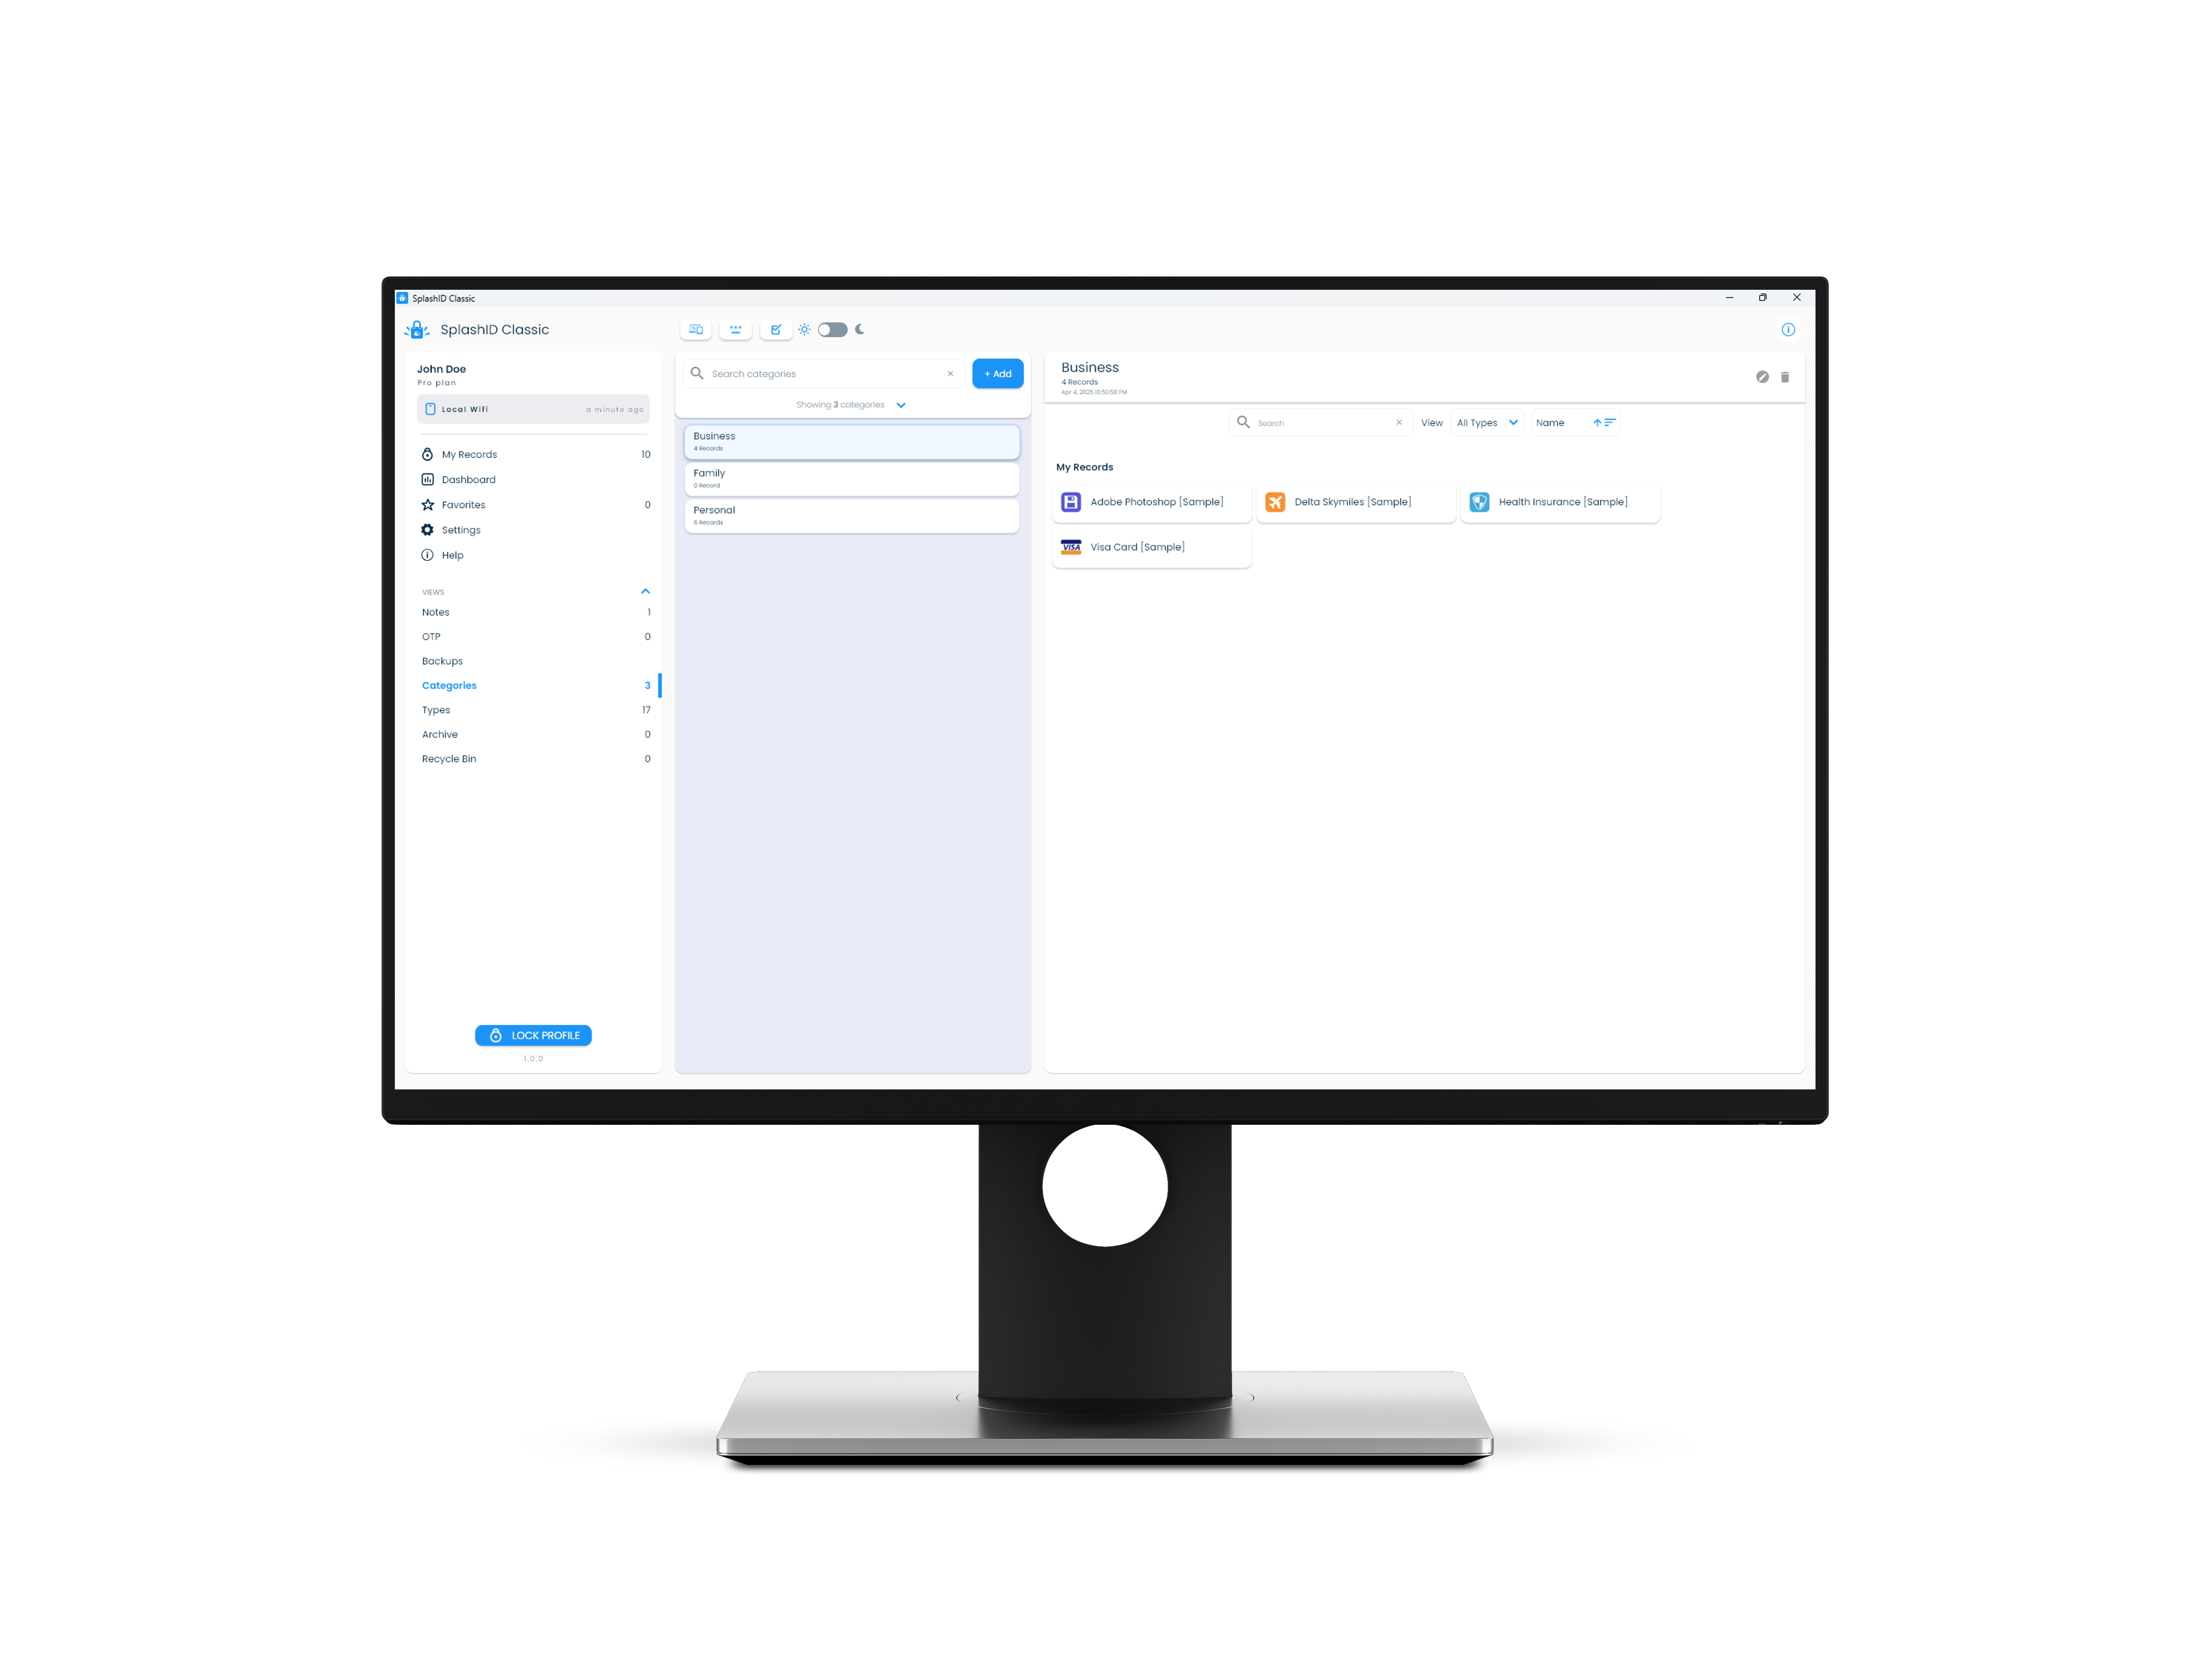
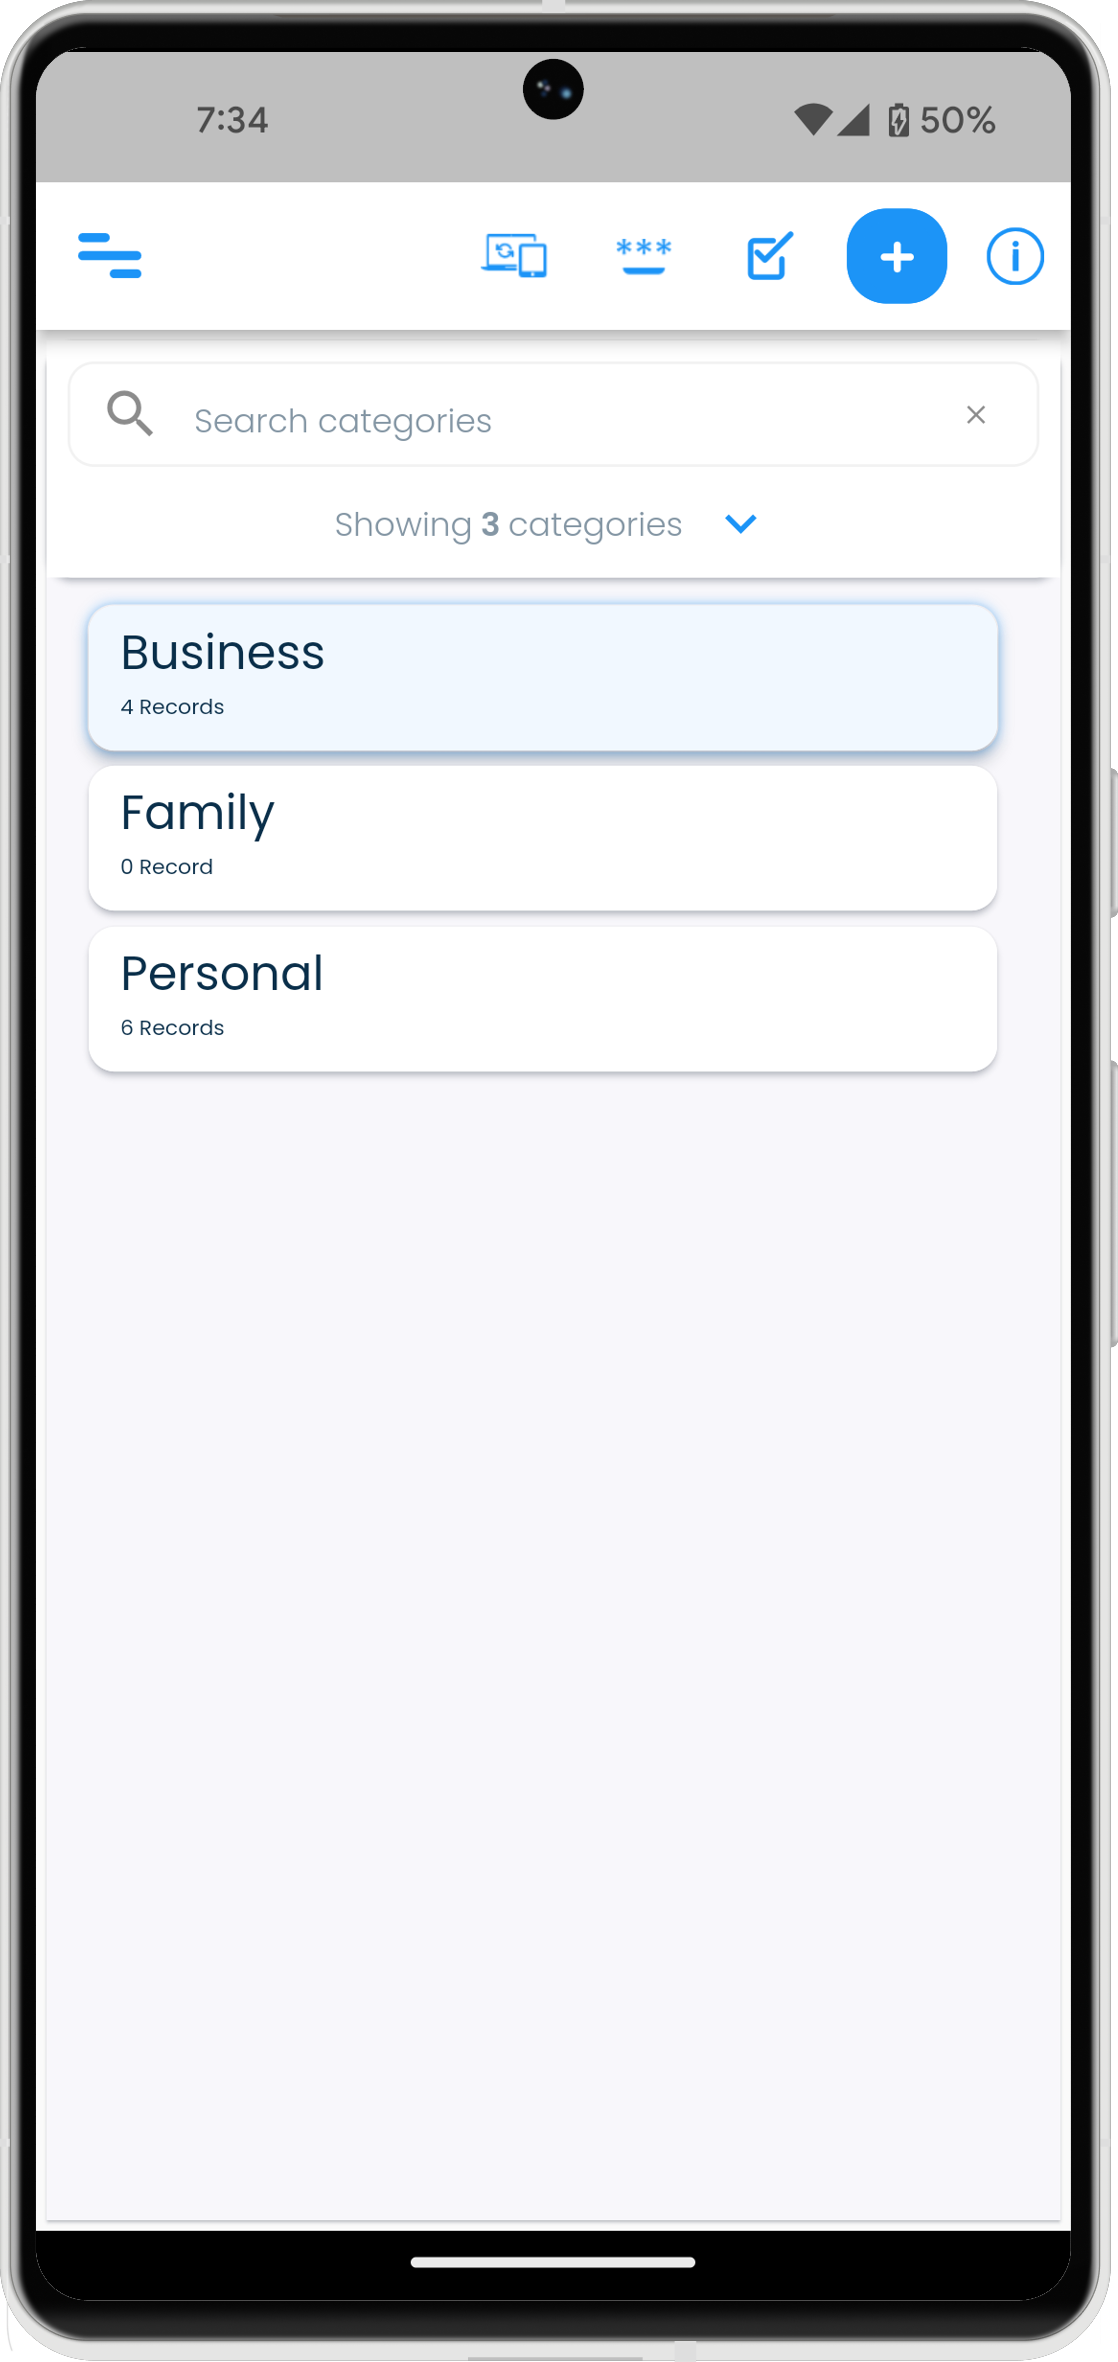
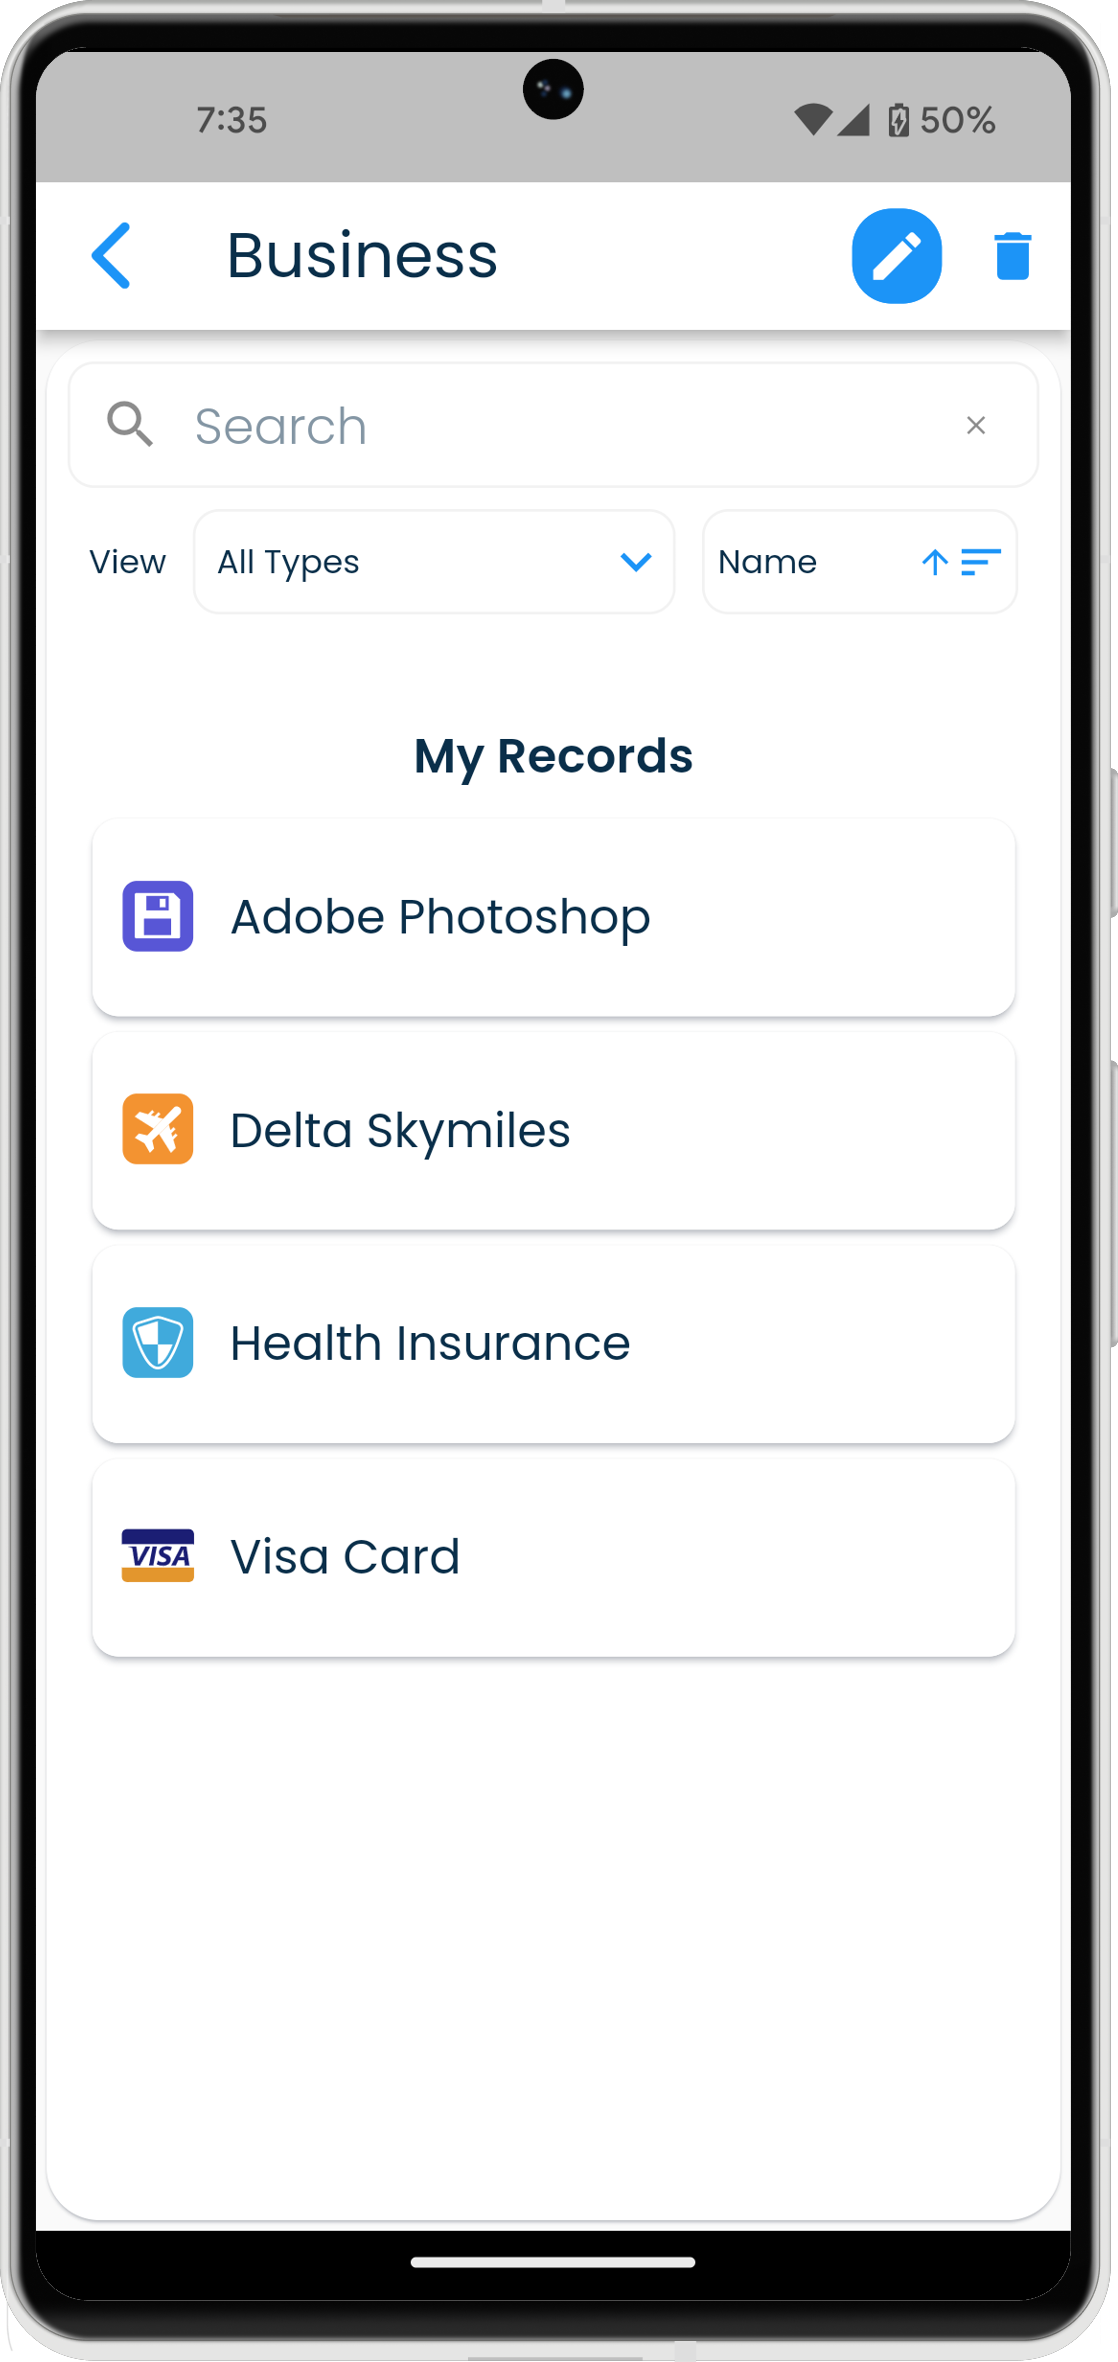
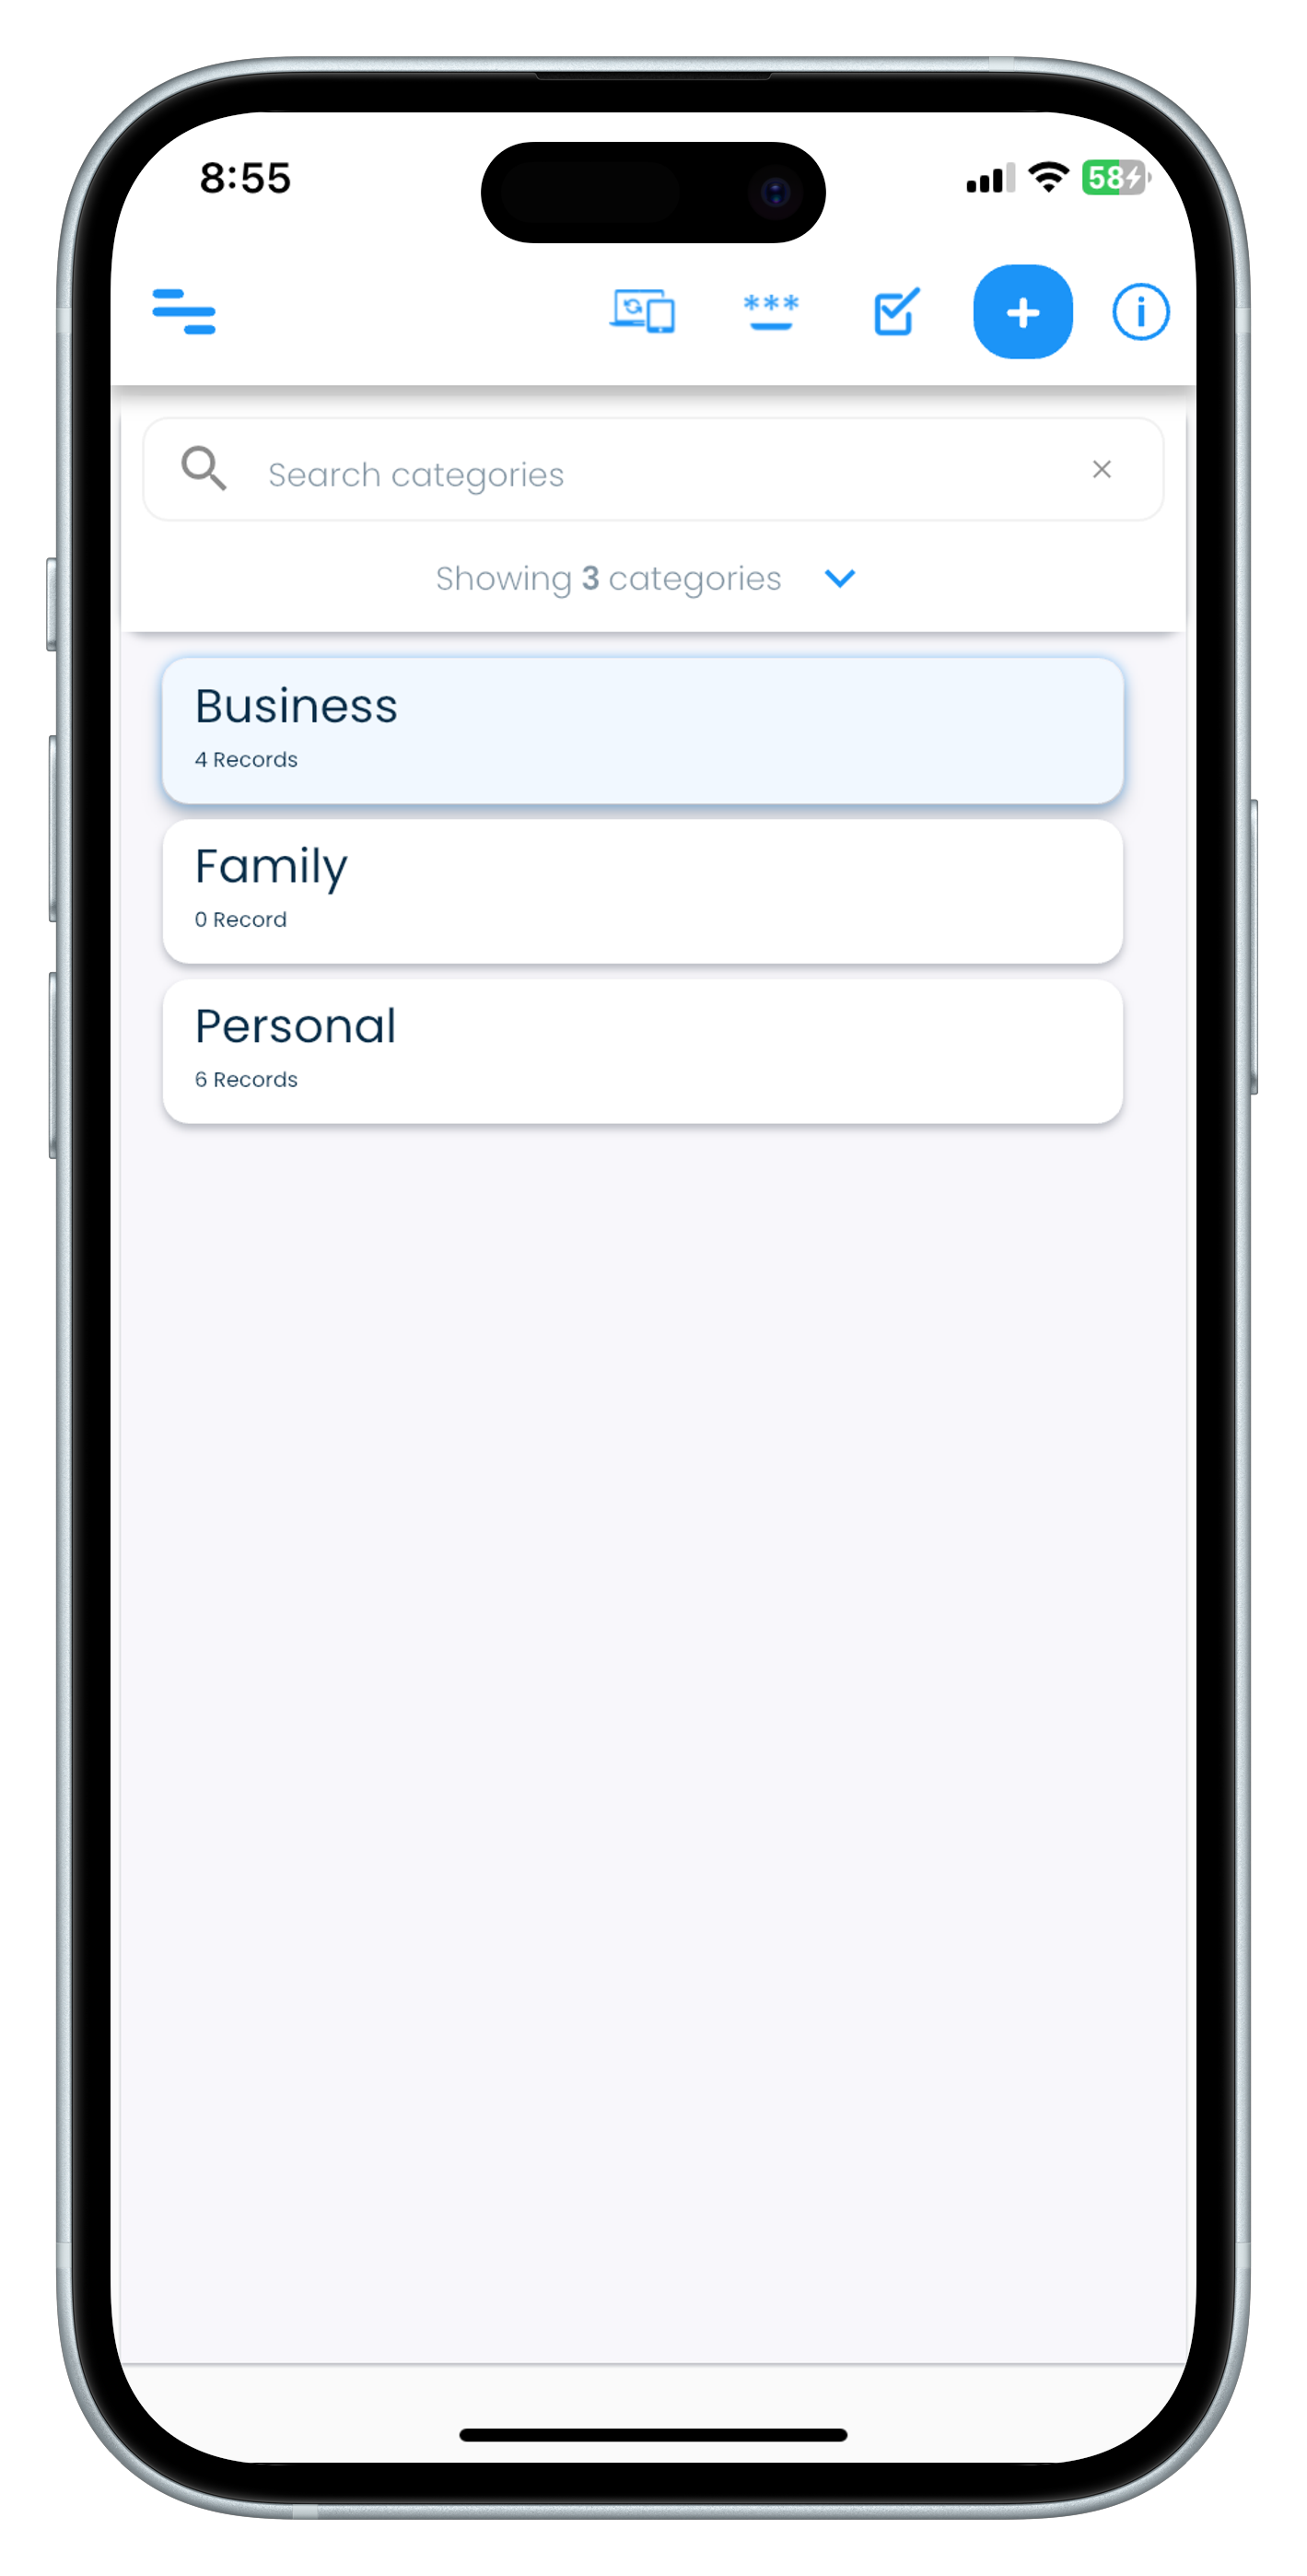
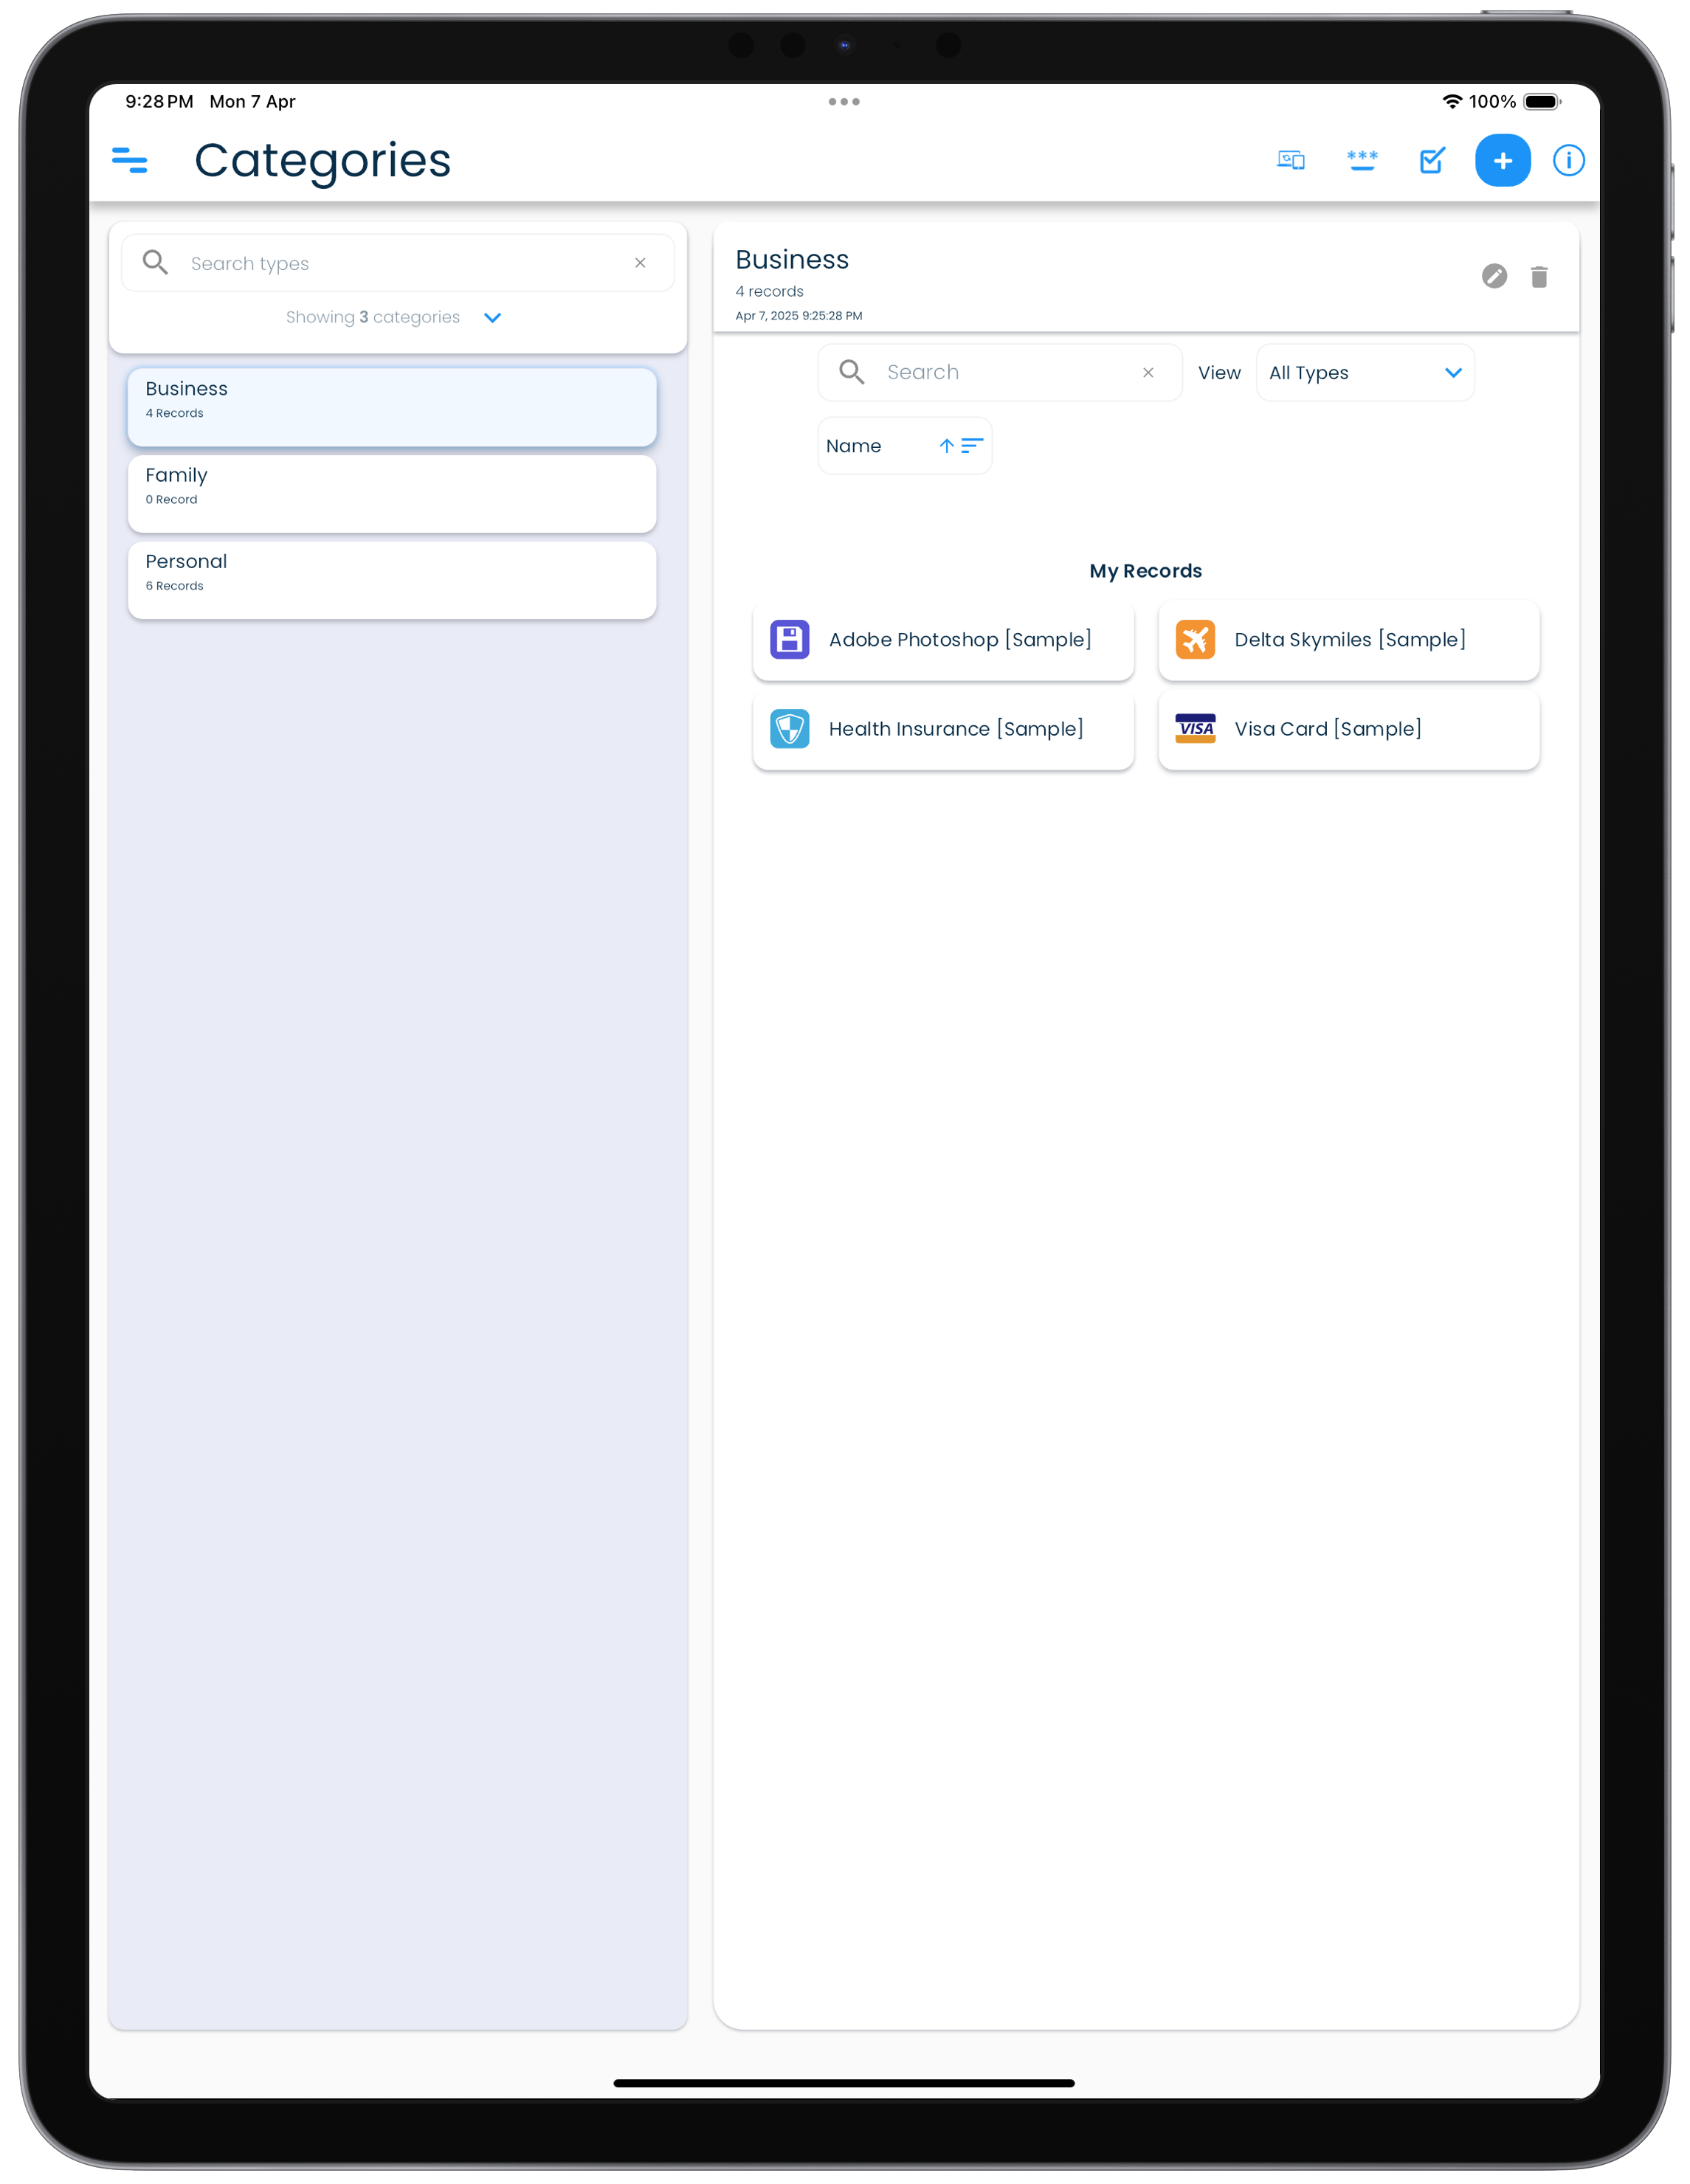
Categories
Categories are used to organise your records into high level groups.
| Mac | Windows |
|---|---|
 |
 |
| Android | iPhone |
|---|---|
  |
  |
| iPad |
|---|
 |
SplashID Classic comes with three categories out of the box. These are
- Personal
- Business
- Family
In addition a virtual category called Unfiled will be used to hold records with a category that is not yet available on the device.
Adding a category
You can create any number of categories to help you organise your records in a folder like way. This can be done in the Categories screen.
Click or tap on the Categories item in the application navigation menu to go to the Categories screen.
Modifying a category
An existing category can be renamed. This can be done in the Categories screen.
Click or tap on the Categories item in the application navigation menu to go to the Categories screen.
Deleting a category
Categories can be deleted if they are not used in any of the records. This can be done in the Categories screen.
Click or tap on the Categories item in the application navigation menu to go to the Categories screen.
WiFi sync and category deletion
For WiFi sync users, it is recommended that all the devices are synced properly before the deletion of a category is attempted on a device. This will prevent the category from being deleted if it was assigned to records on other devices, but was not synced on the current device where it was being deleted from.
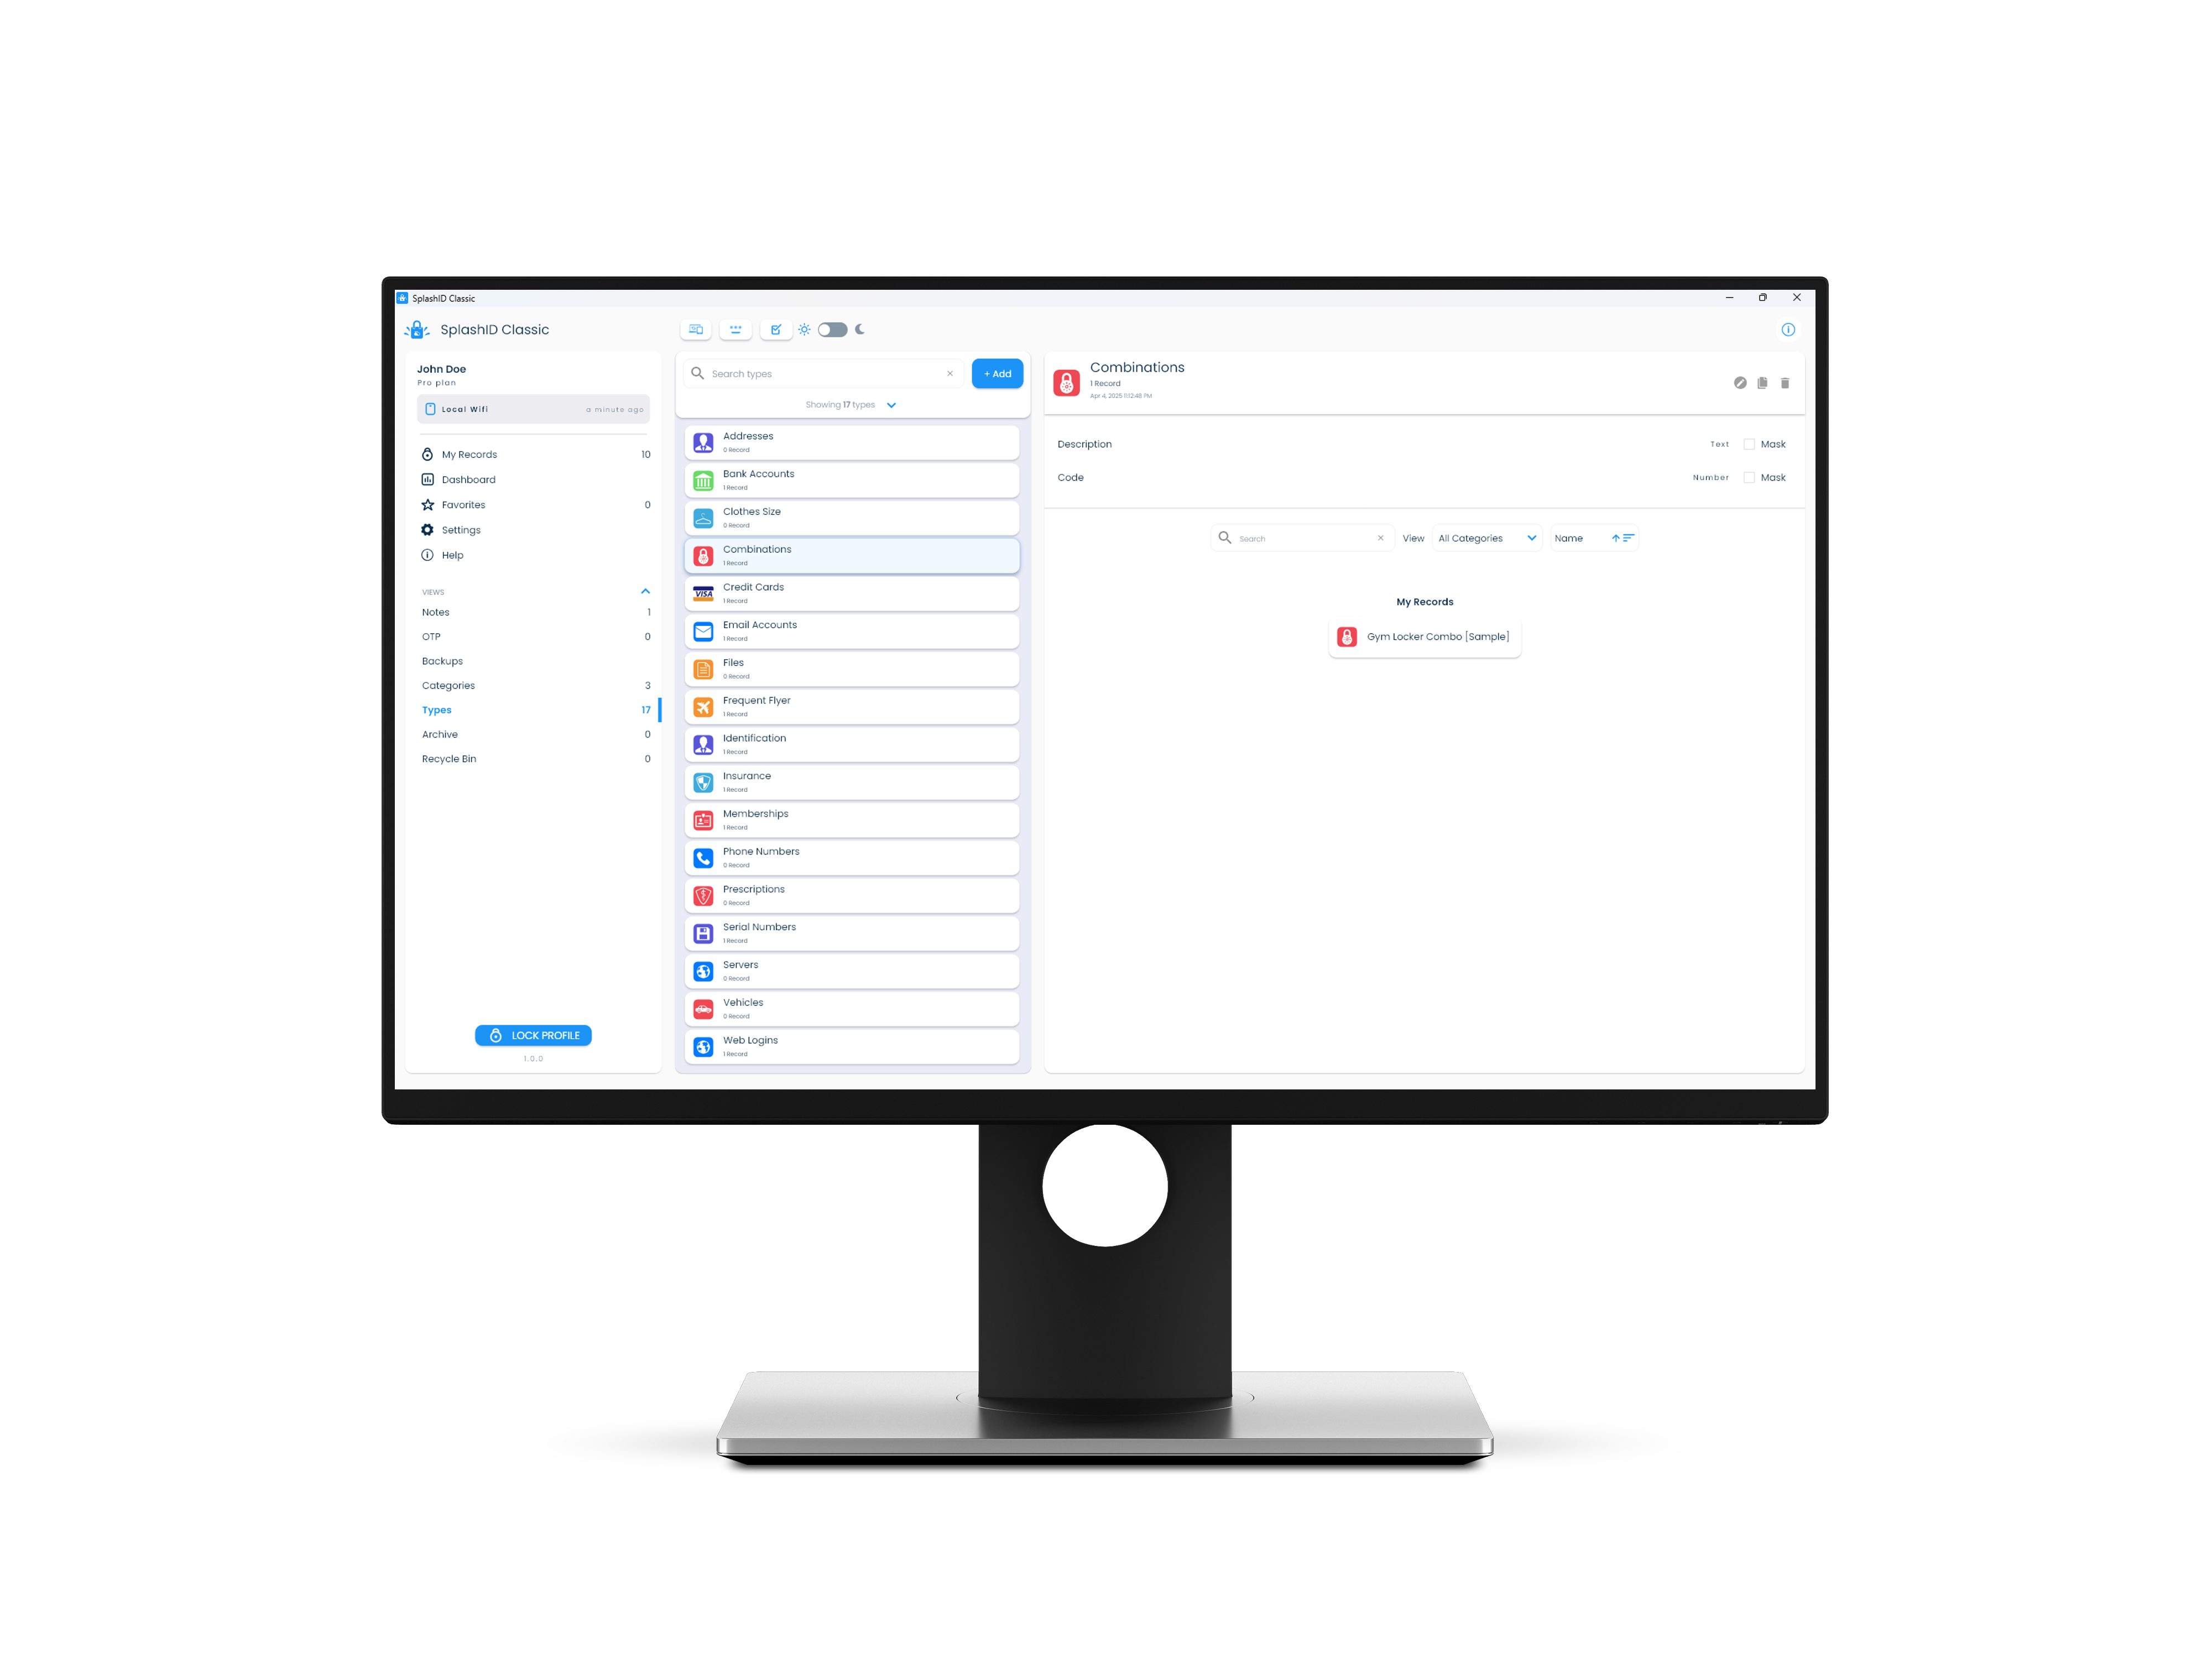
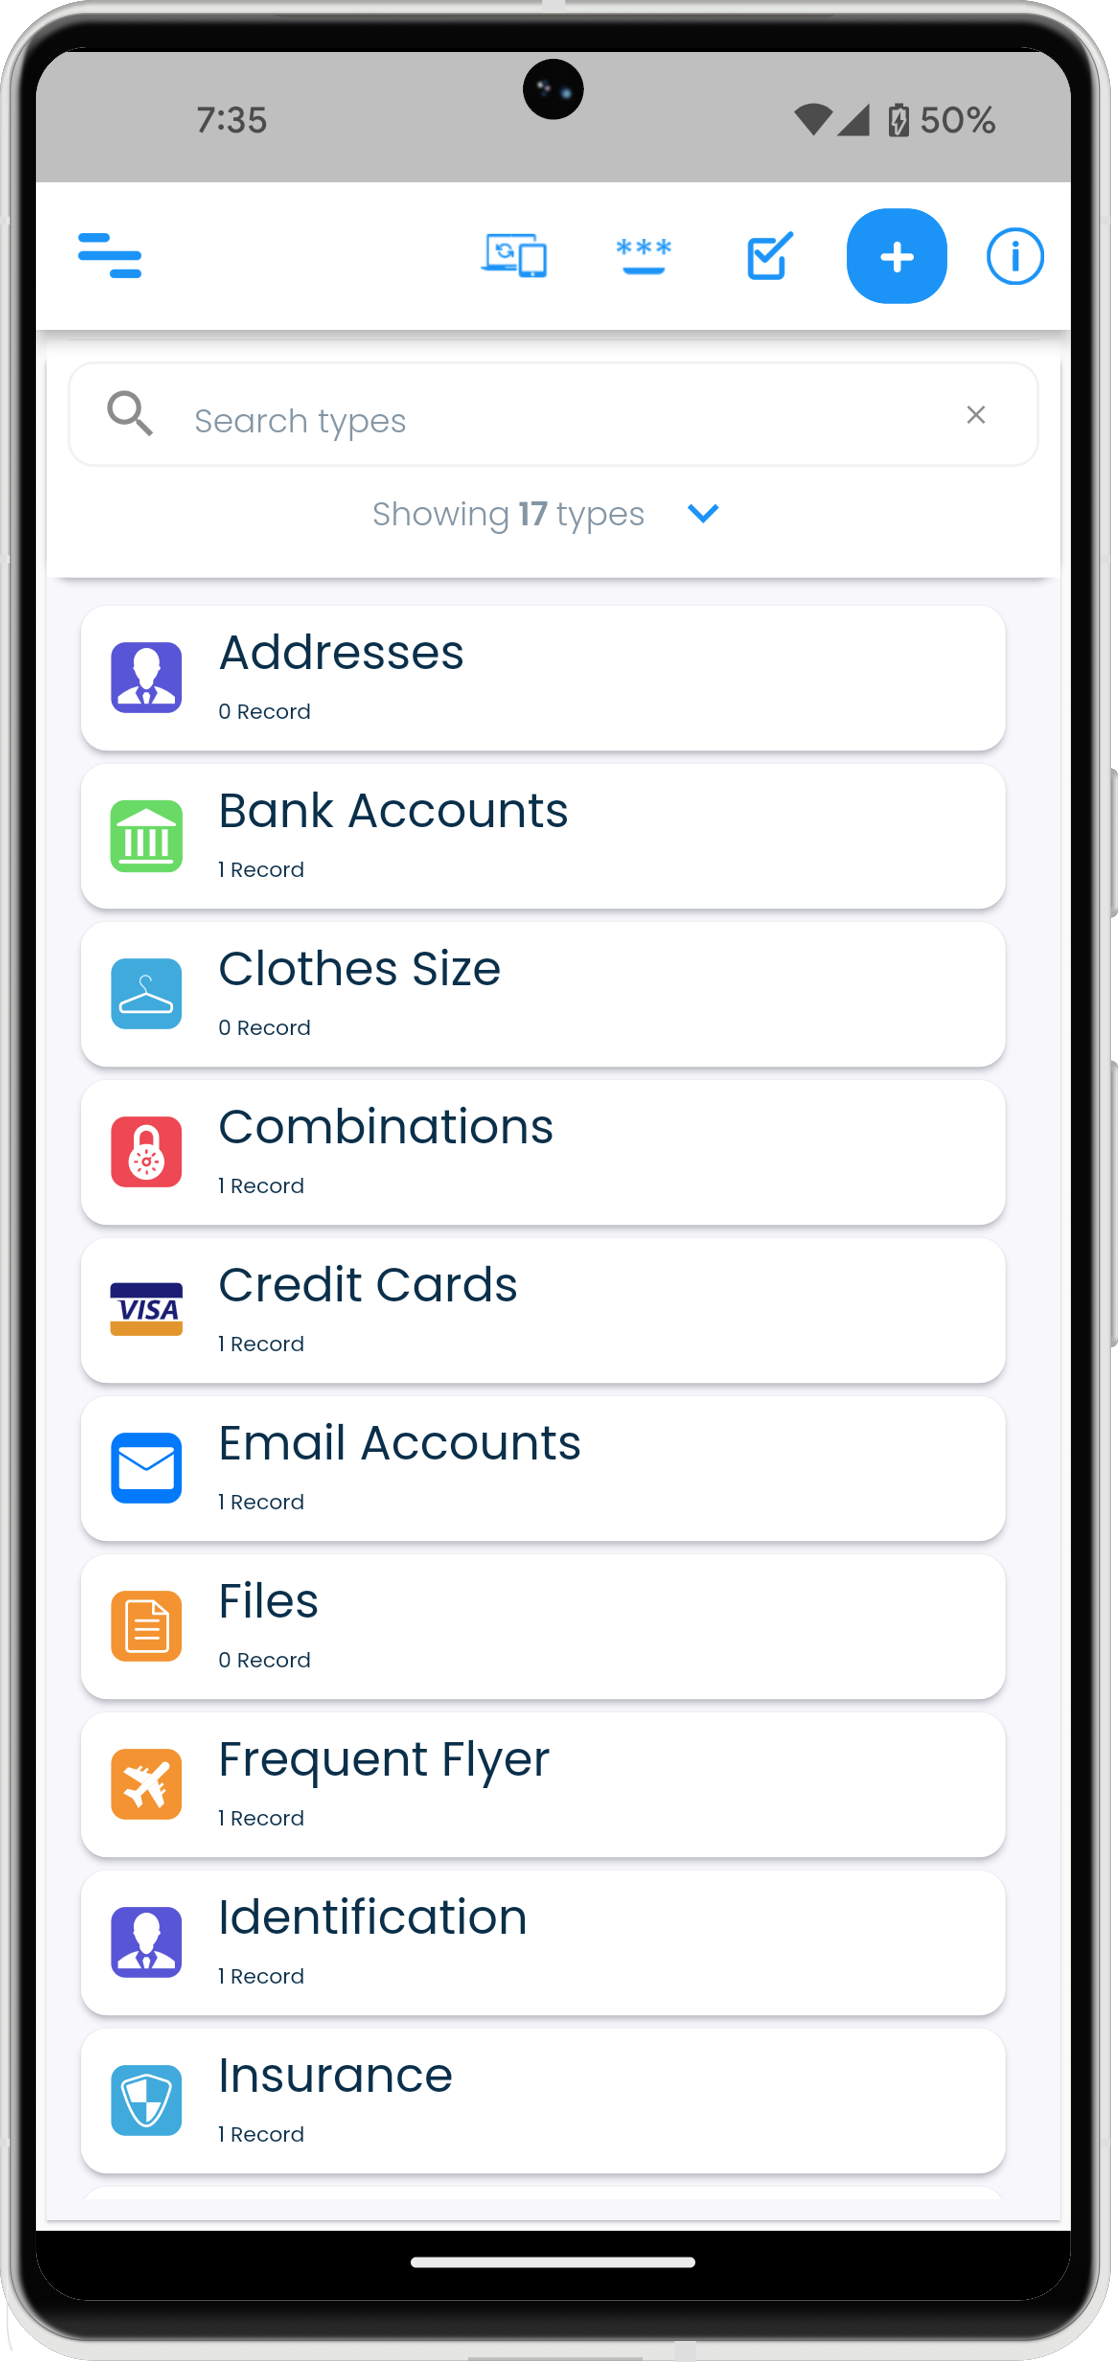
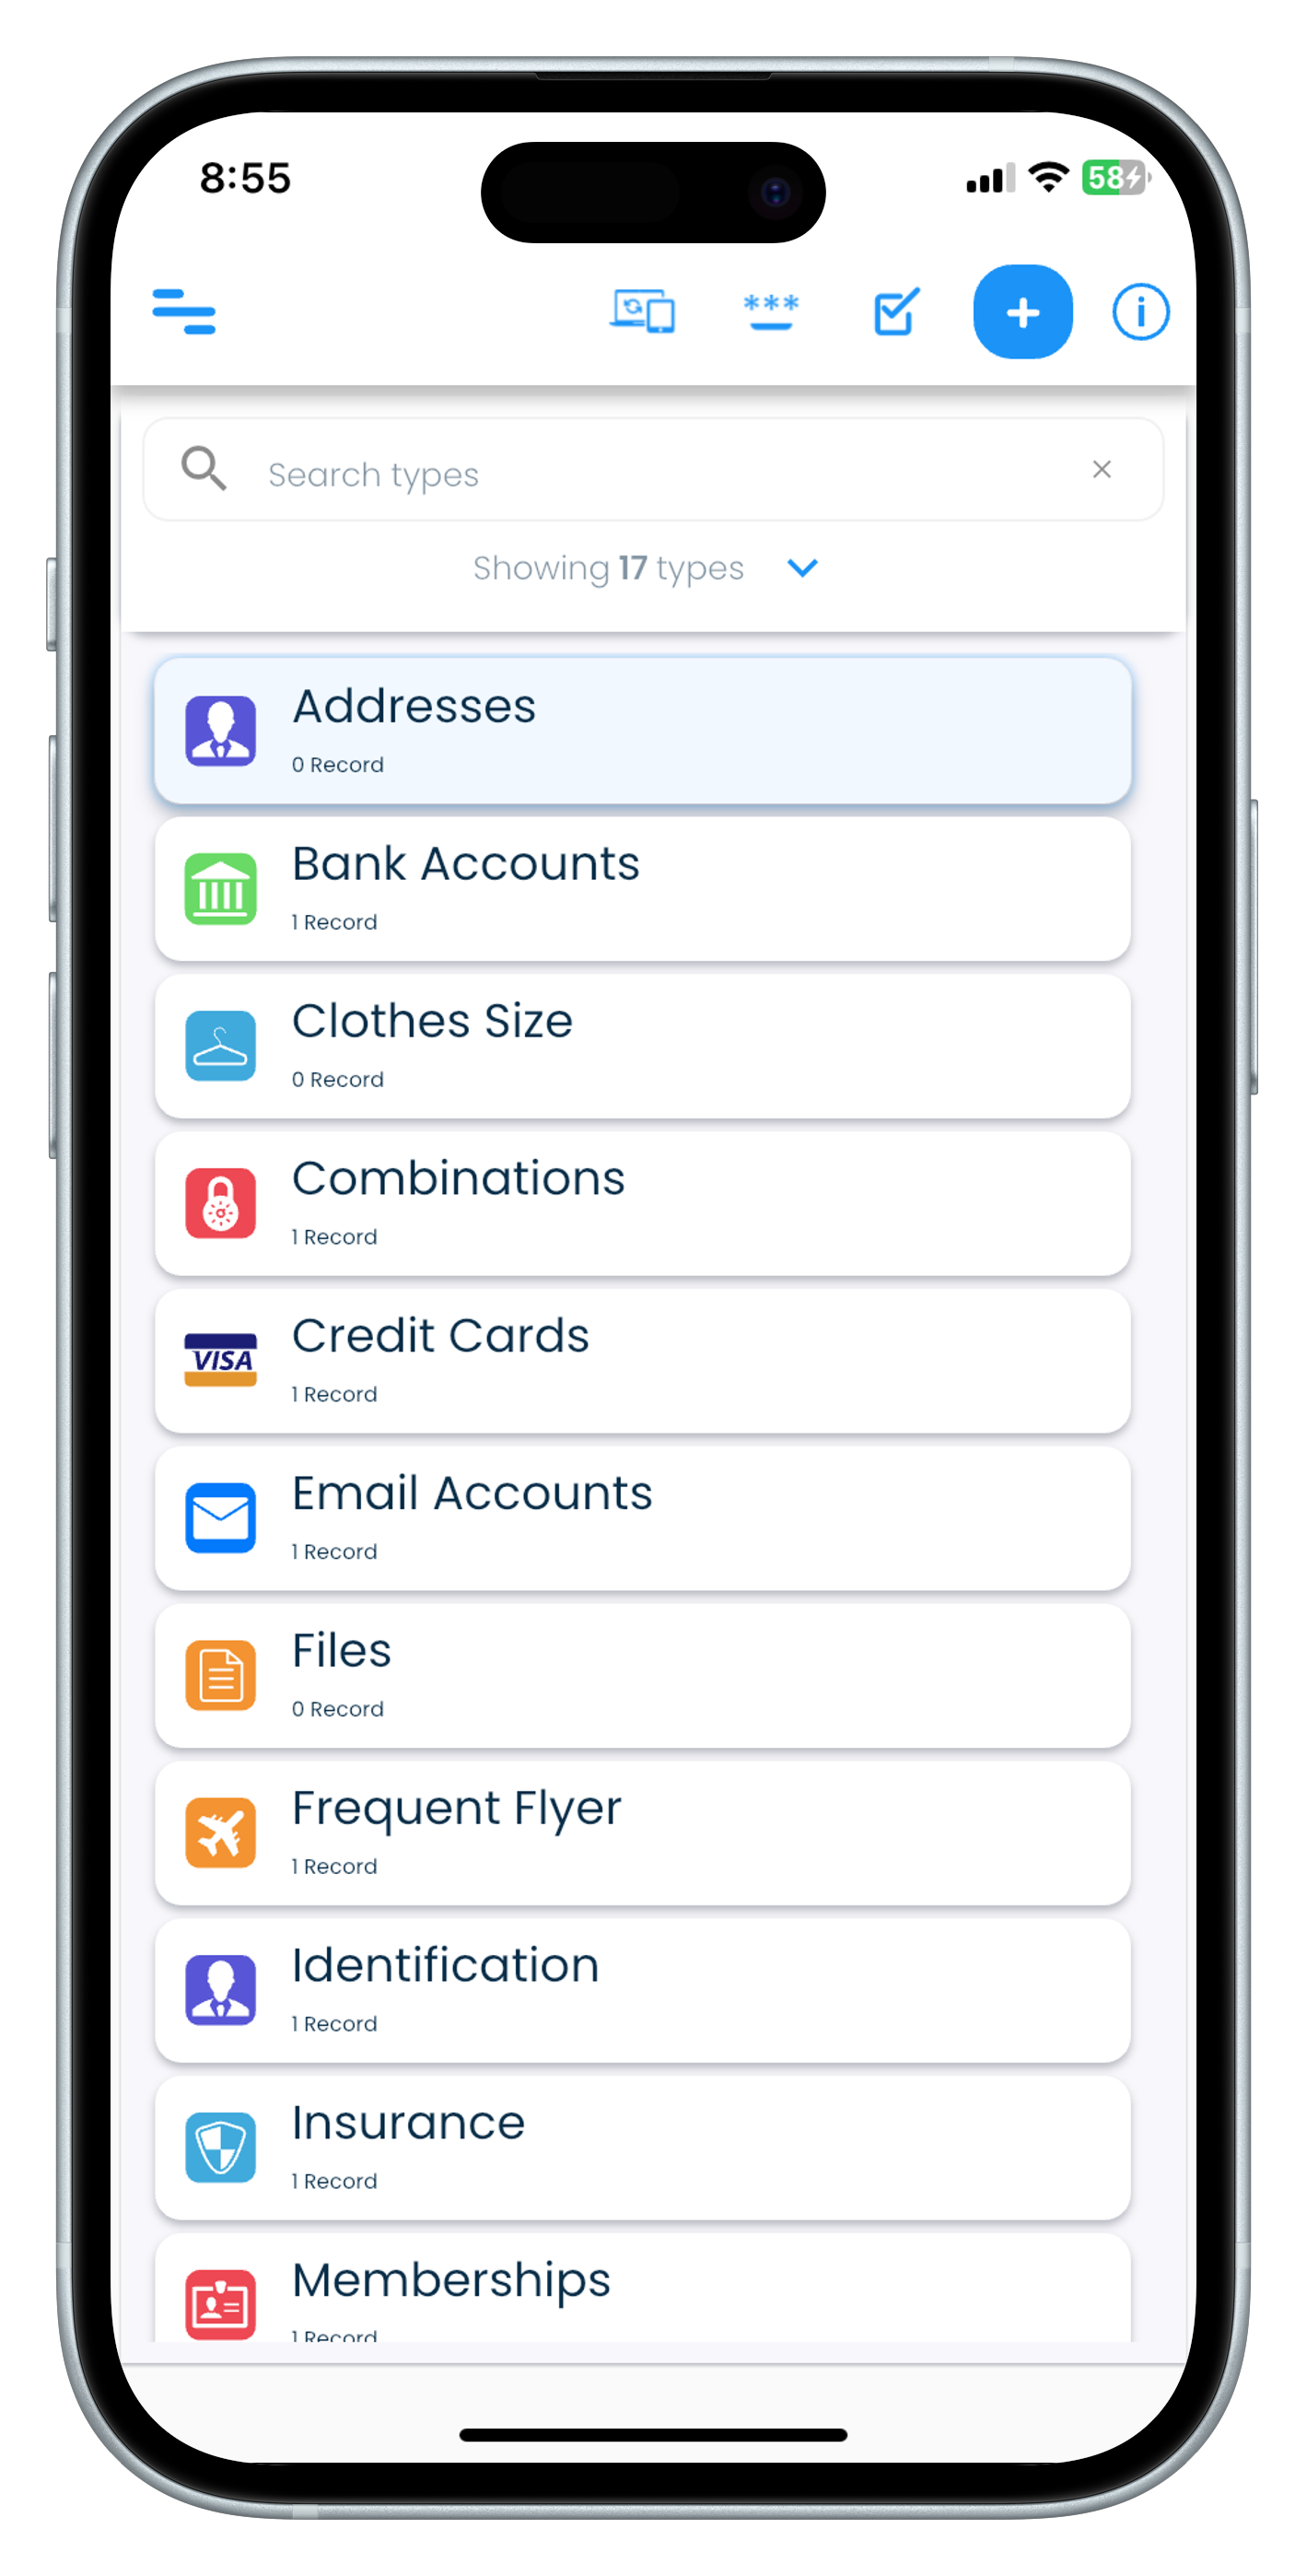
Types
Types can be used to indicate the purpose of a record. Types can also be thought of as record templates used at the time of the record creation.
| Mac | Windows |
|---|---|
 |
 |
| Android | iPhone |
|---|---|
  |
  |
| iPad |
|---|
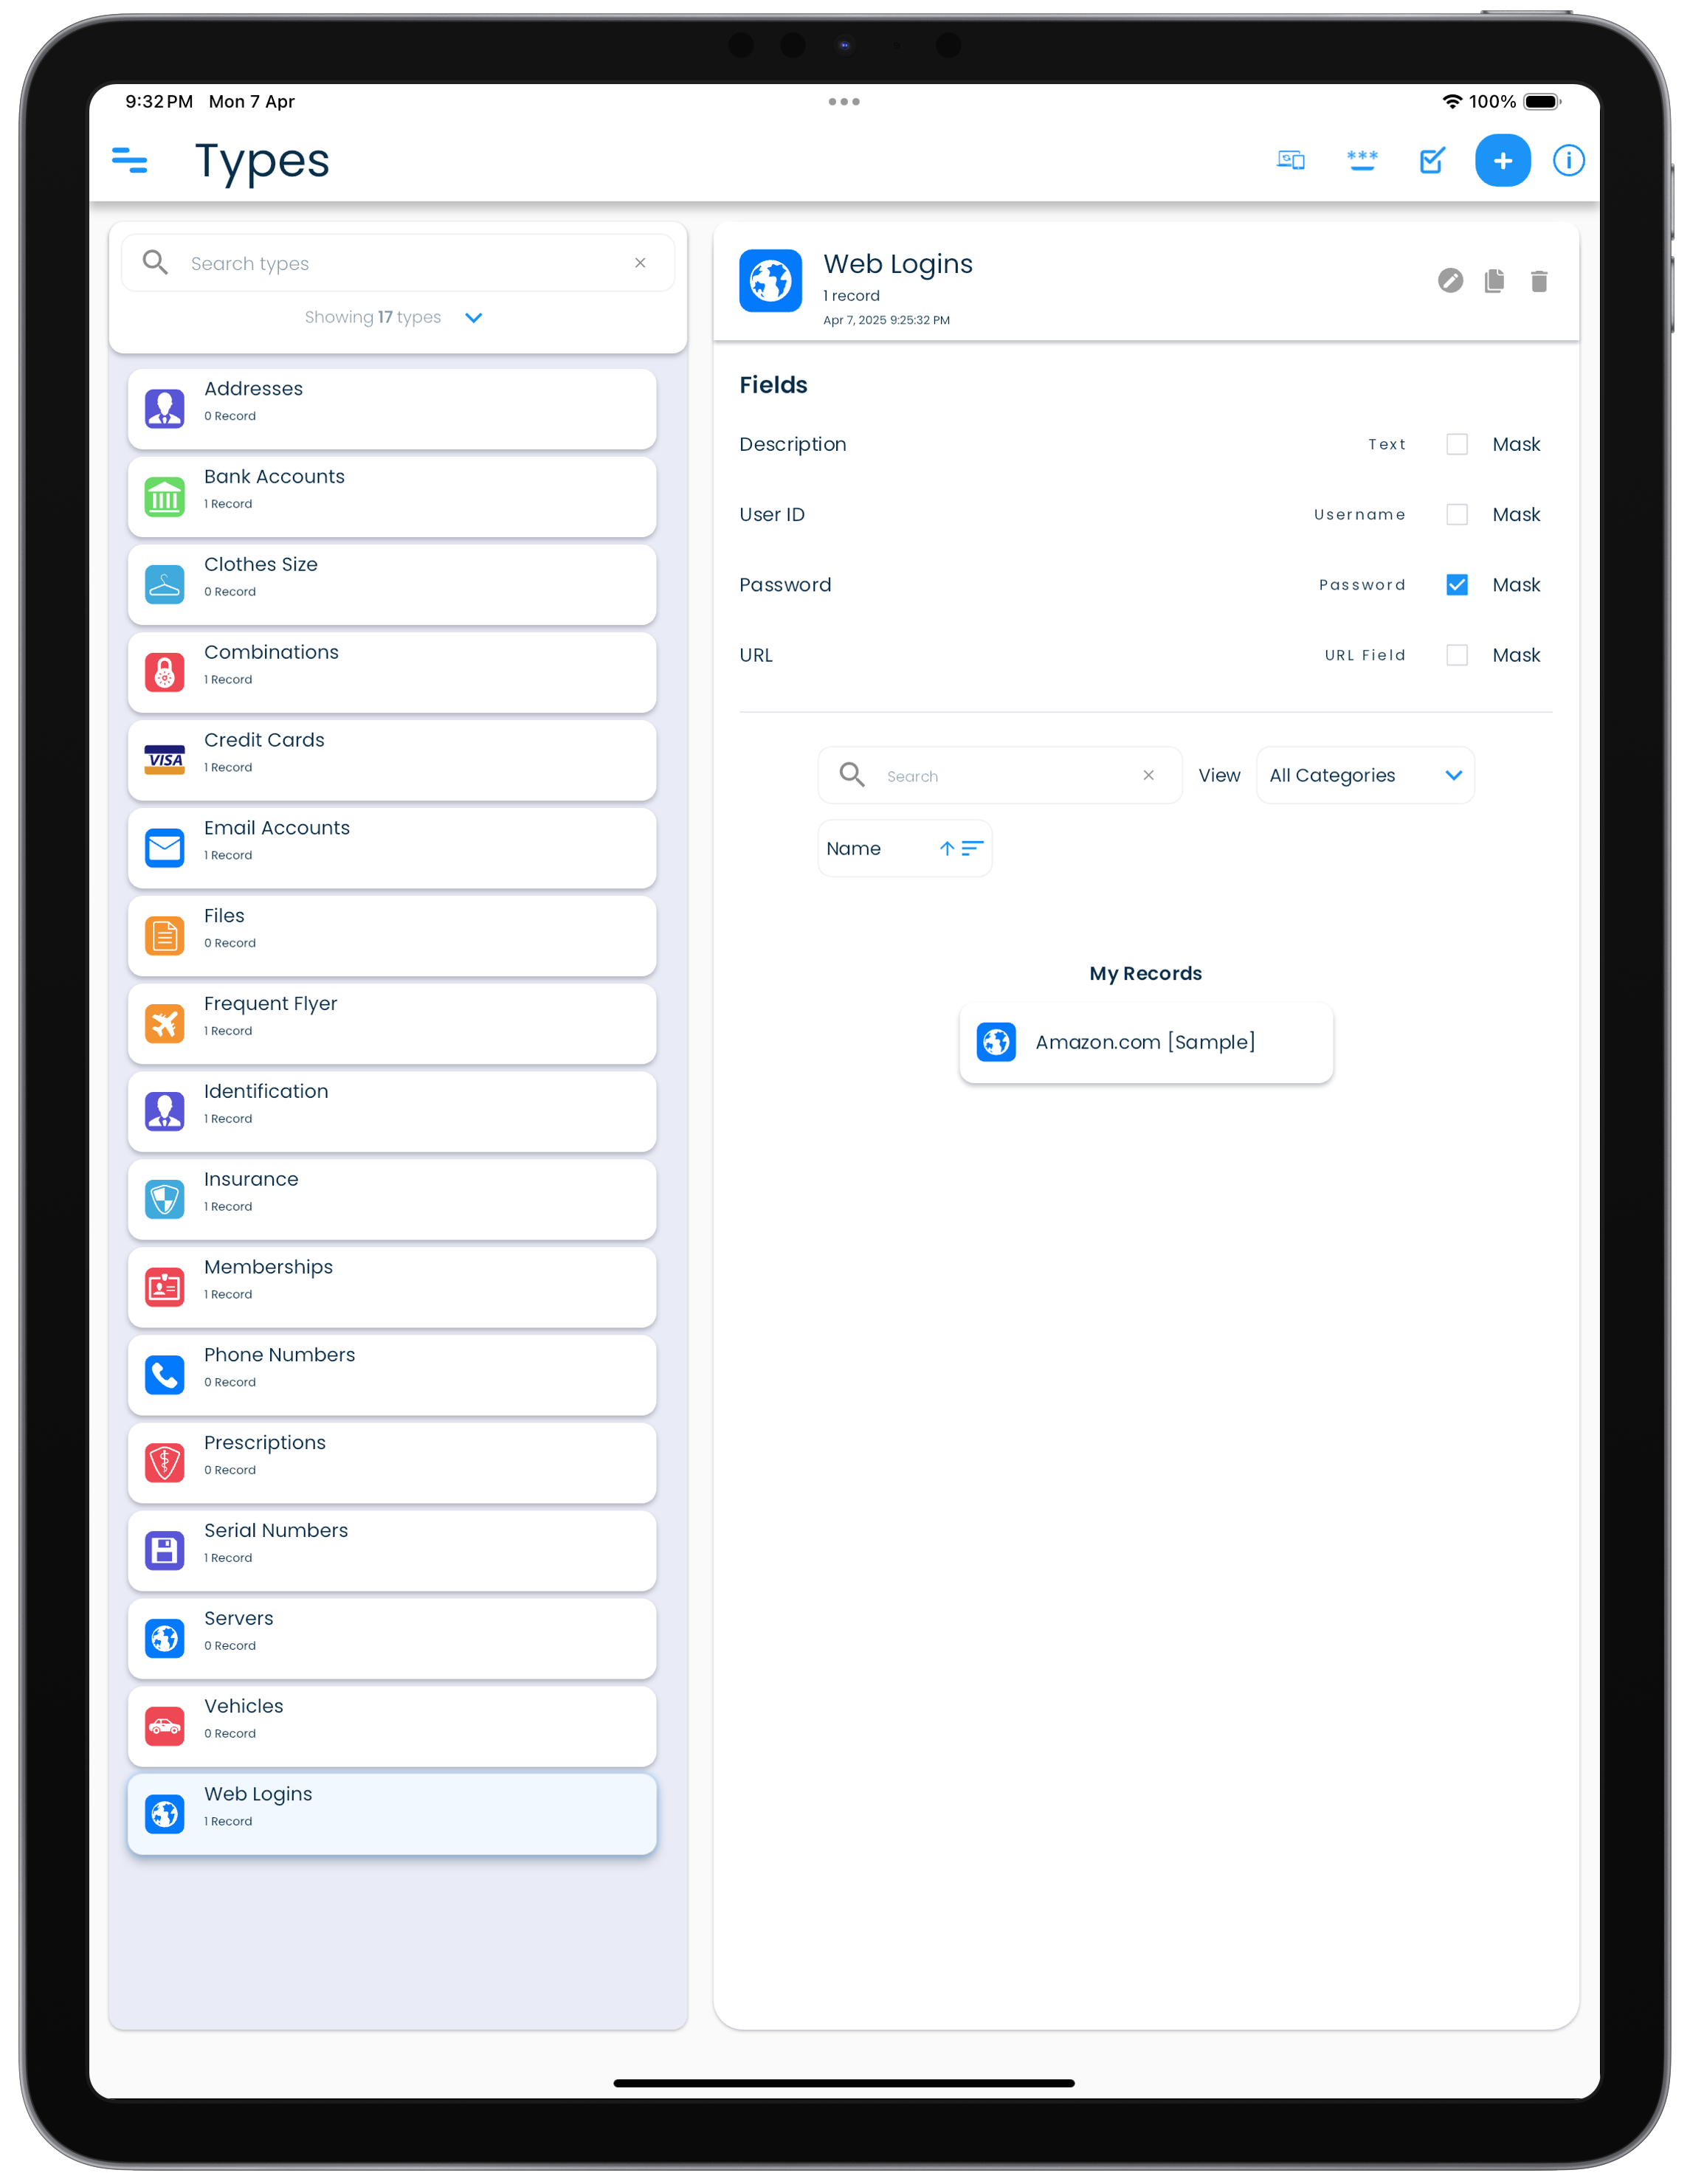 |
Each type has a predefined set of fields that are used to populate a record when a record is being created for the first time.
For existing records, subsequently changing the type of the record will redefine its purpose, but will not change the fields that were already populated in the record with the fields from the previous type.
Changing type of a record does not change its fields
The fields in an existing record will not change when the type is changed during editing of the record.
There are 17 predefined types available in SplashID.
- Addresses
- Bank Accounts
- Clothes Size
- Combinations
- Credit Cards
- Email Accounts
- Files
- Frequent Flyer
- Identification
- Insurance
- Memberships
- Phone Numbers
- Prescriptions
- Serial Numbers
- Servers
- Vehicles
- Web Logins
In addition a virtual type called Unfiled will be used to hold records with a type that is not yet available on the device.
Adding a type
You can create your own types if you want to. This can be done in the Types screen.
Click or tap on the Types item in the application navigation menu to go to the Types screen.
Modifying a type
An existing type can be renamed, or their fields changed. This can be done in the Types screen.
Click or tap on the Types item in the application navigation menu to go to the Types screen.
Deleting a type
Types can be deleted if they are not used in any of the records. This can be done in the Types screen.
Click or tap on the Types item in the application navigation menu to go to the Types screen.
WiFi sync and type deletion
For WiFi sync users, it is recommended that all the devices are synced properly before the deletion of a type is attempted on a device. This will prevent the type from being deleted if it was assigned to records on other devices, but was not synced on the current device where it was being deleted from.
Attachments
Attachments are not supported in SplashID Classic.
Icons
Icons help you visually identify records and distinguish between them.
A record gets an icon from the type it is created from initially. Later, if required, you can change the icon in a record.
Changing an icon in a record
To change the icon on a record you need to open the icon editor as explained below.
- Open a record for editing.
- Click or tap on the icon displayed on the left of the record name in the details header to show the icon editor.
- Filter out the available icons by using some search words, or scroll and select the desired icon from the list of icons displayed.
- The chosen icon will be displayed in the bottom left part of the icon editor screen.
- Click or tap on Save to set the icon in the record.
Using your own icons
SplashID Classic does not support uploading your own icons for use in the records.
Record views
Records created by you can be accessed in different ways. These views can be accessed from the application menu.
My Records
All your records can be viewed in the My Records view.
These records can be searched, filtered and sorted as per your needs.
| Mac | Windows |
|---|---|
|
|
| Android | iPhone |
|---|---|
| |
|
| iPad |
|---|
|
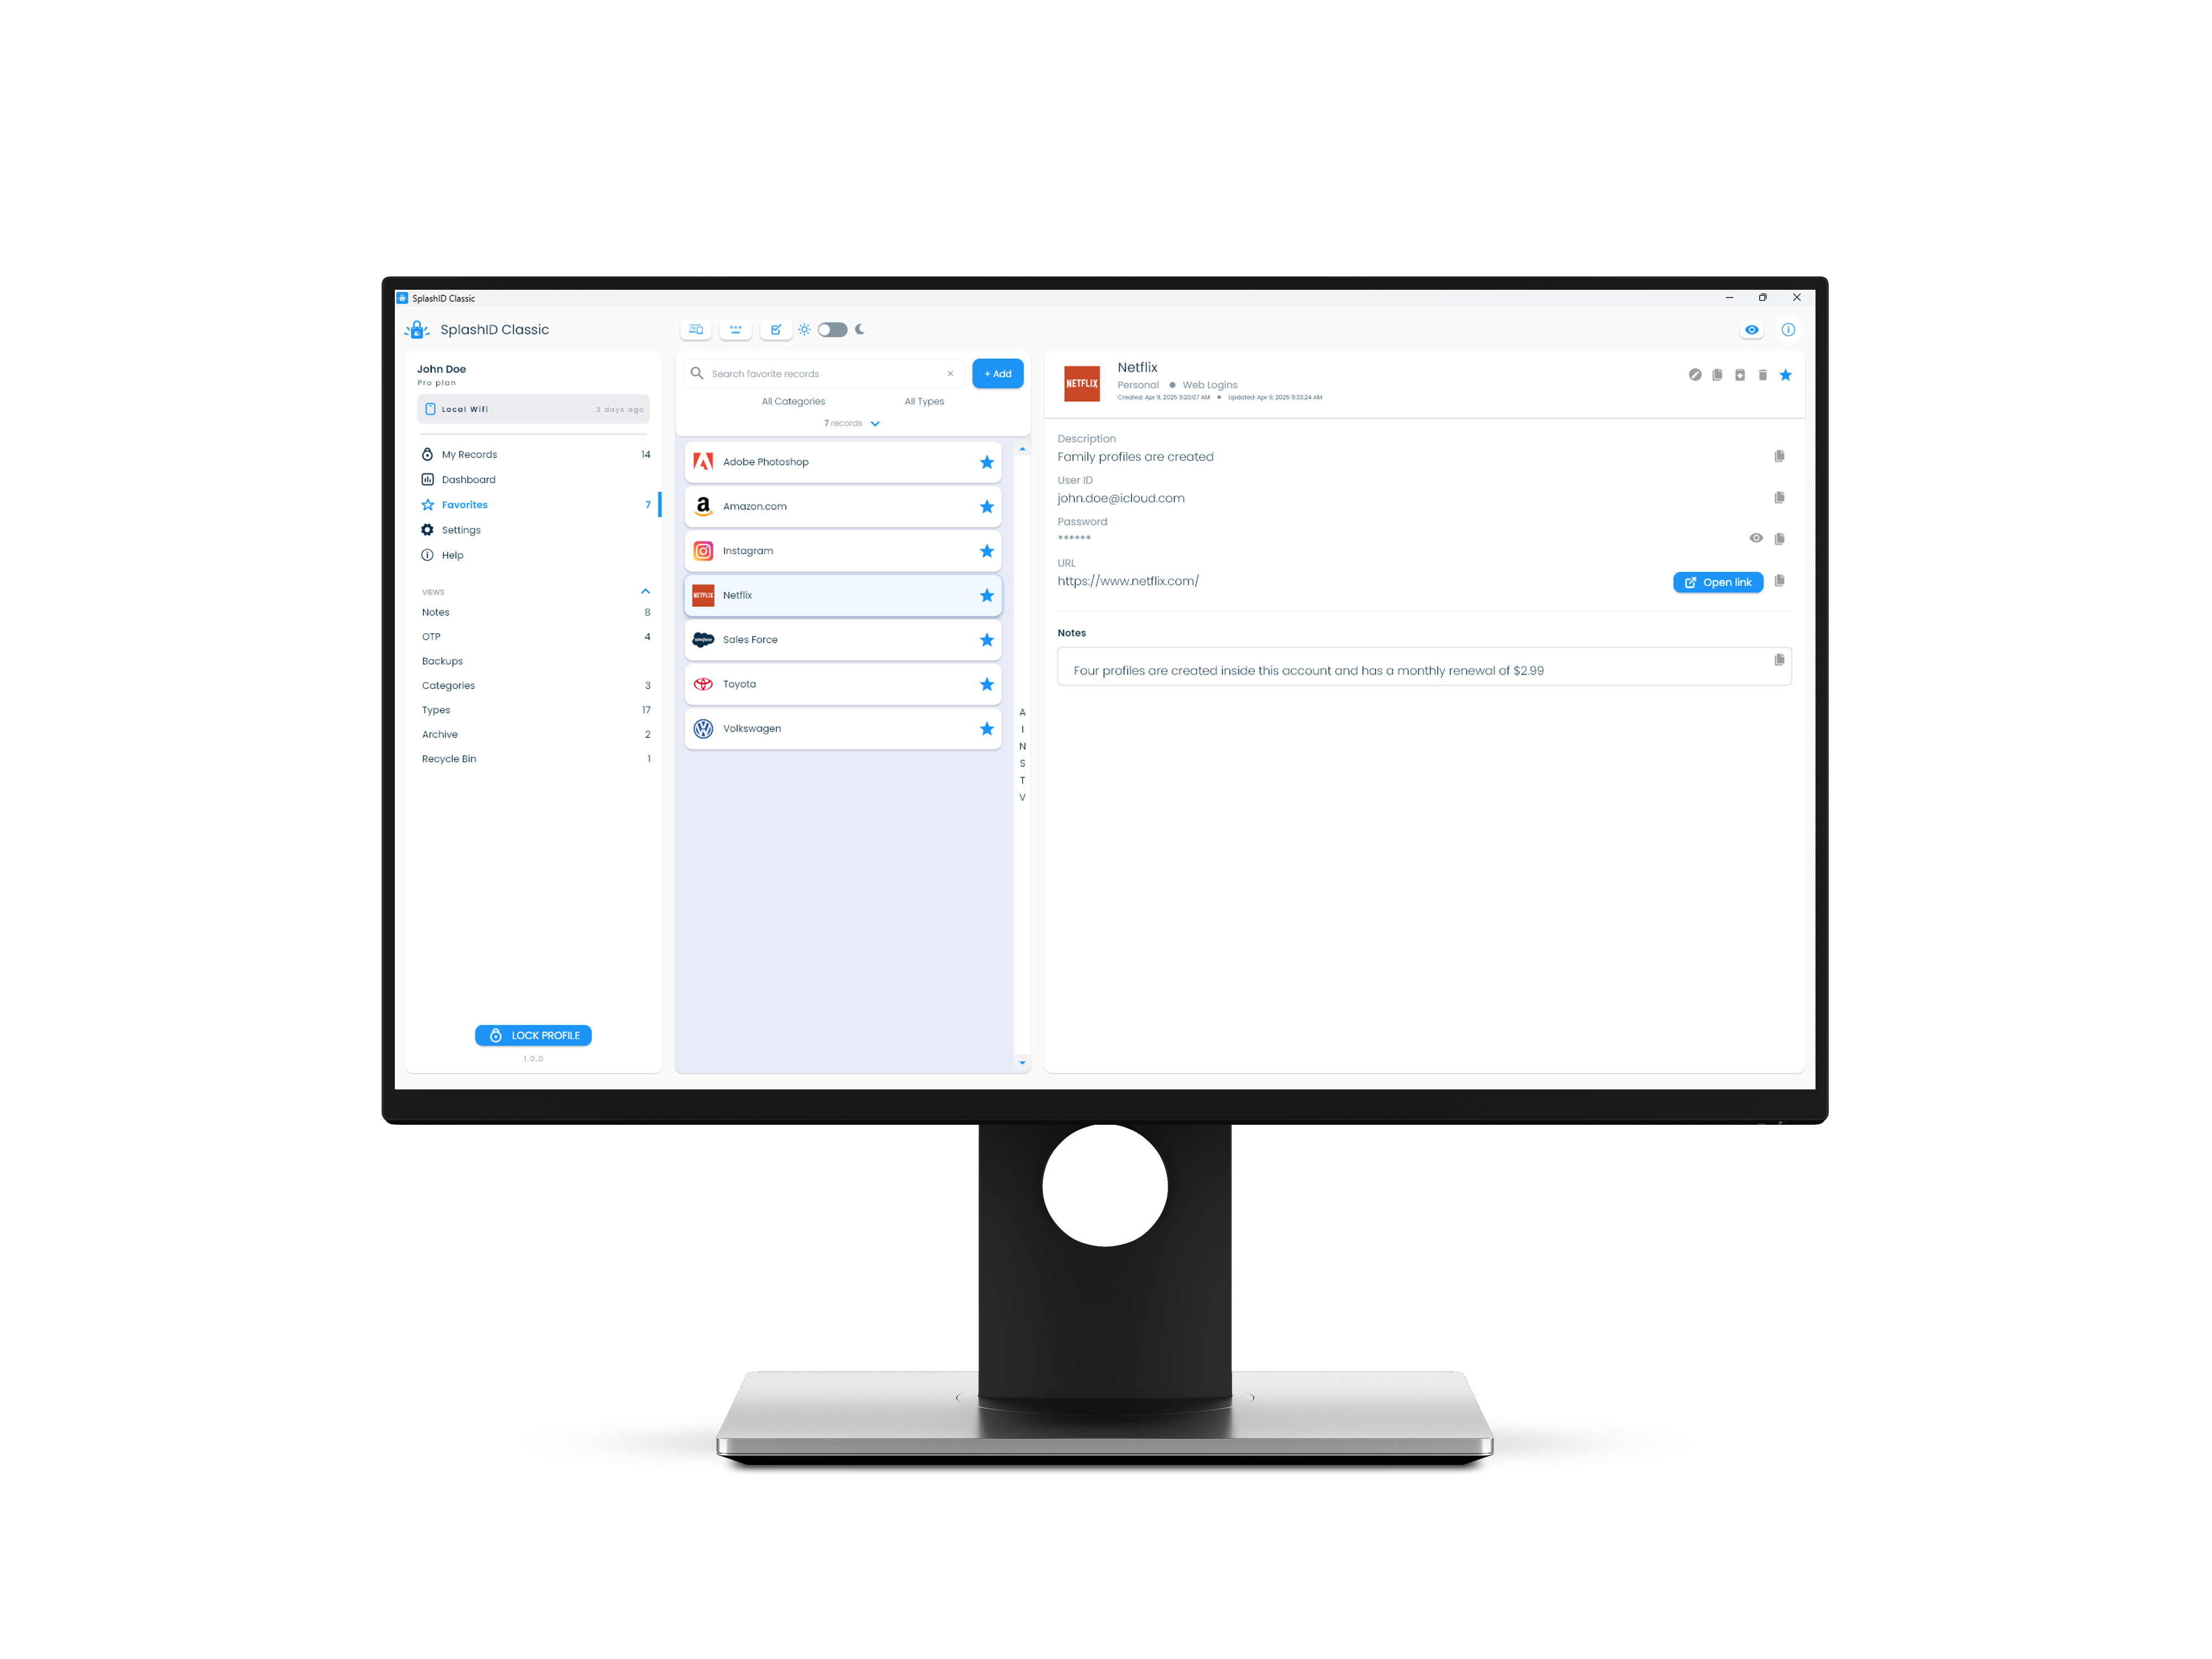
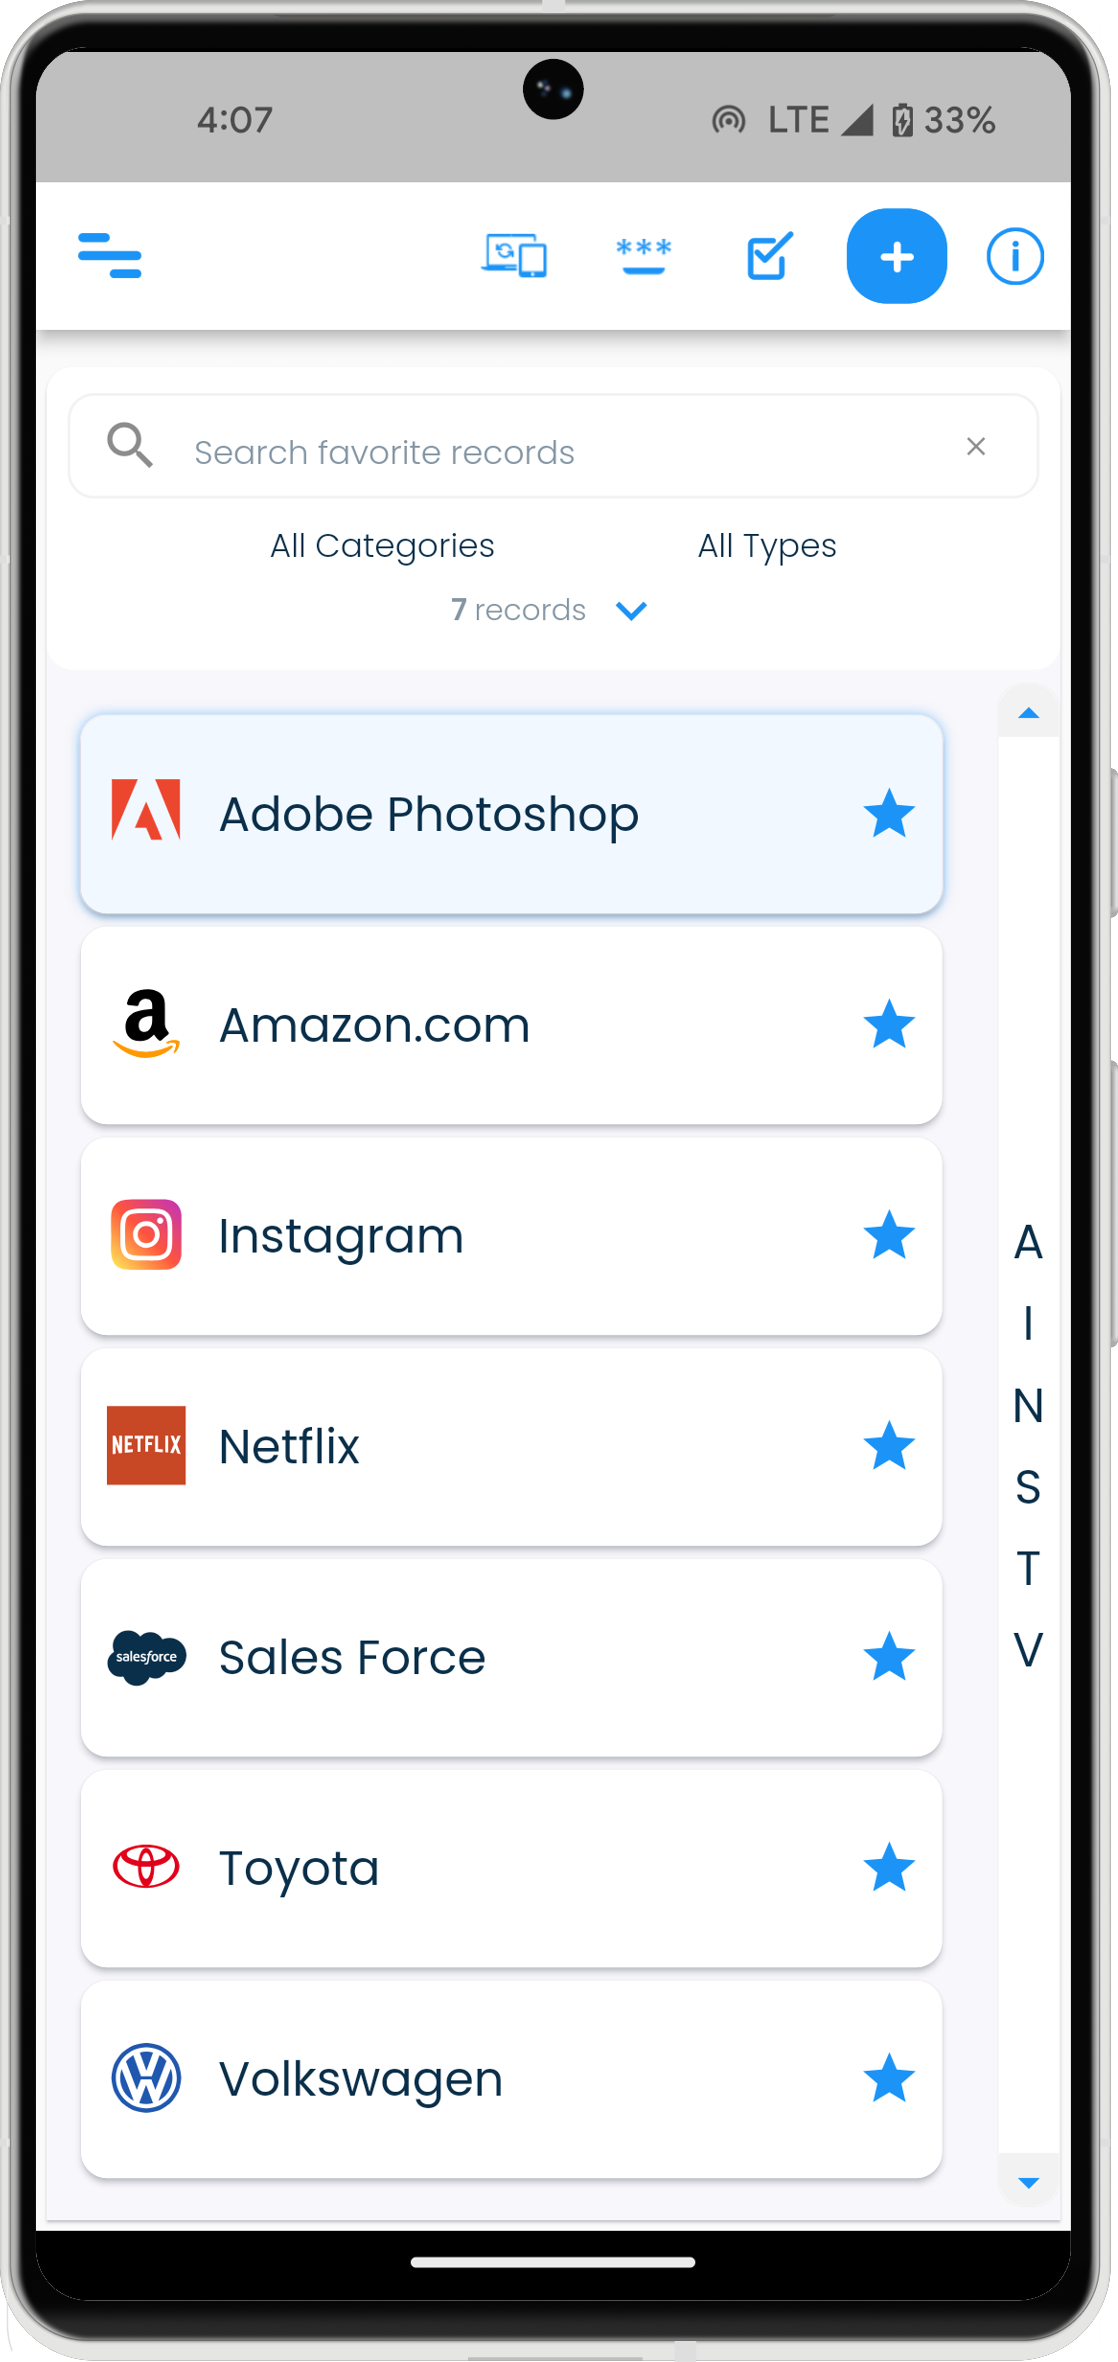
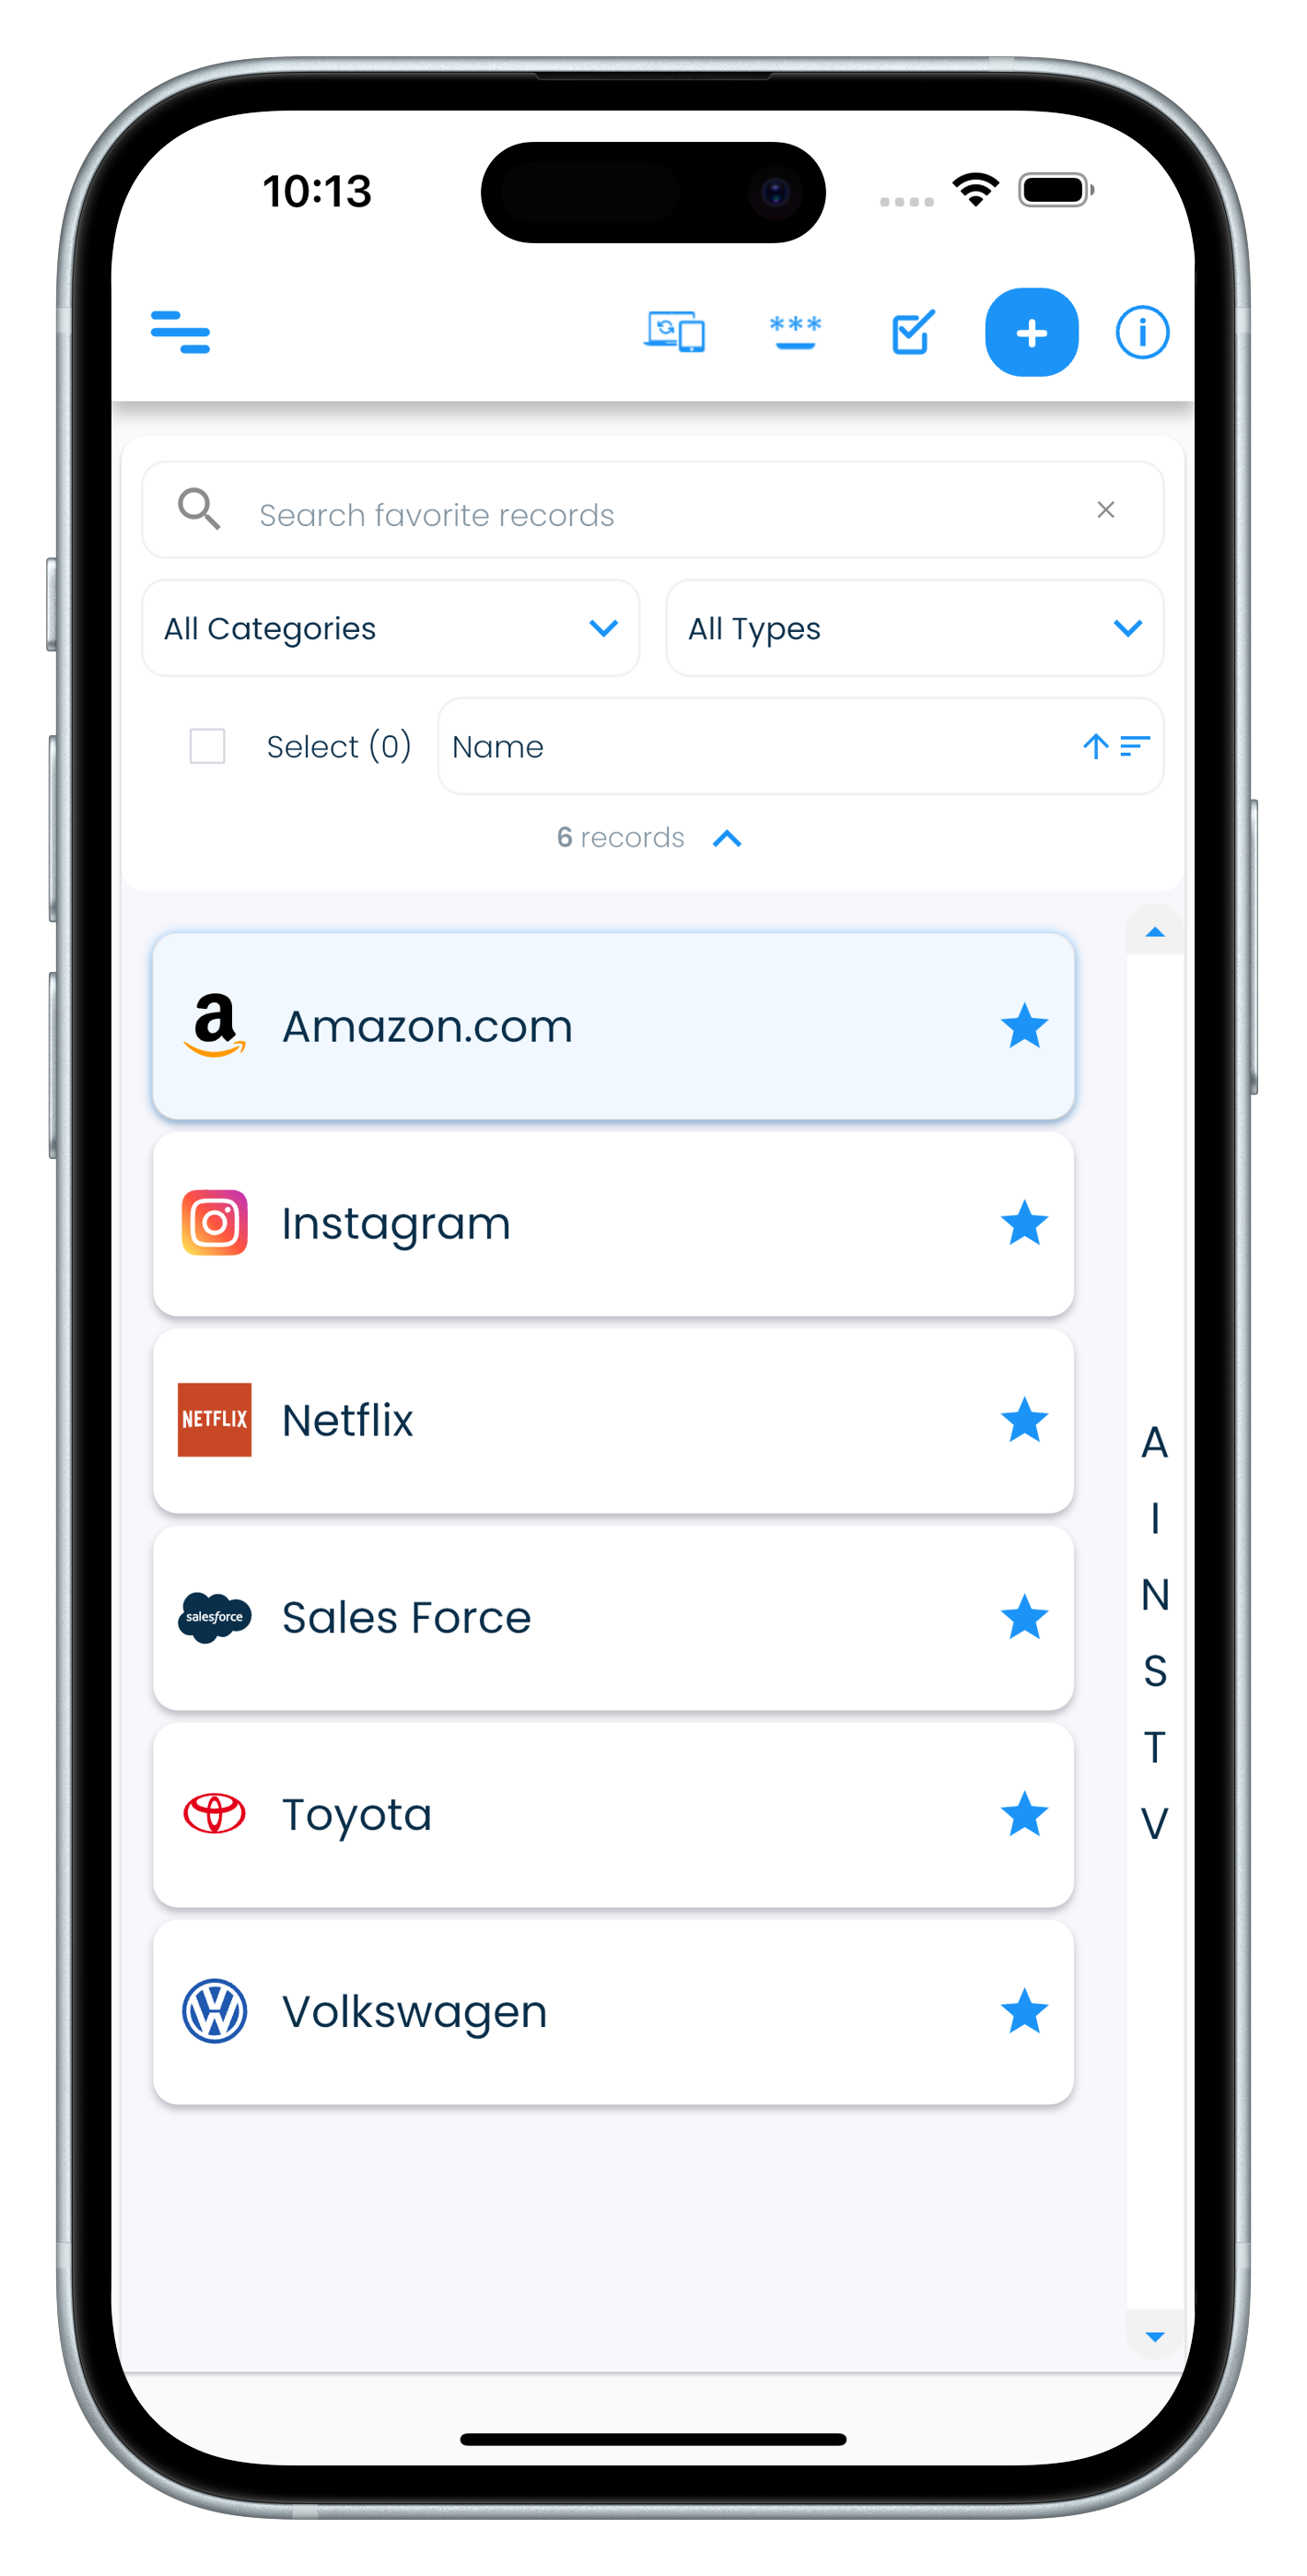
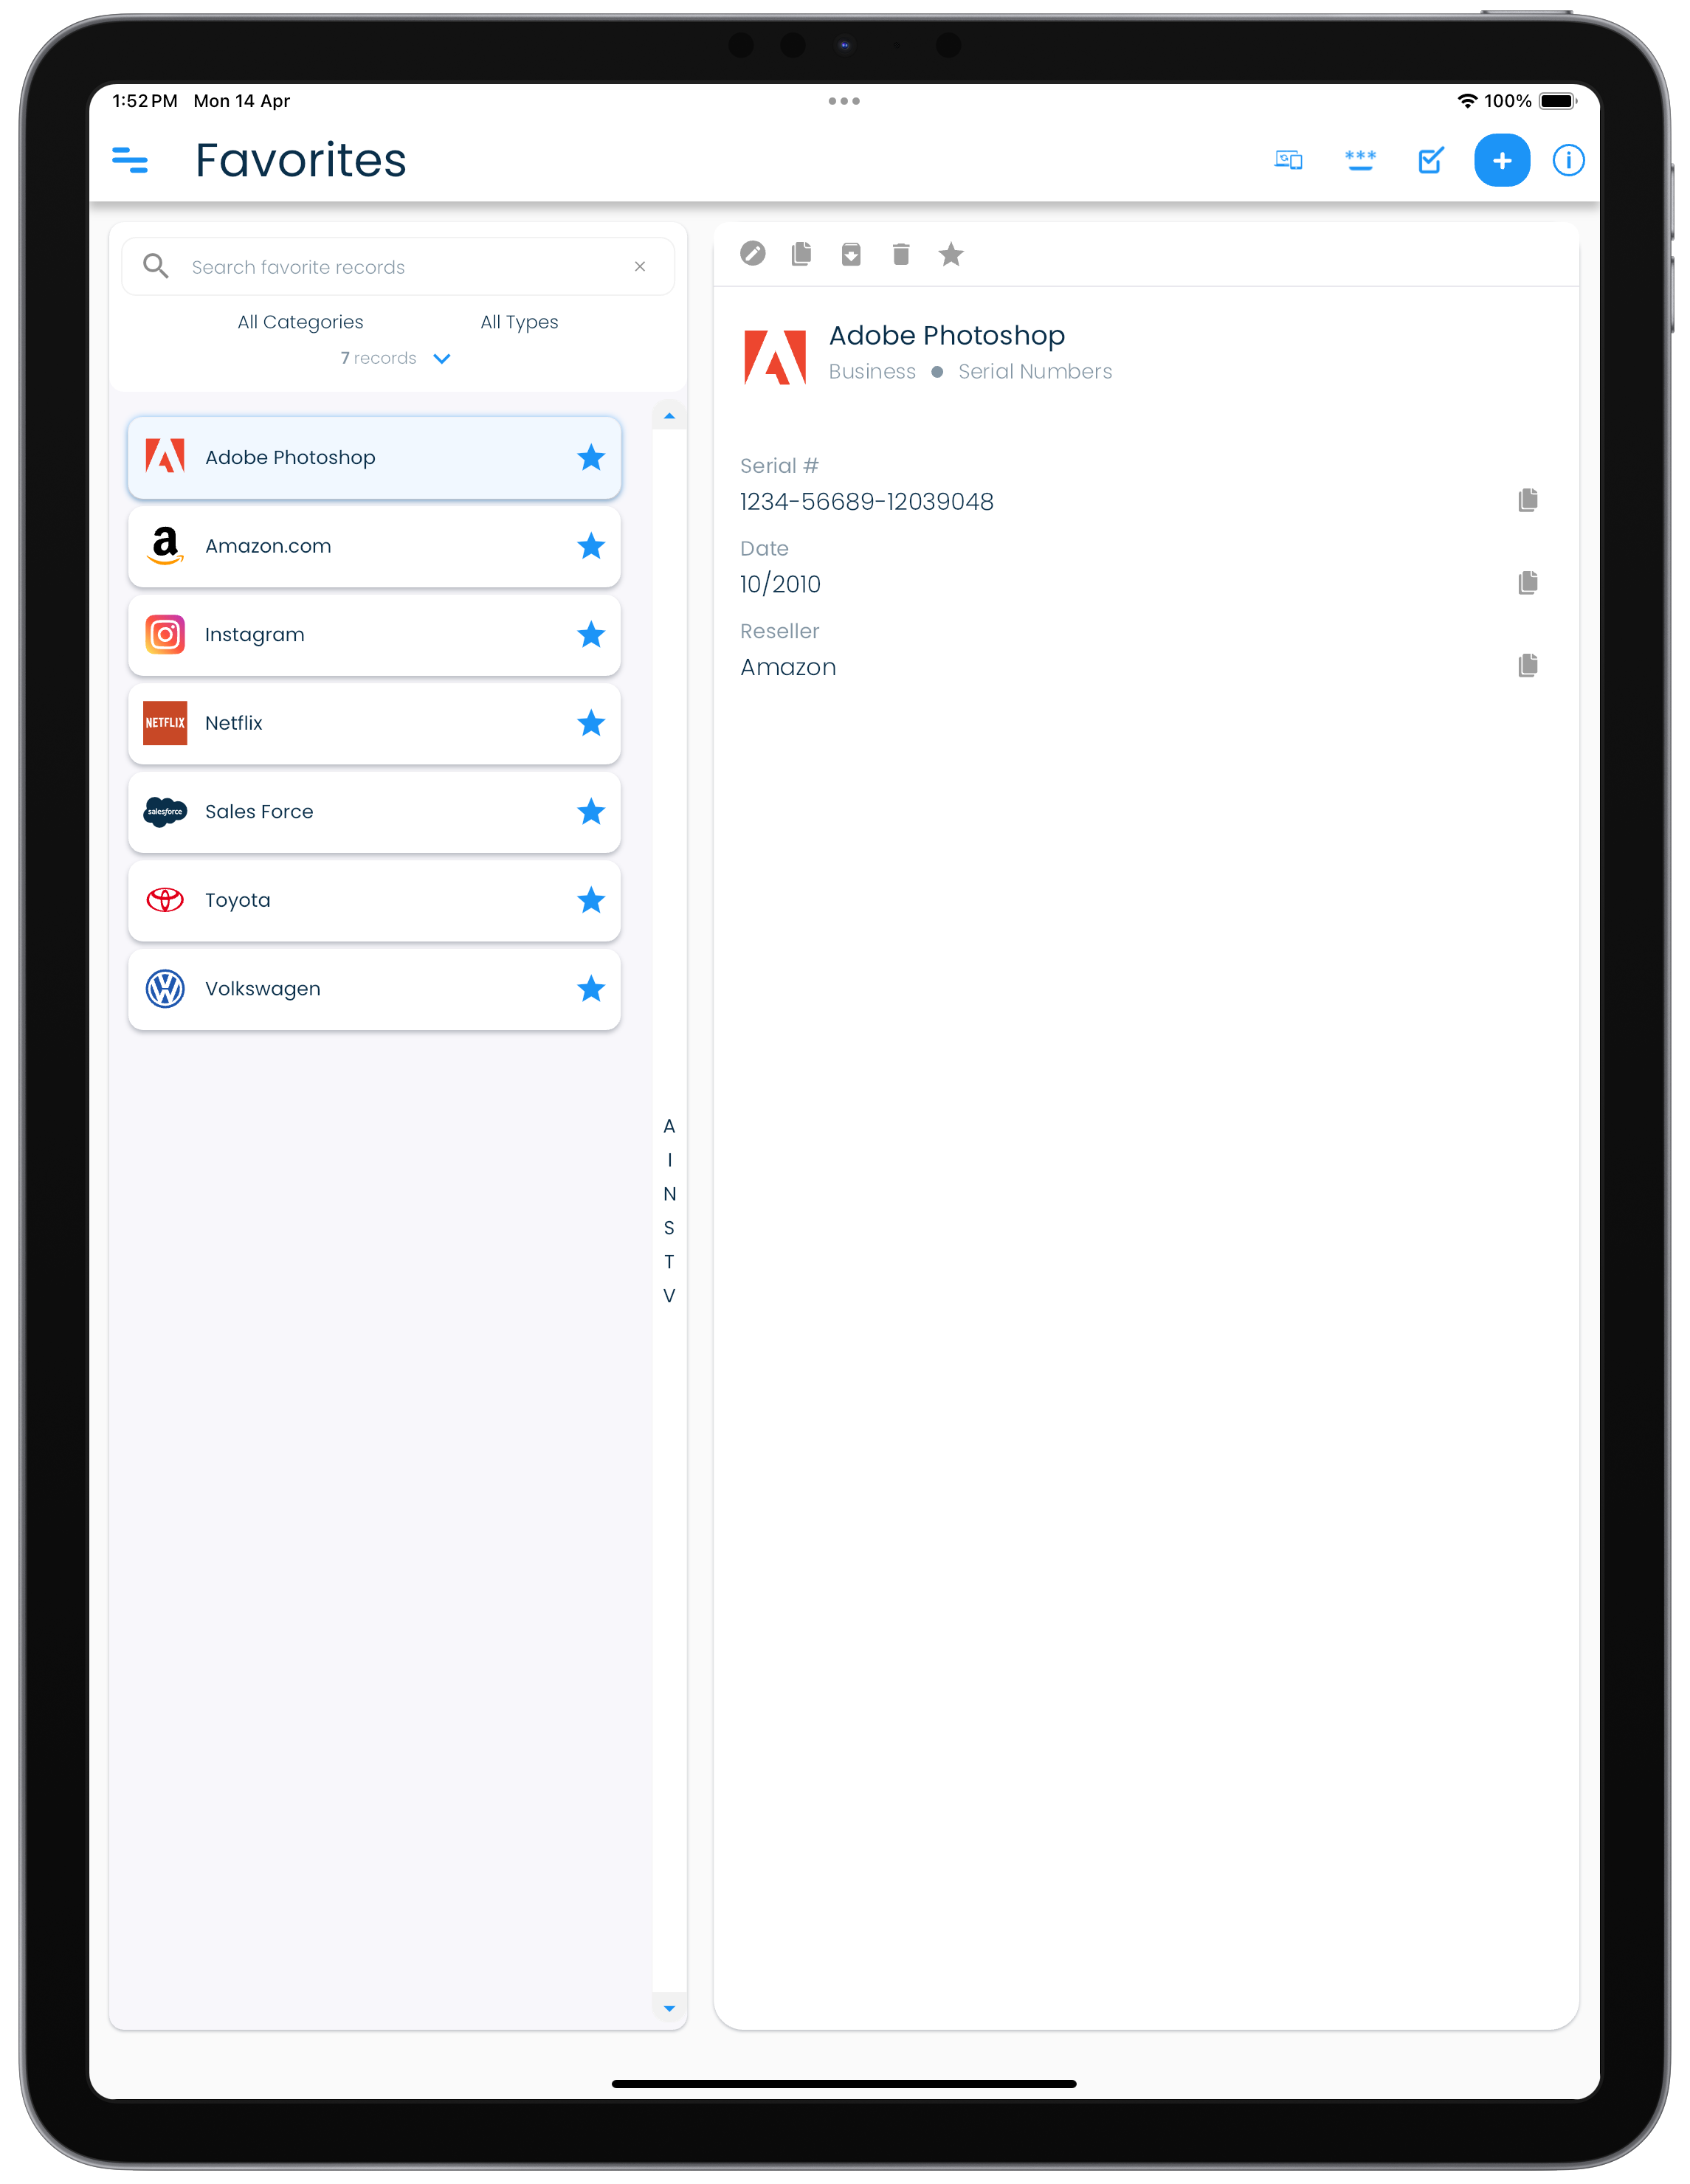
Favorites
The Favorites view shows all your records that you have marked as a favorite in one place.
| Mac | Windows |
|---|---|
 |
 |
| Android | iPhone |
|---|---|
 |
 |
| iPad |
|---|
 |
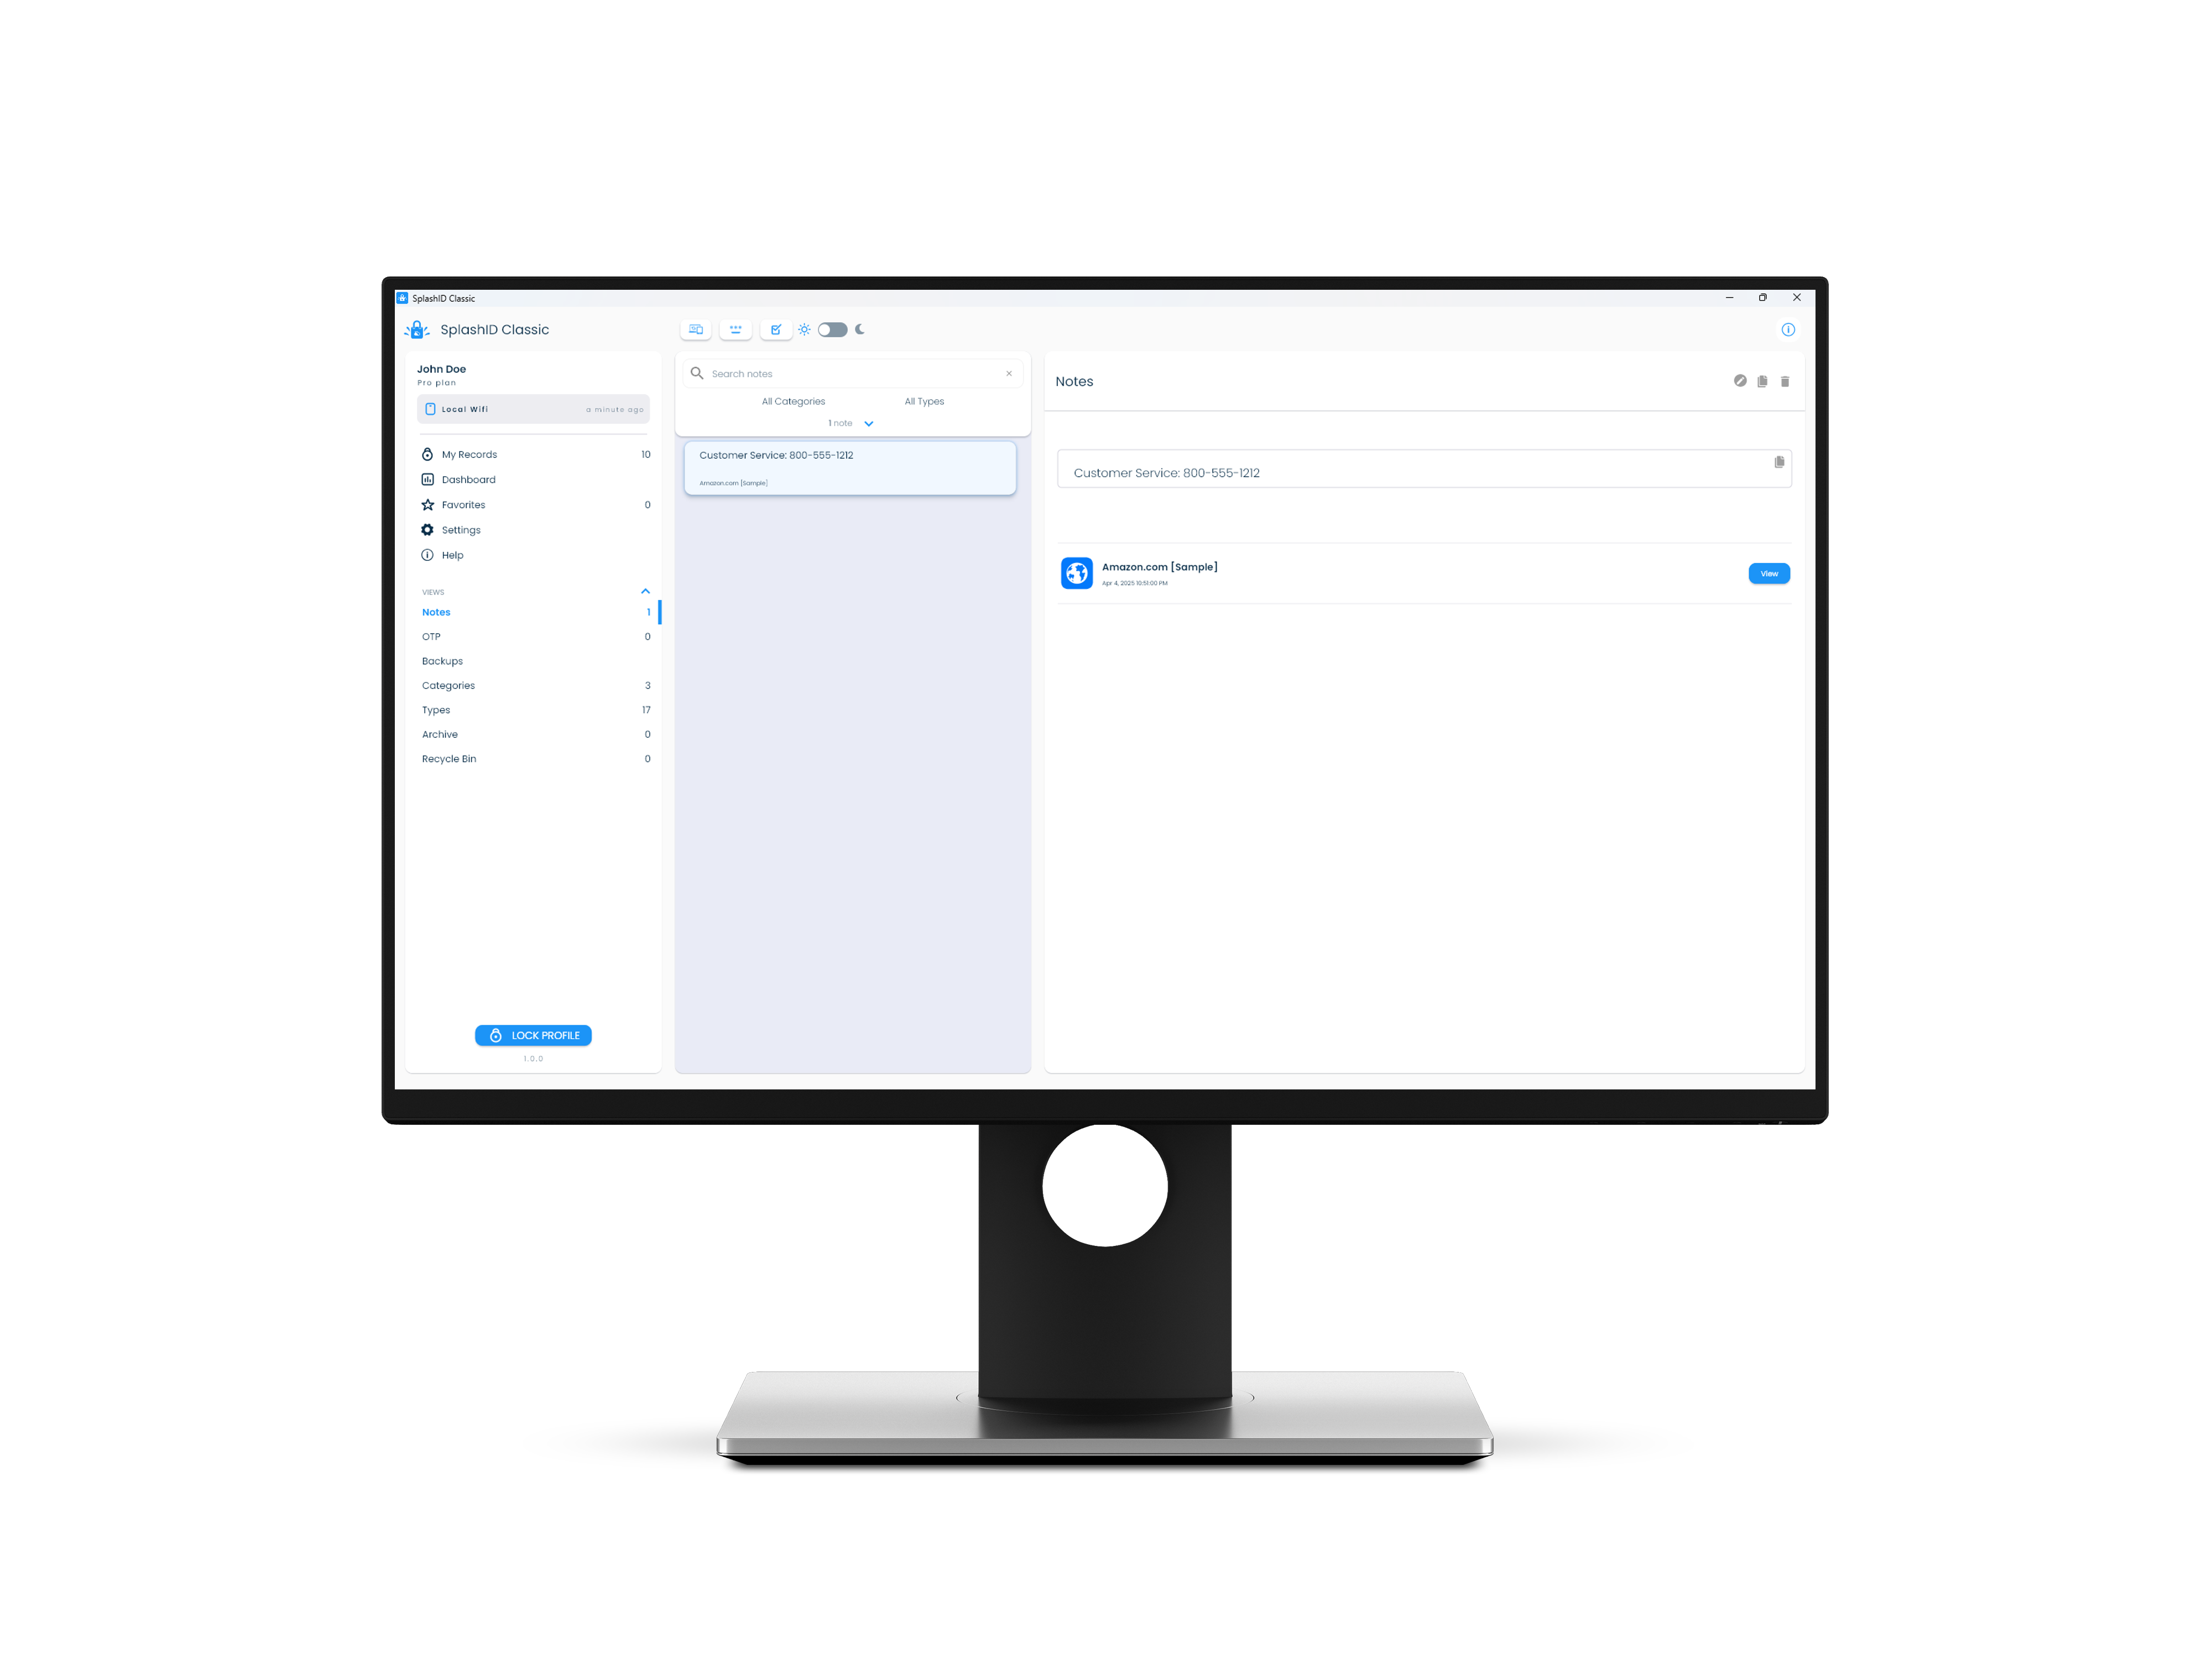
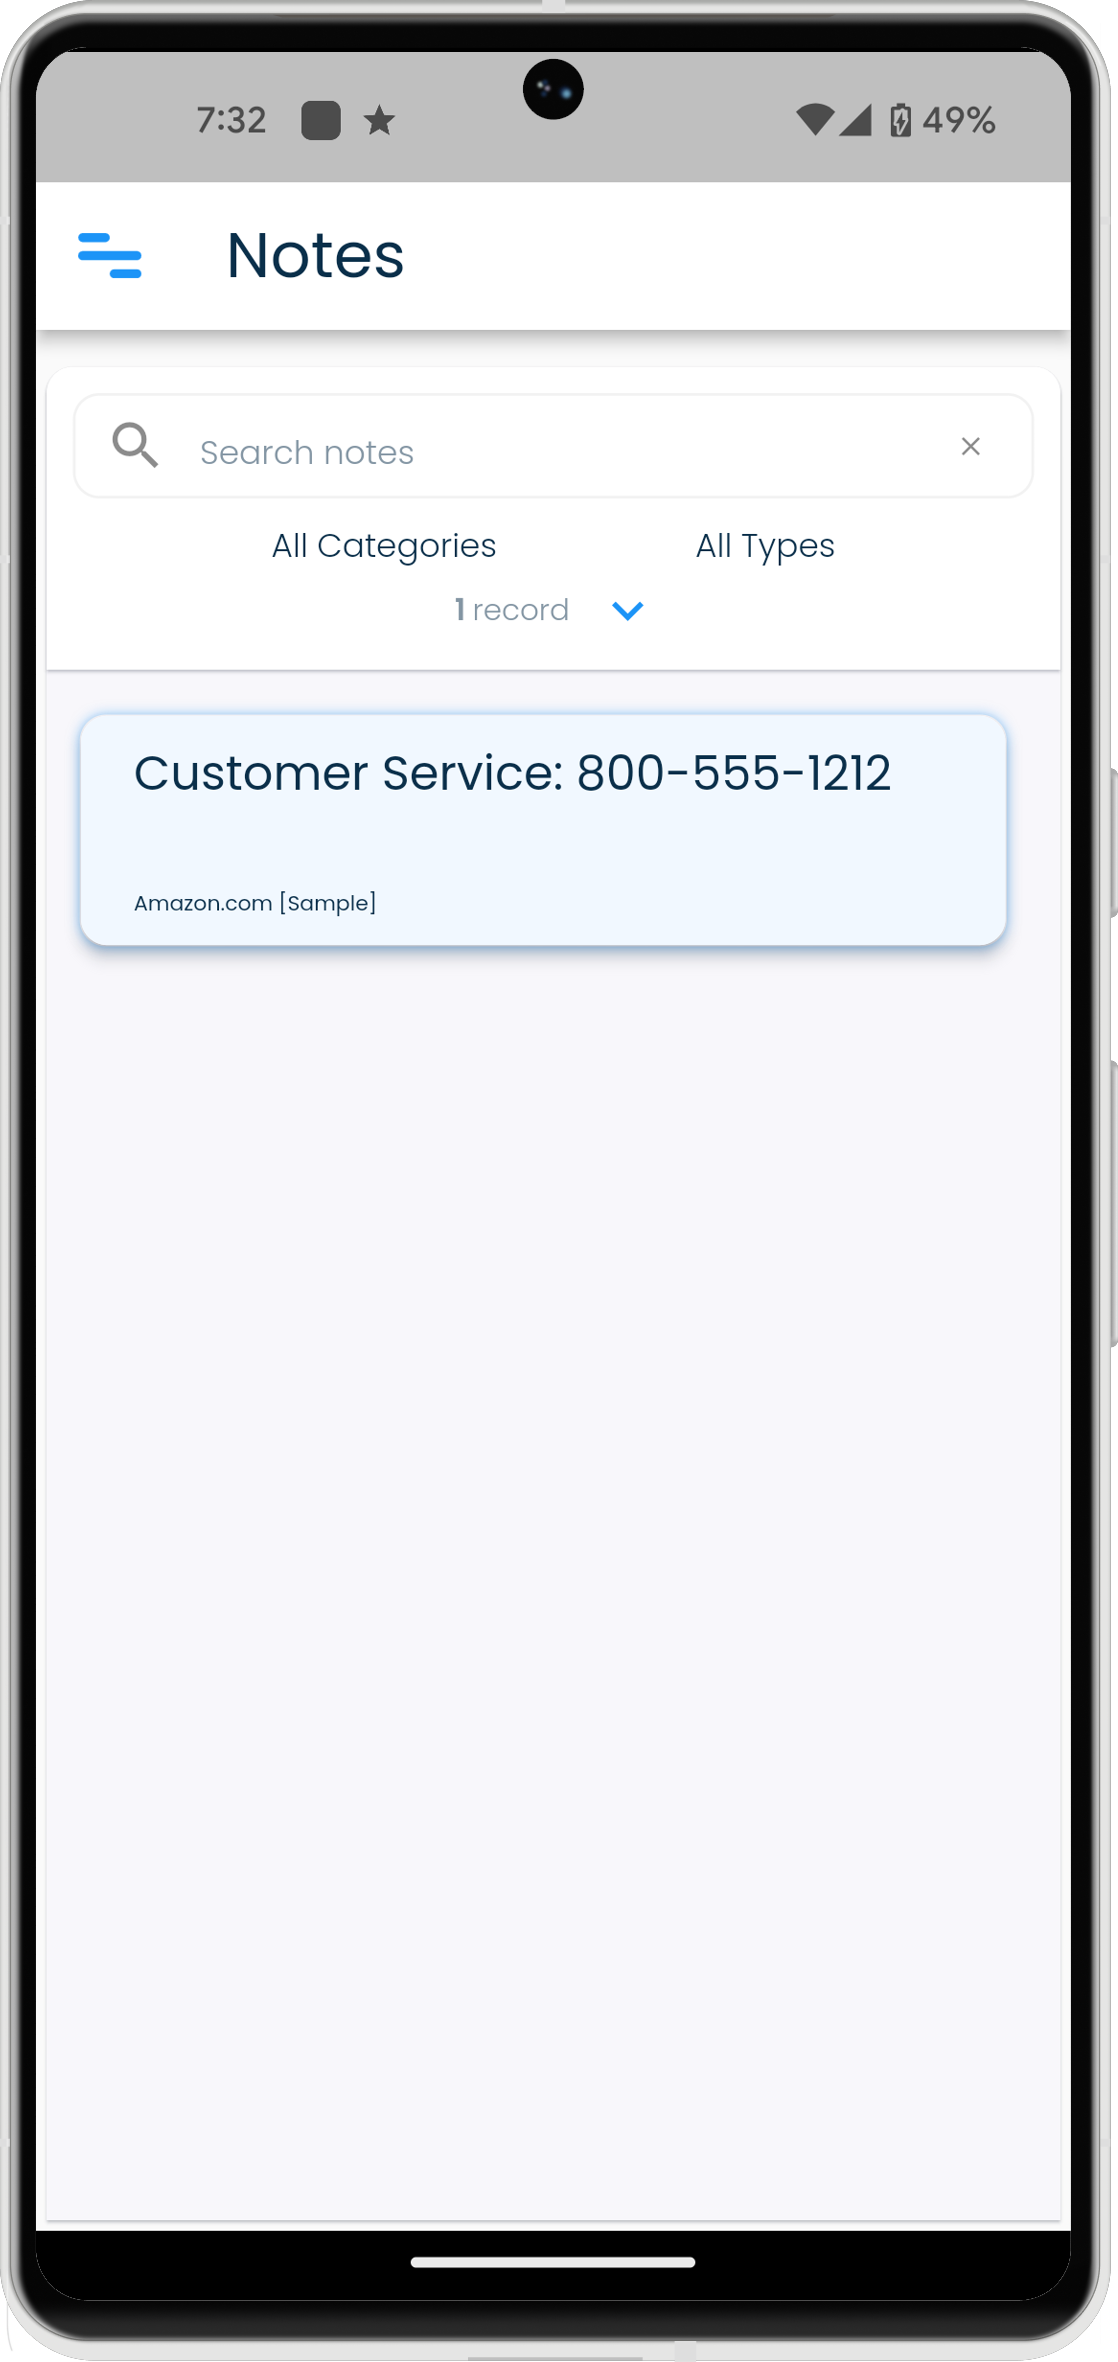
Notes
The Notes screen displays all the notes that you have in your records in a single view.
Use this screen to manage your notes across records and to access them quickly.
| Mac | Windows |
|---|---|
 |
 |
| Android | iPhone |
|---|---|
 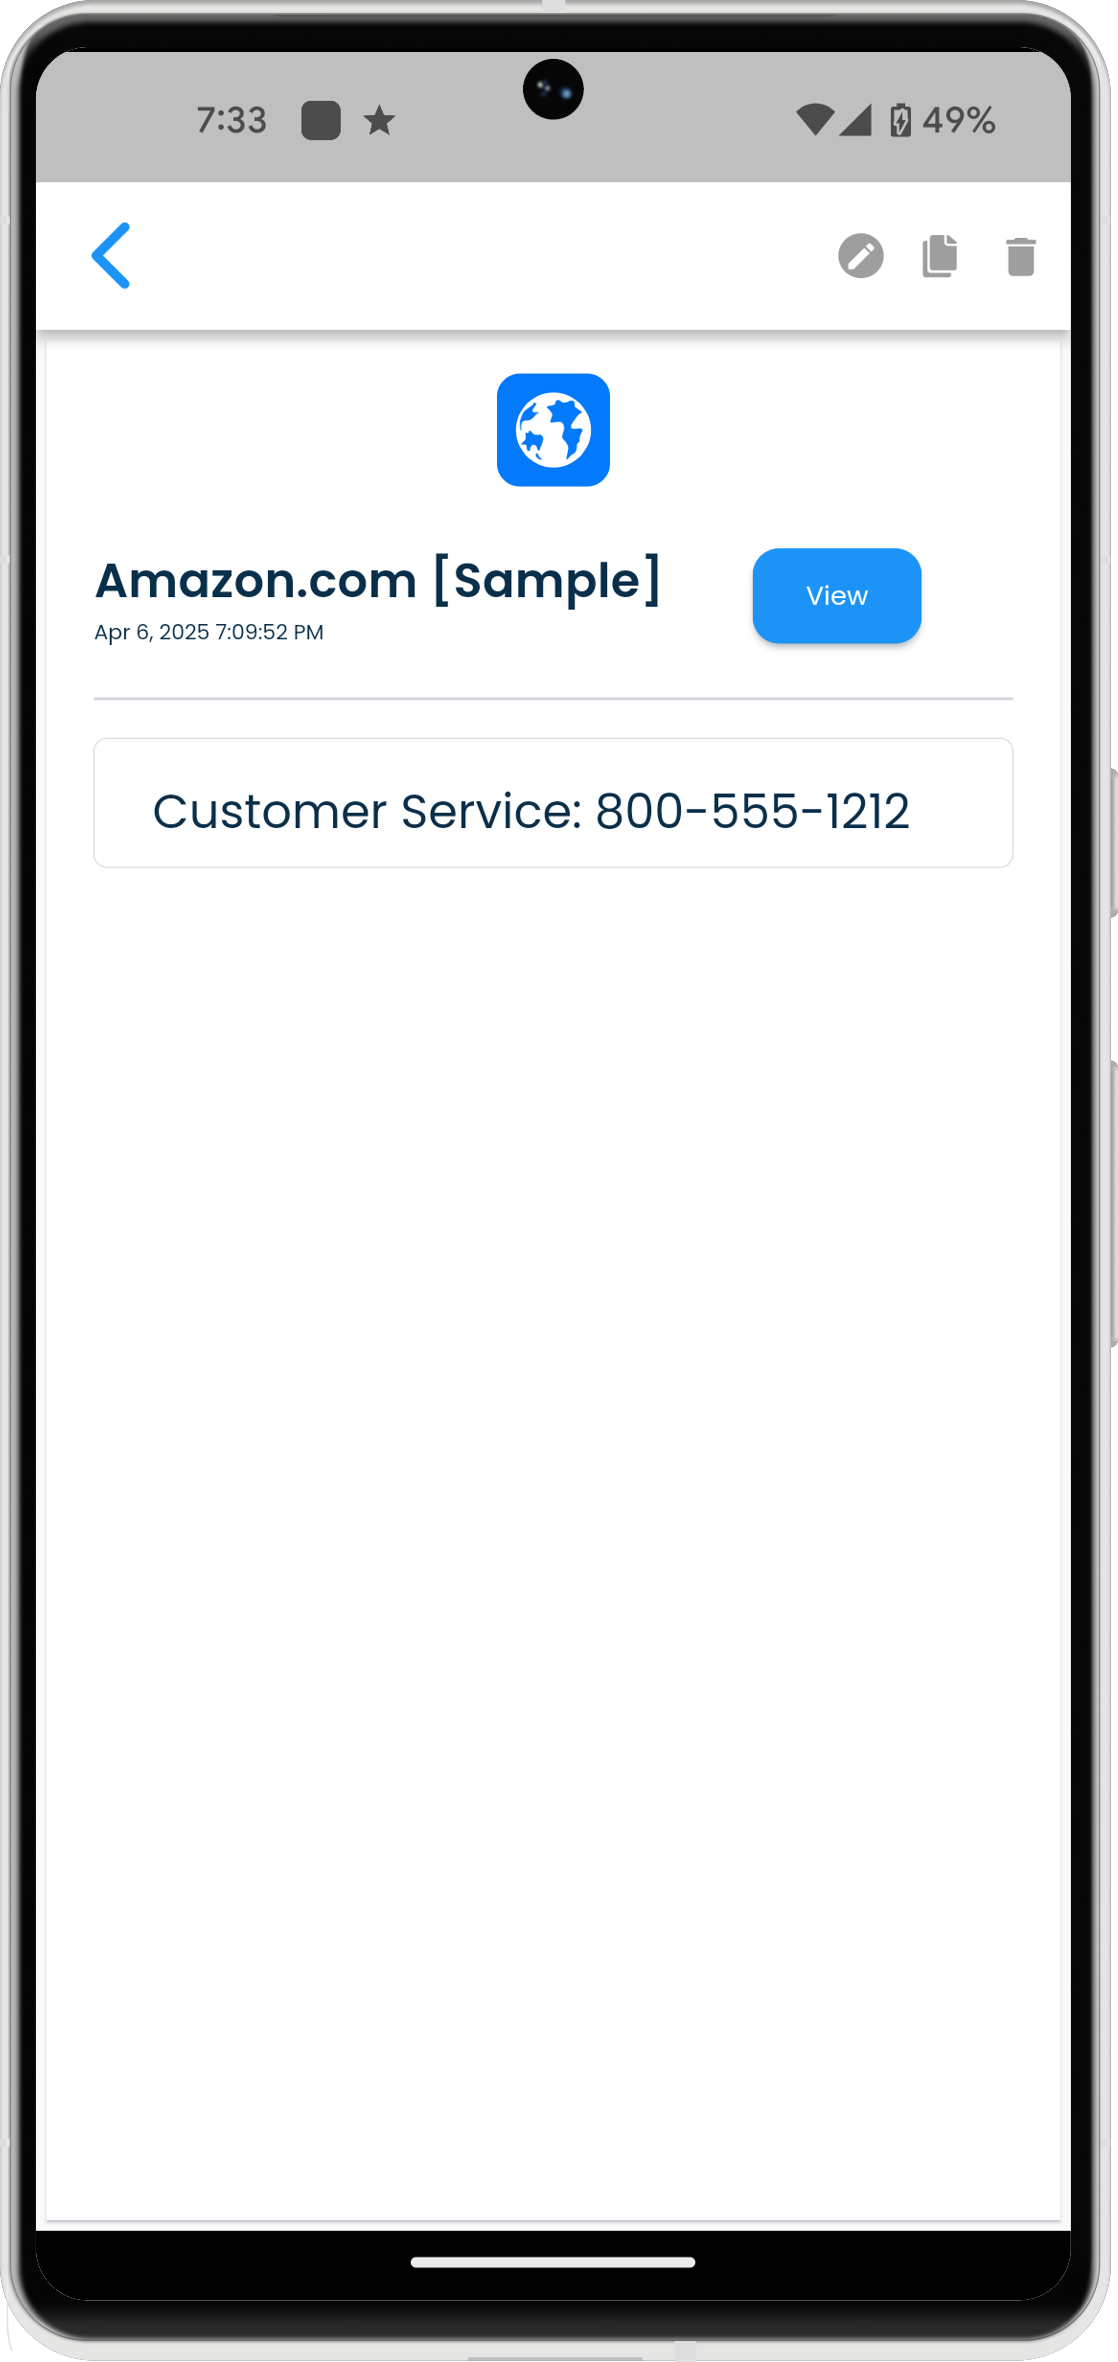 |
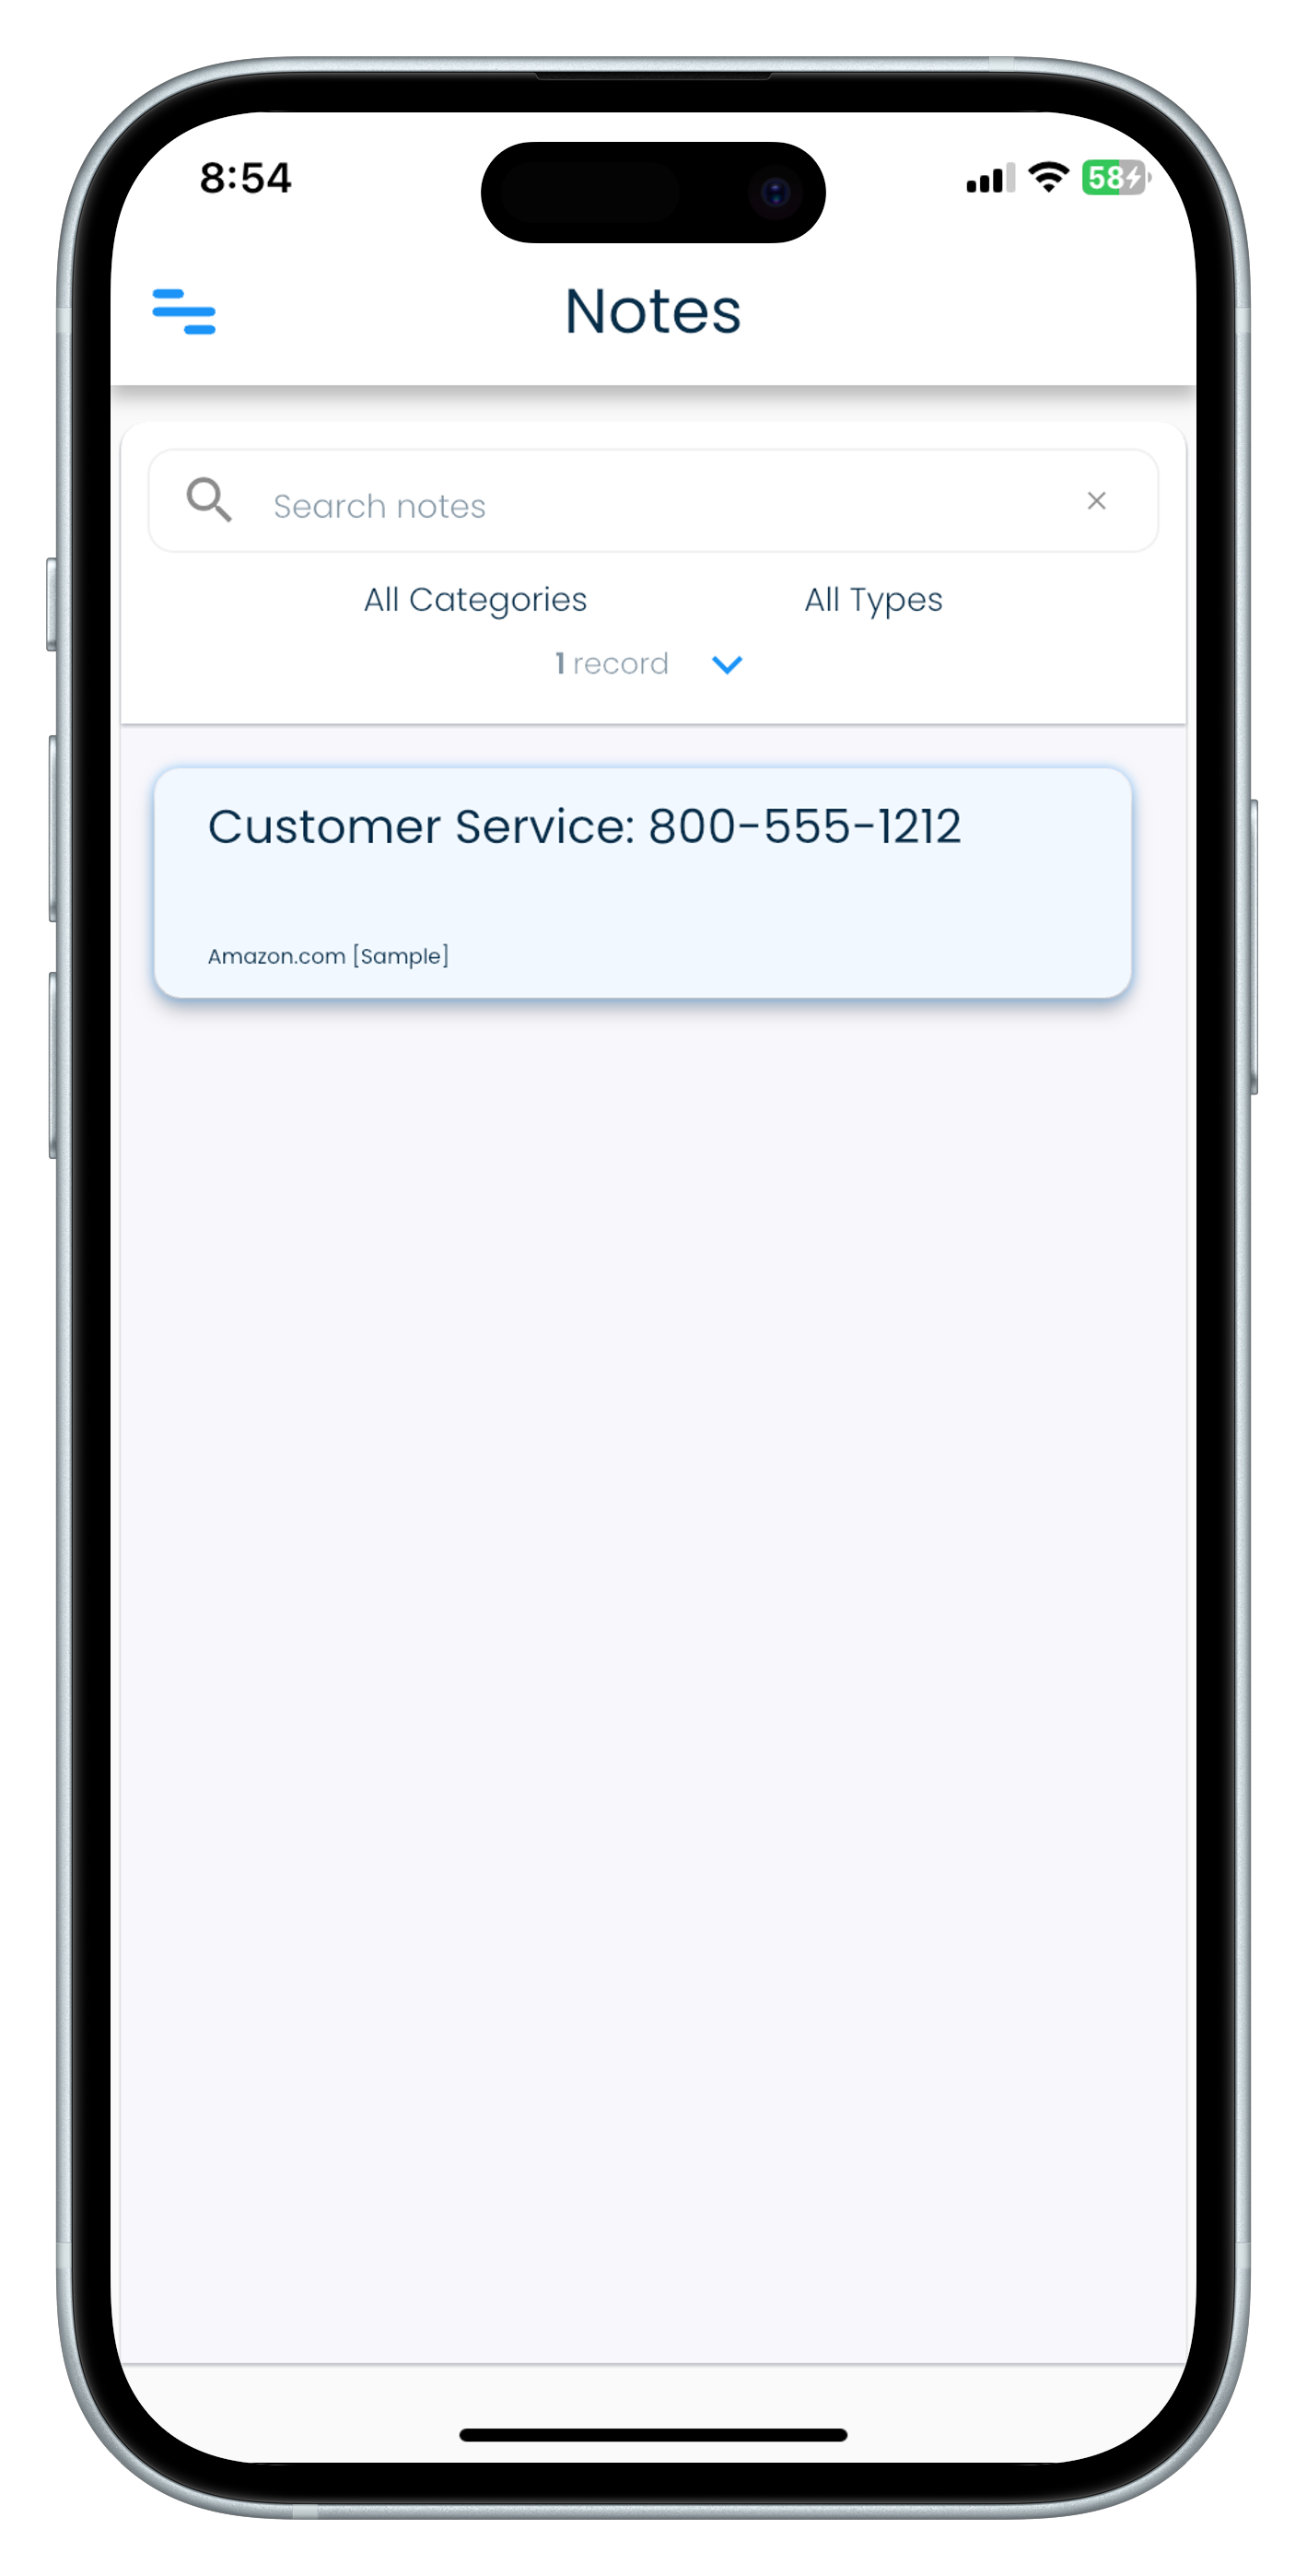 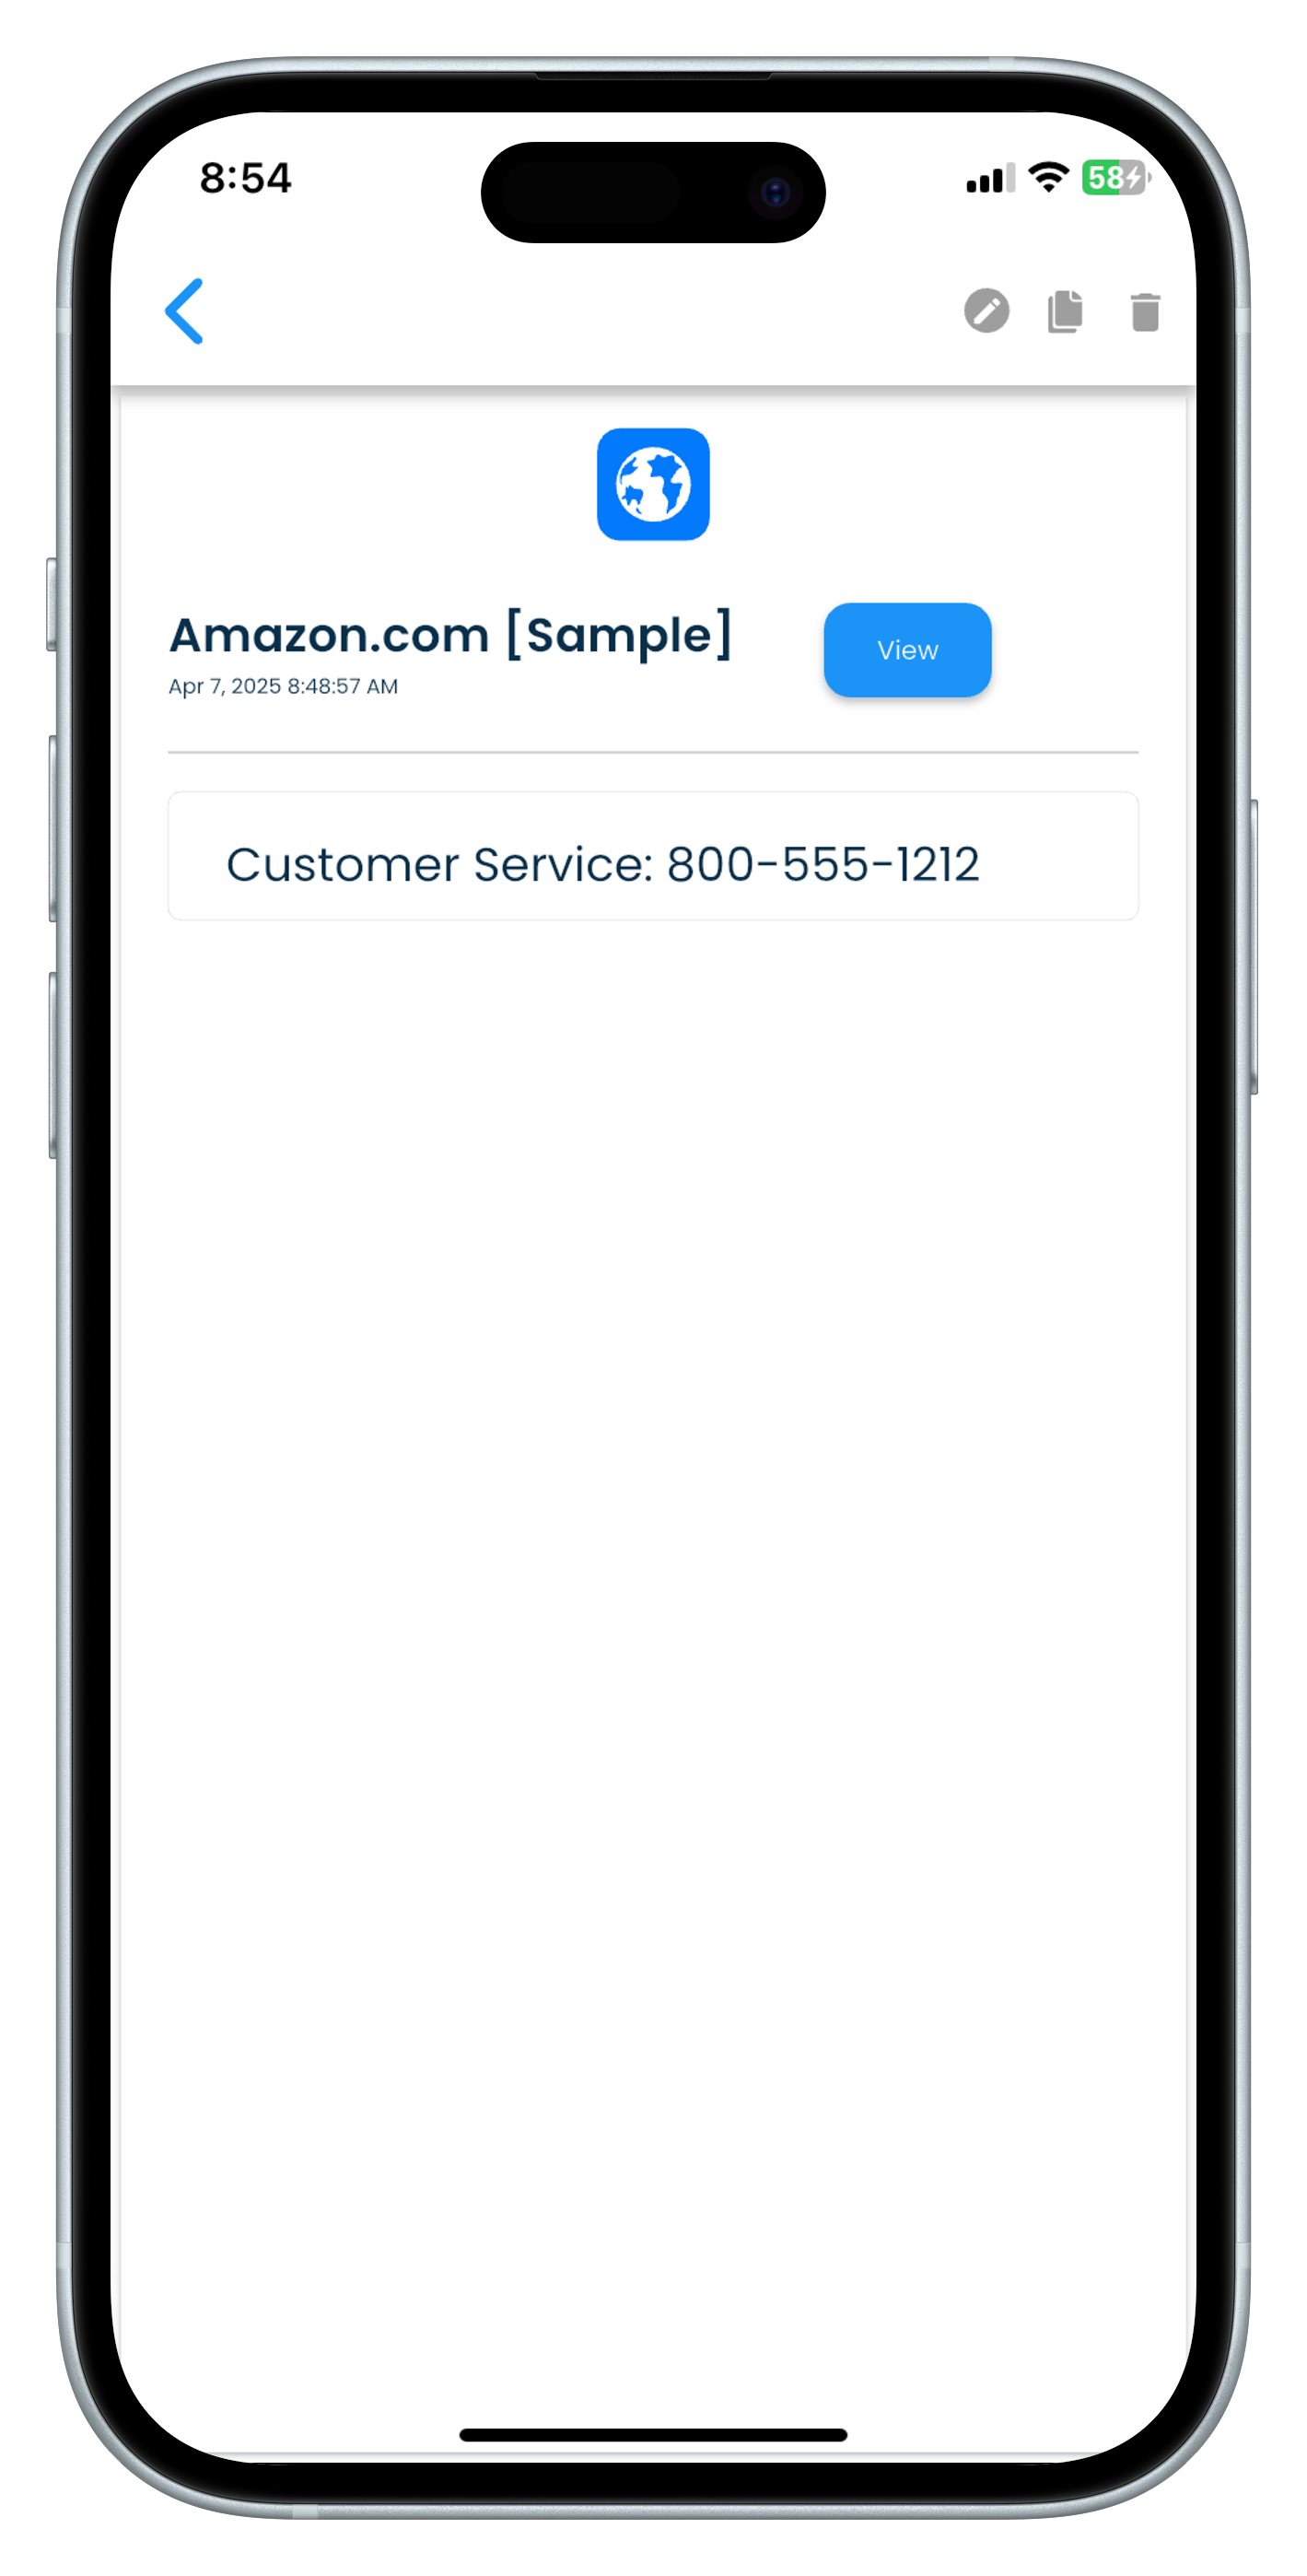 |
| iPad |
|---|
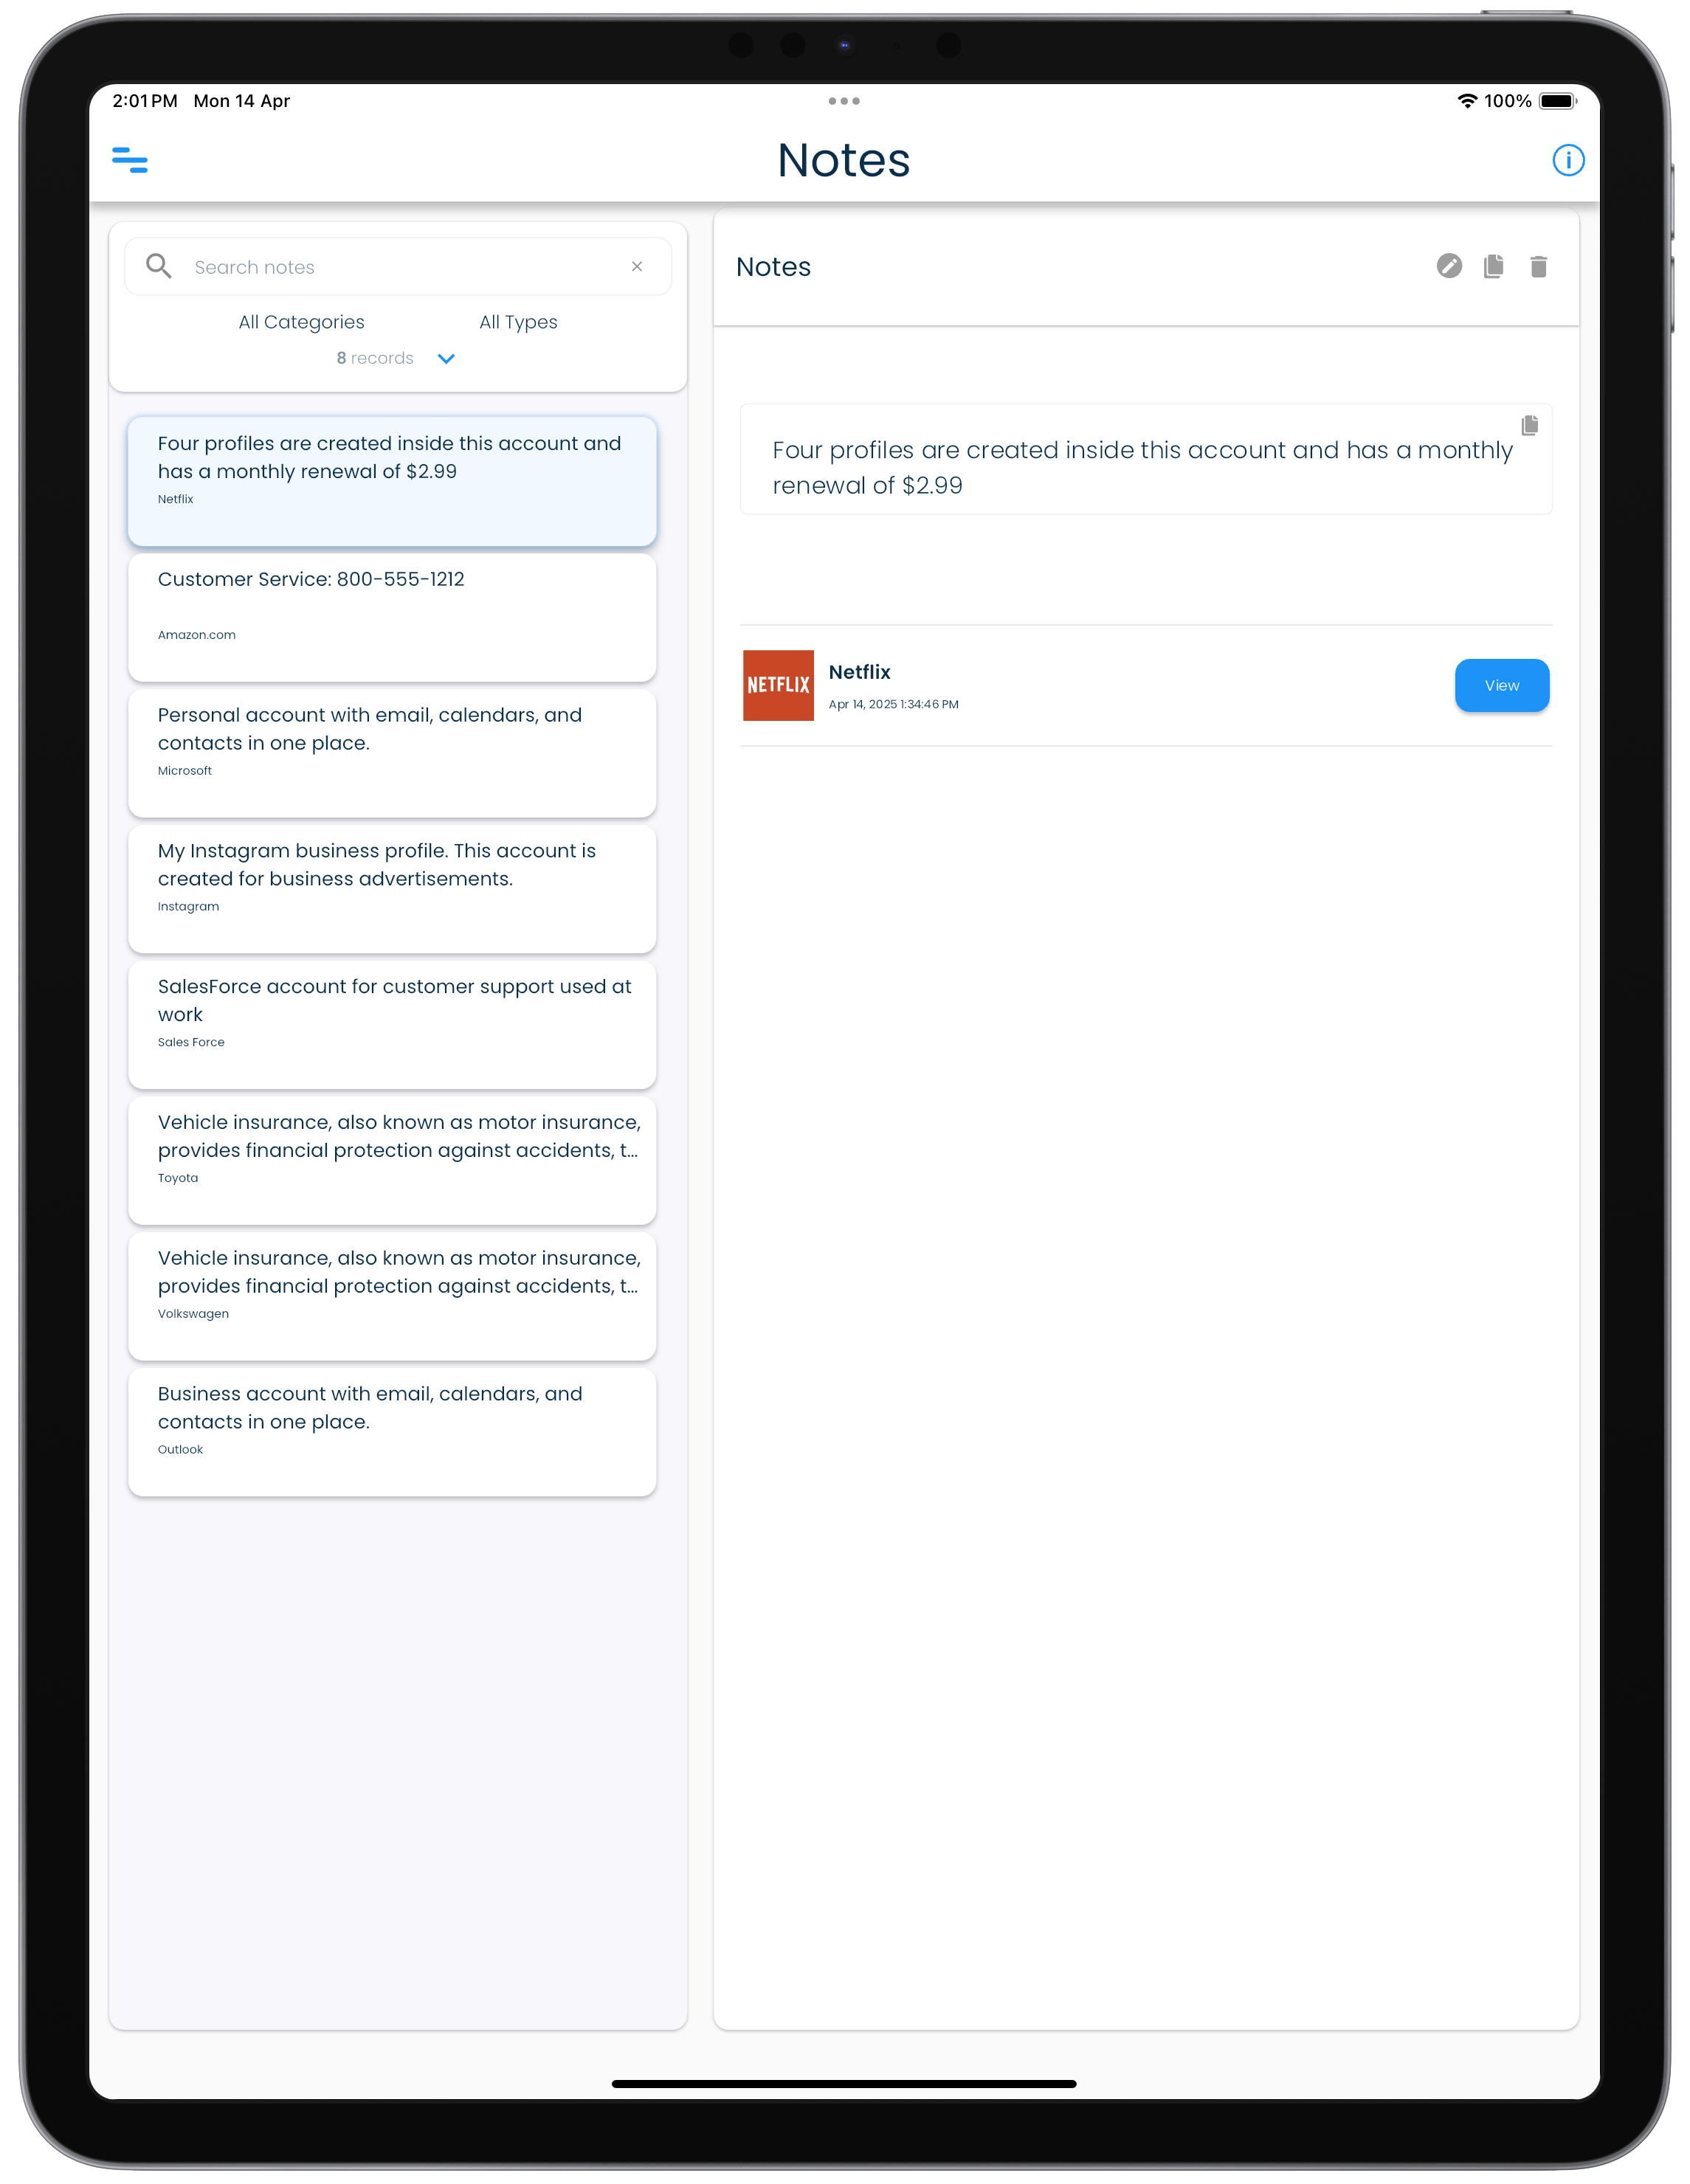 |
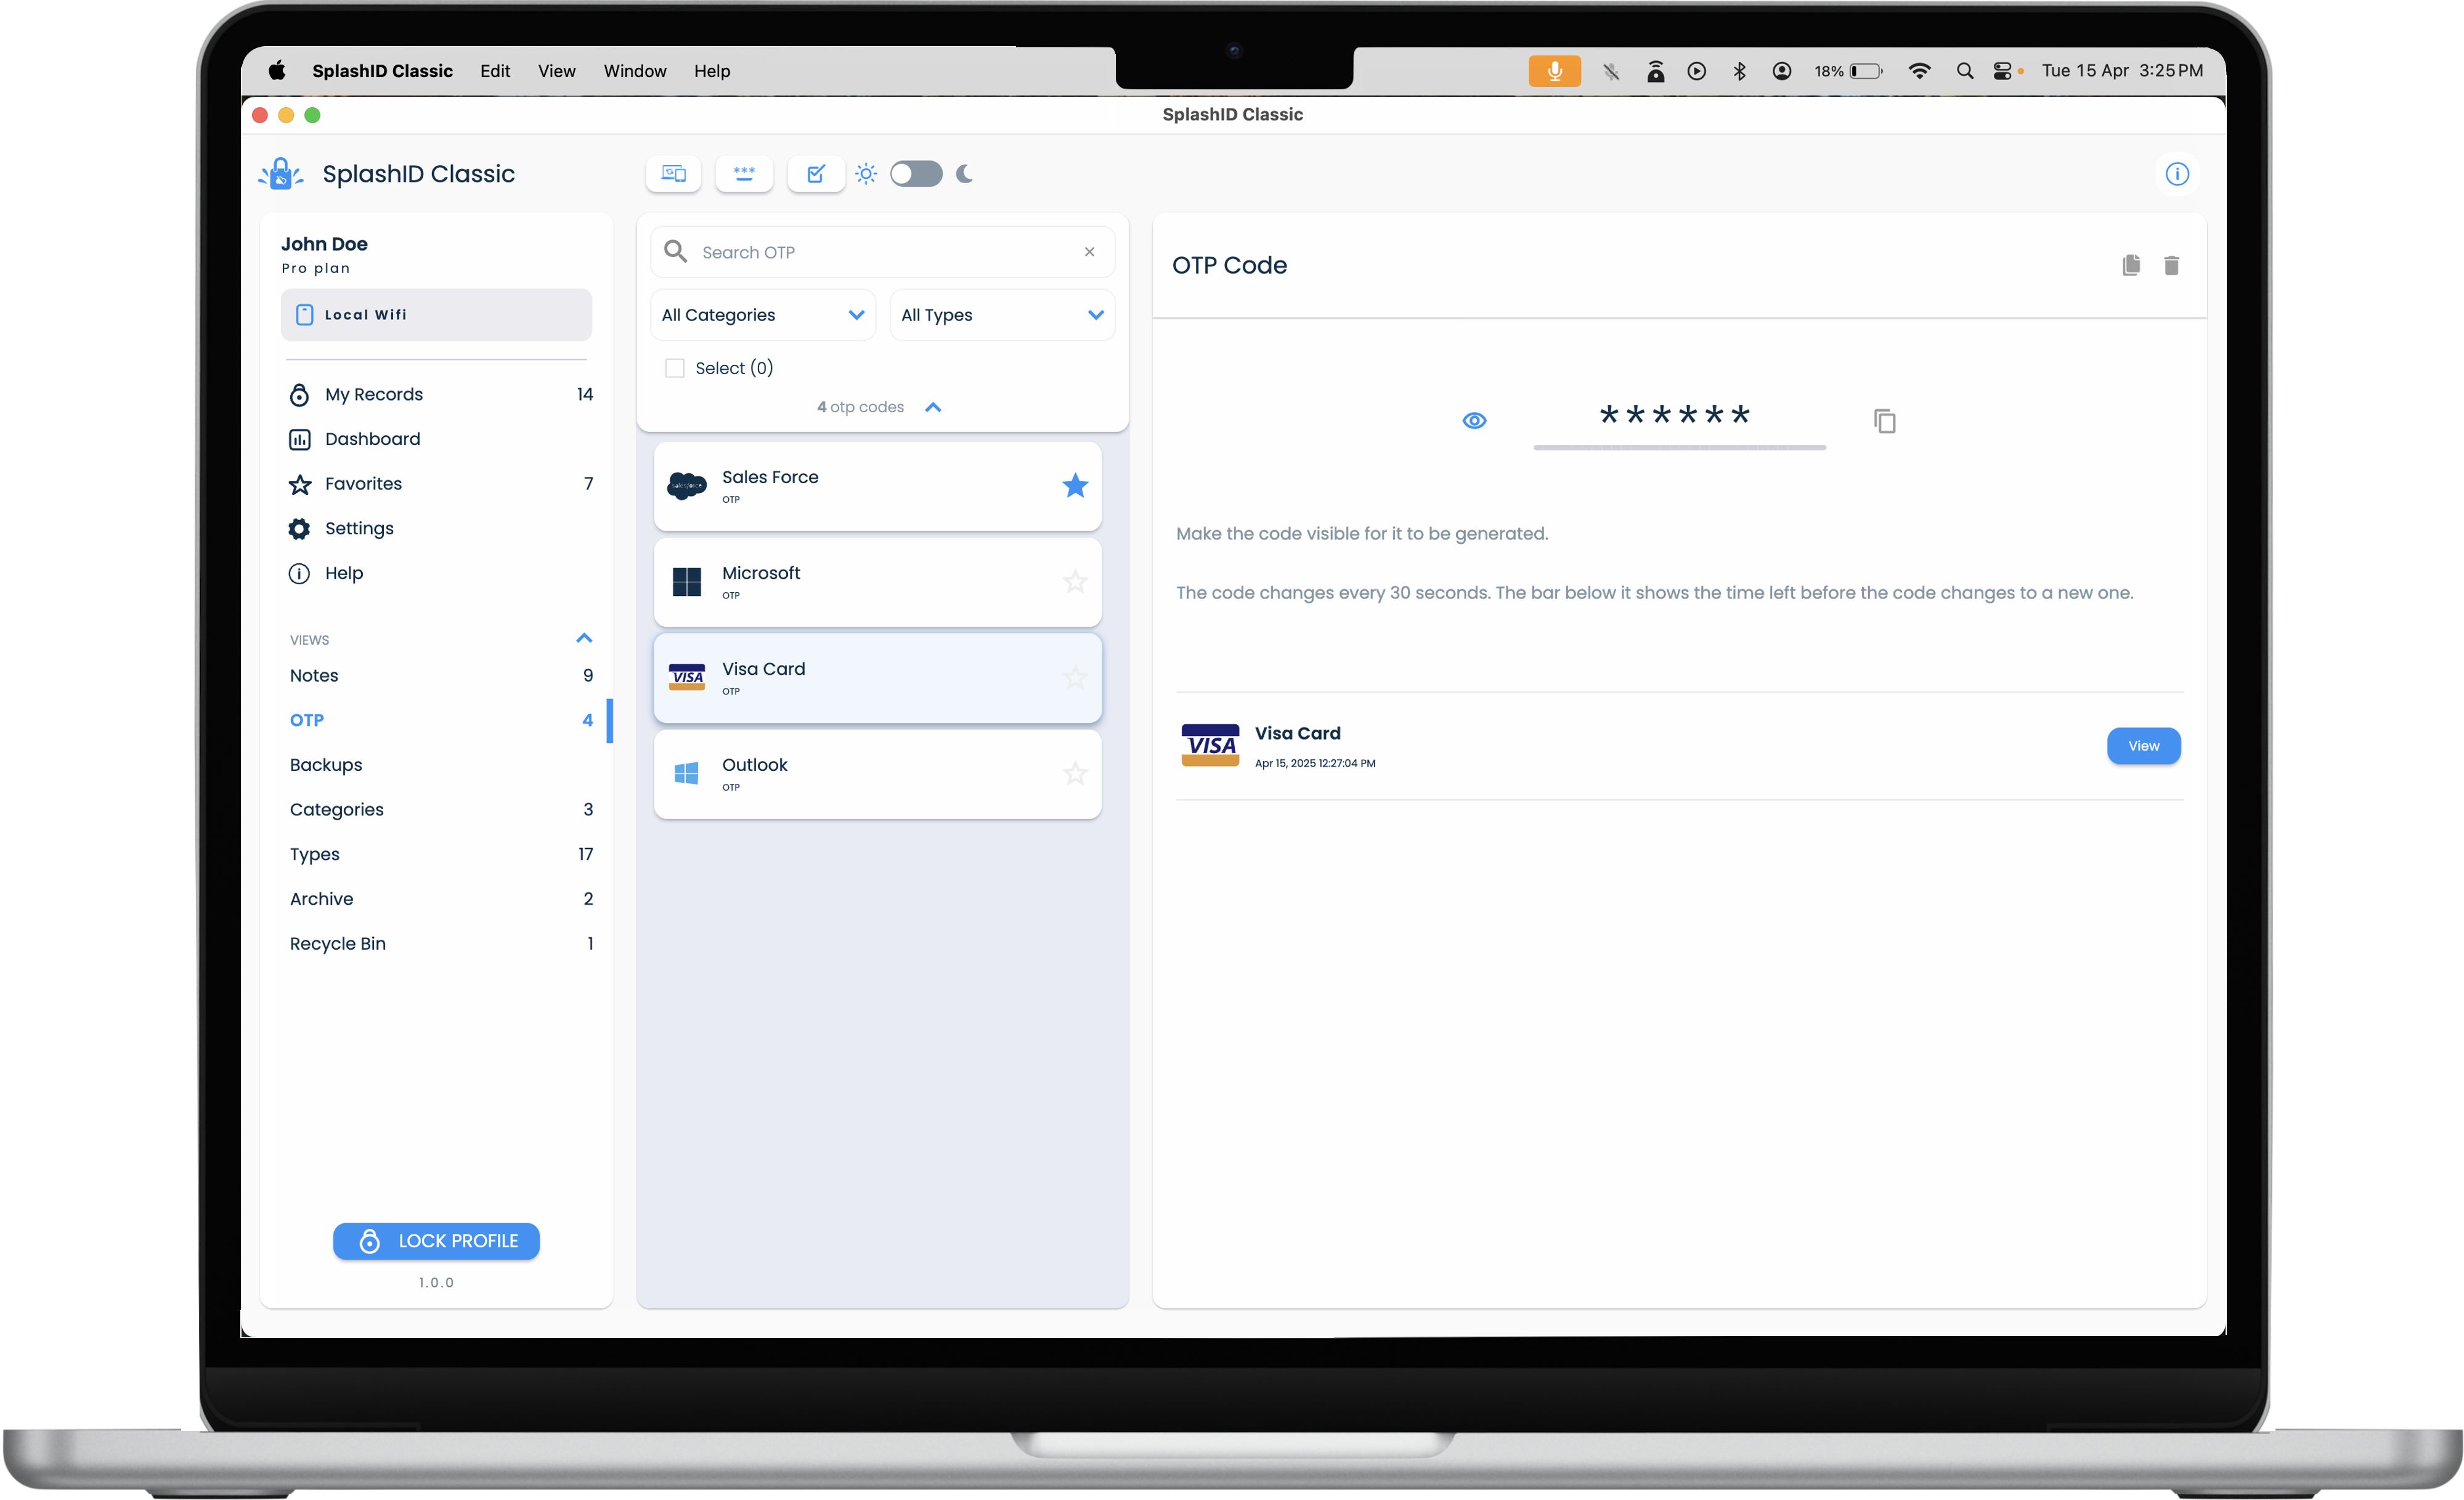
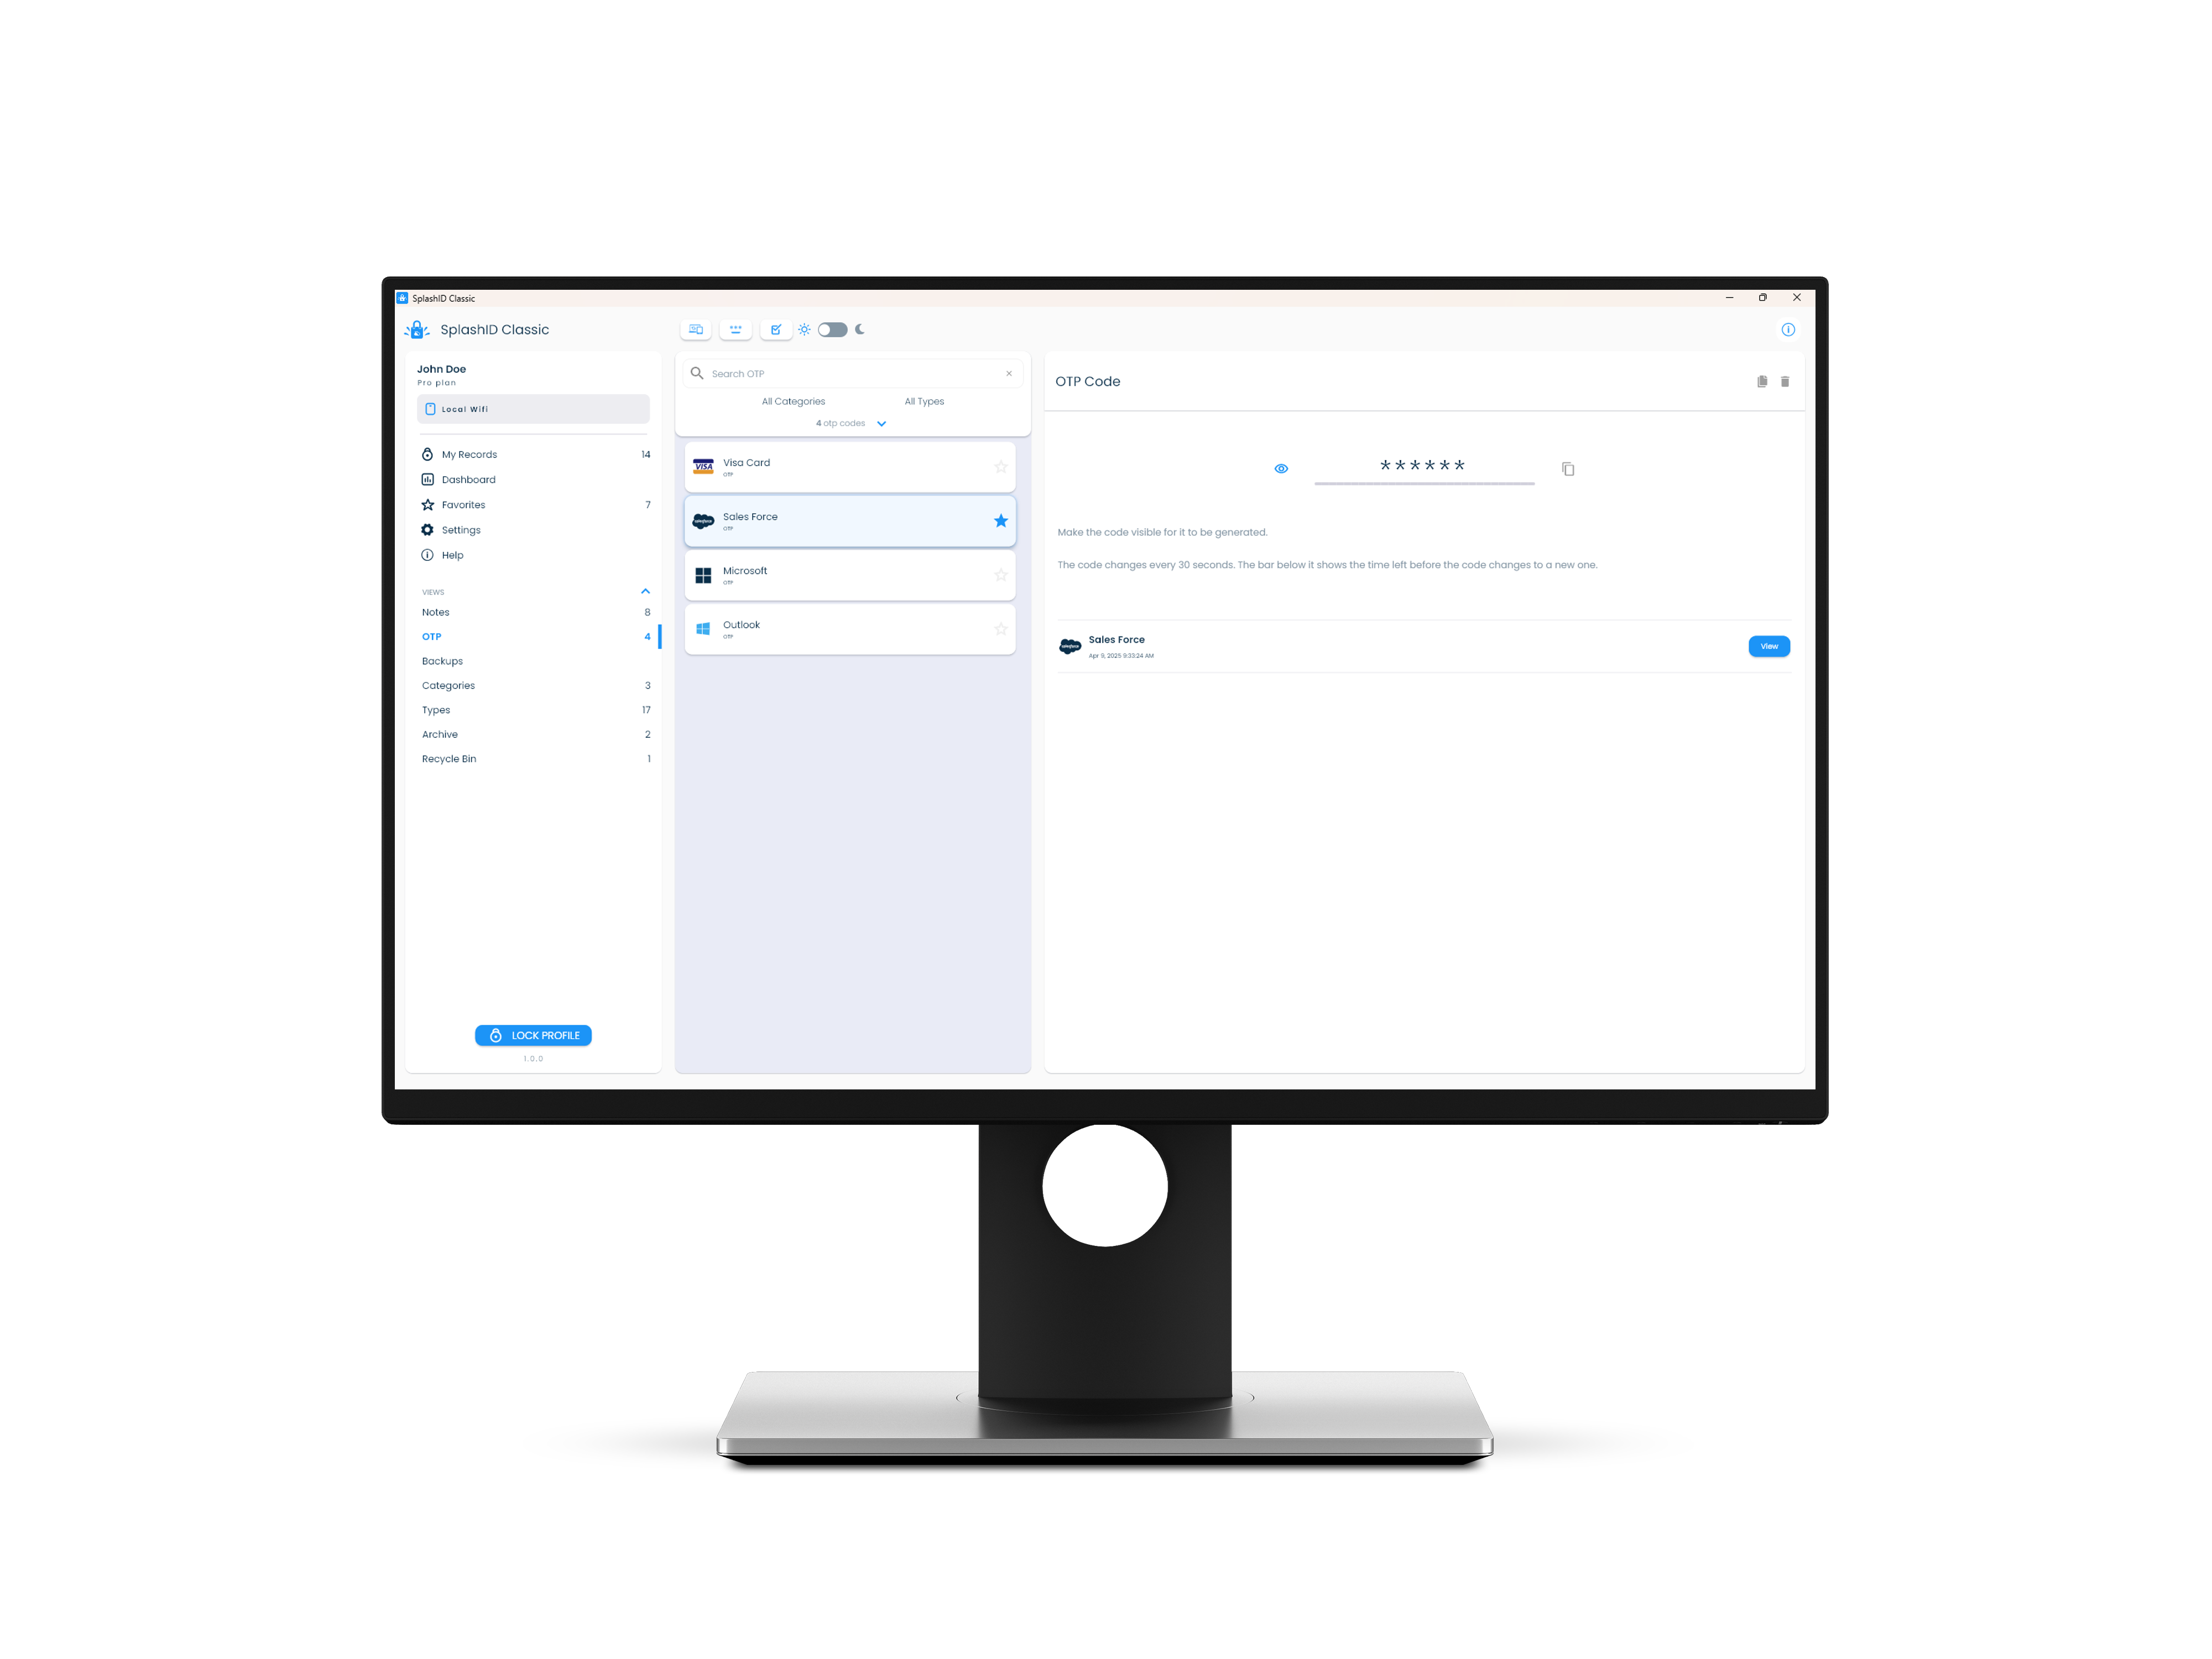
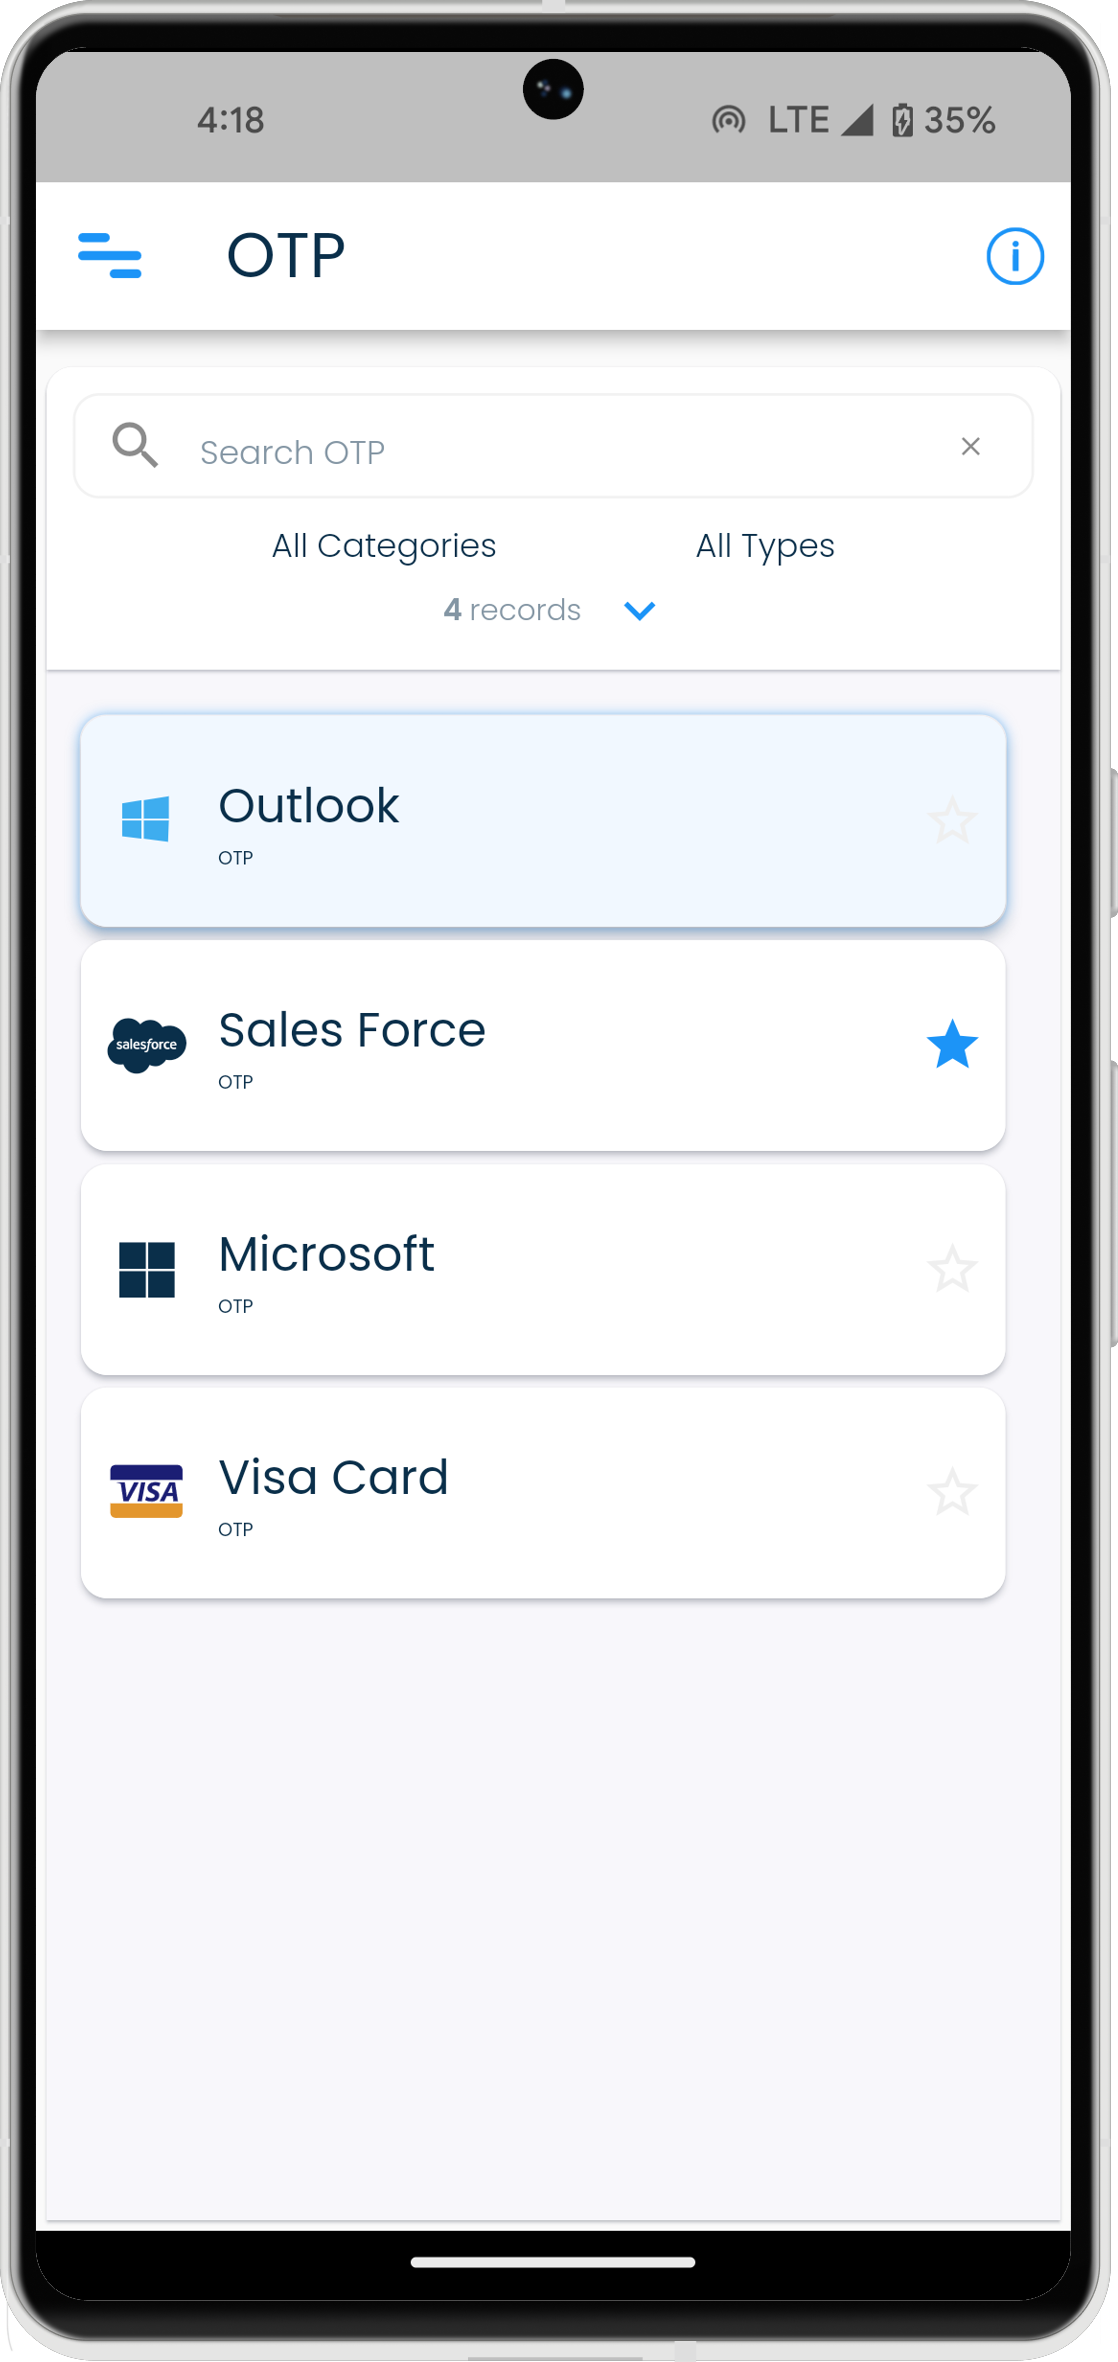
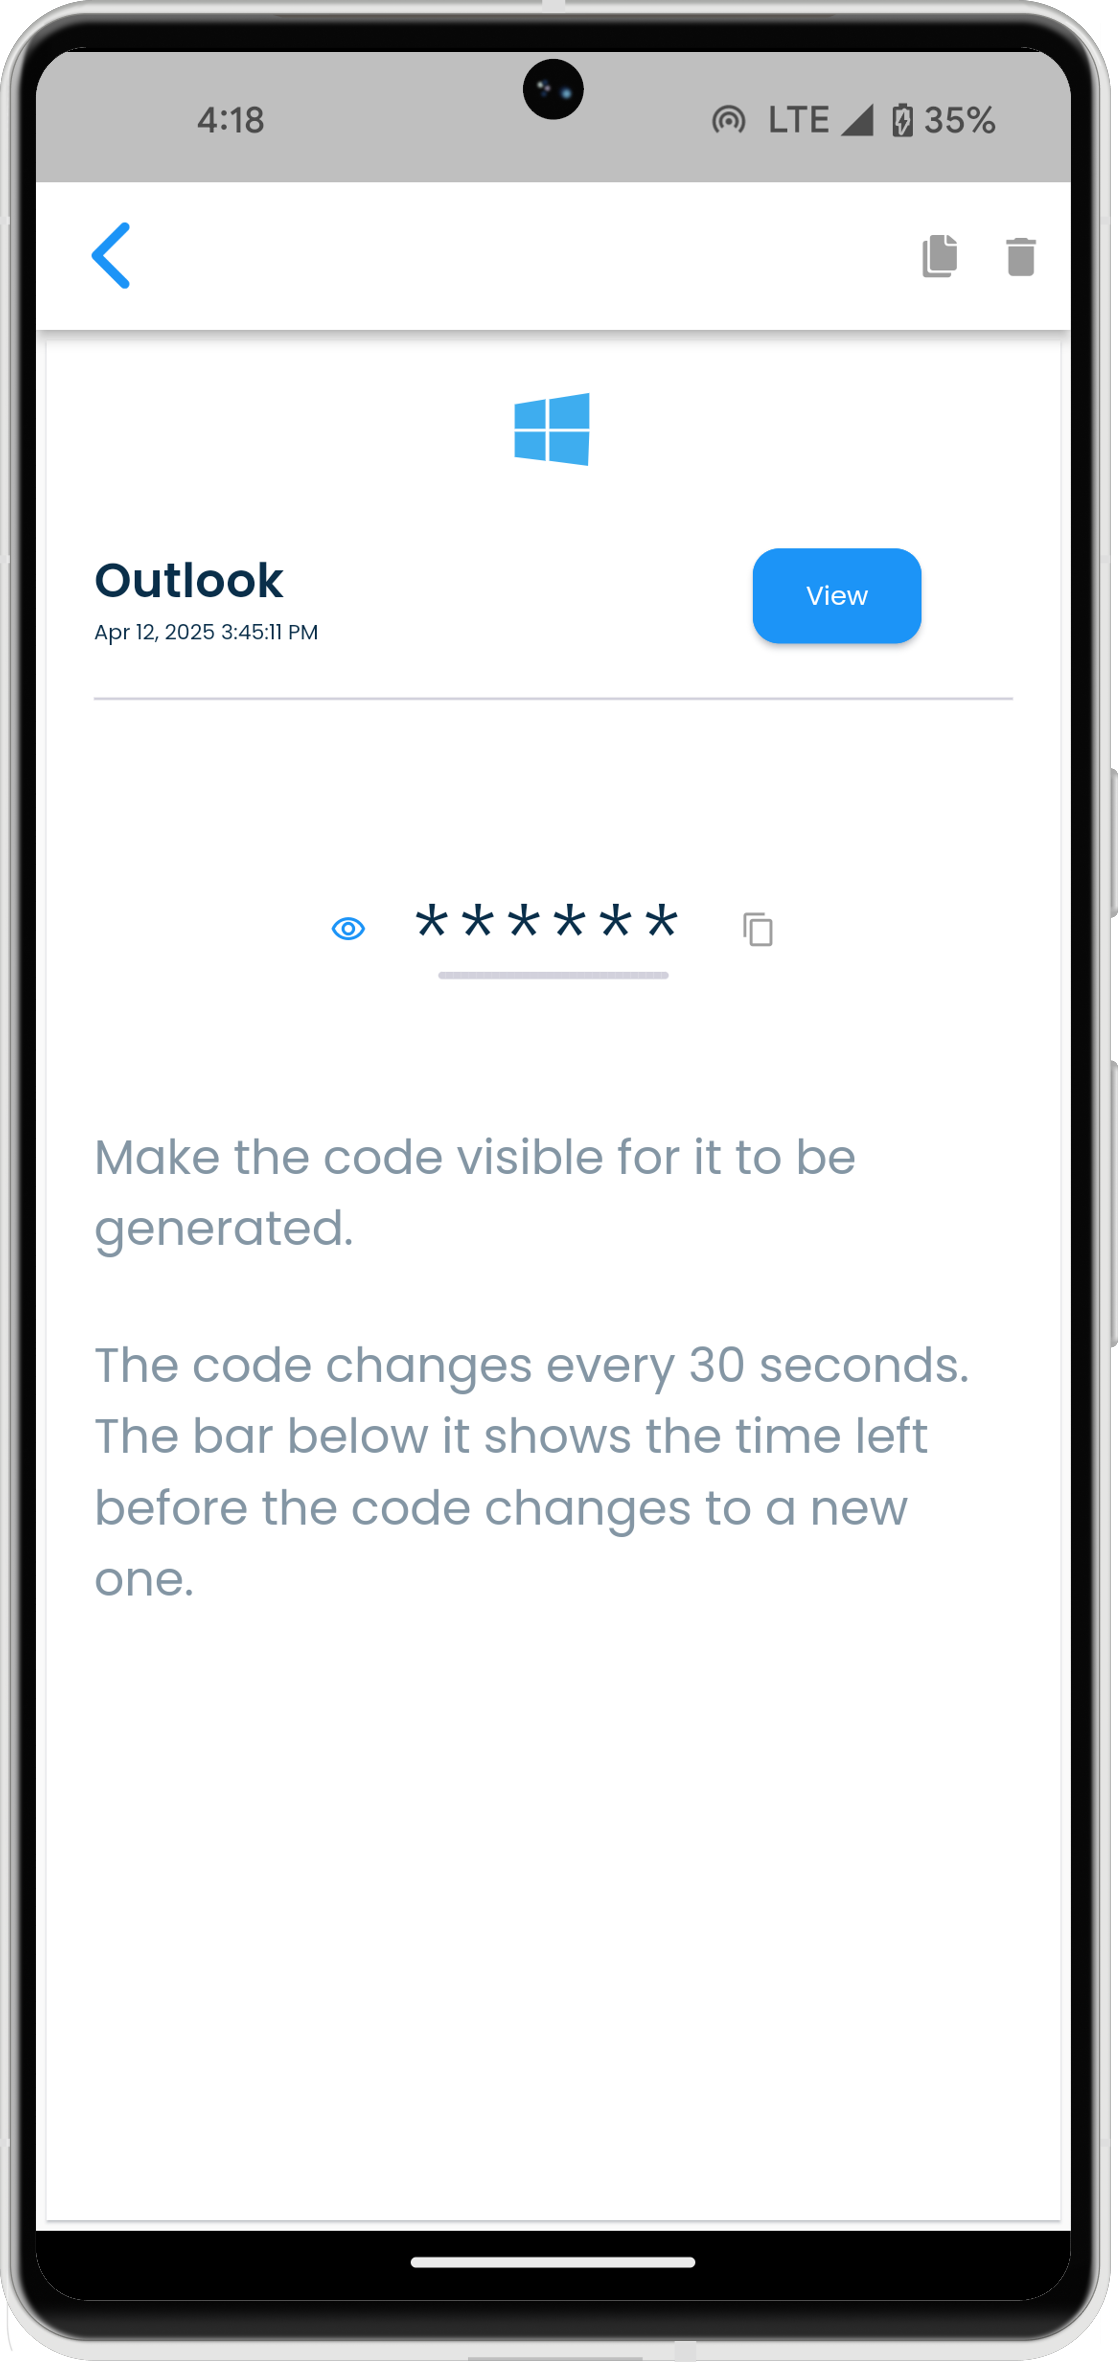
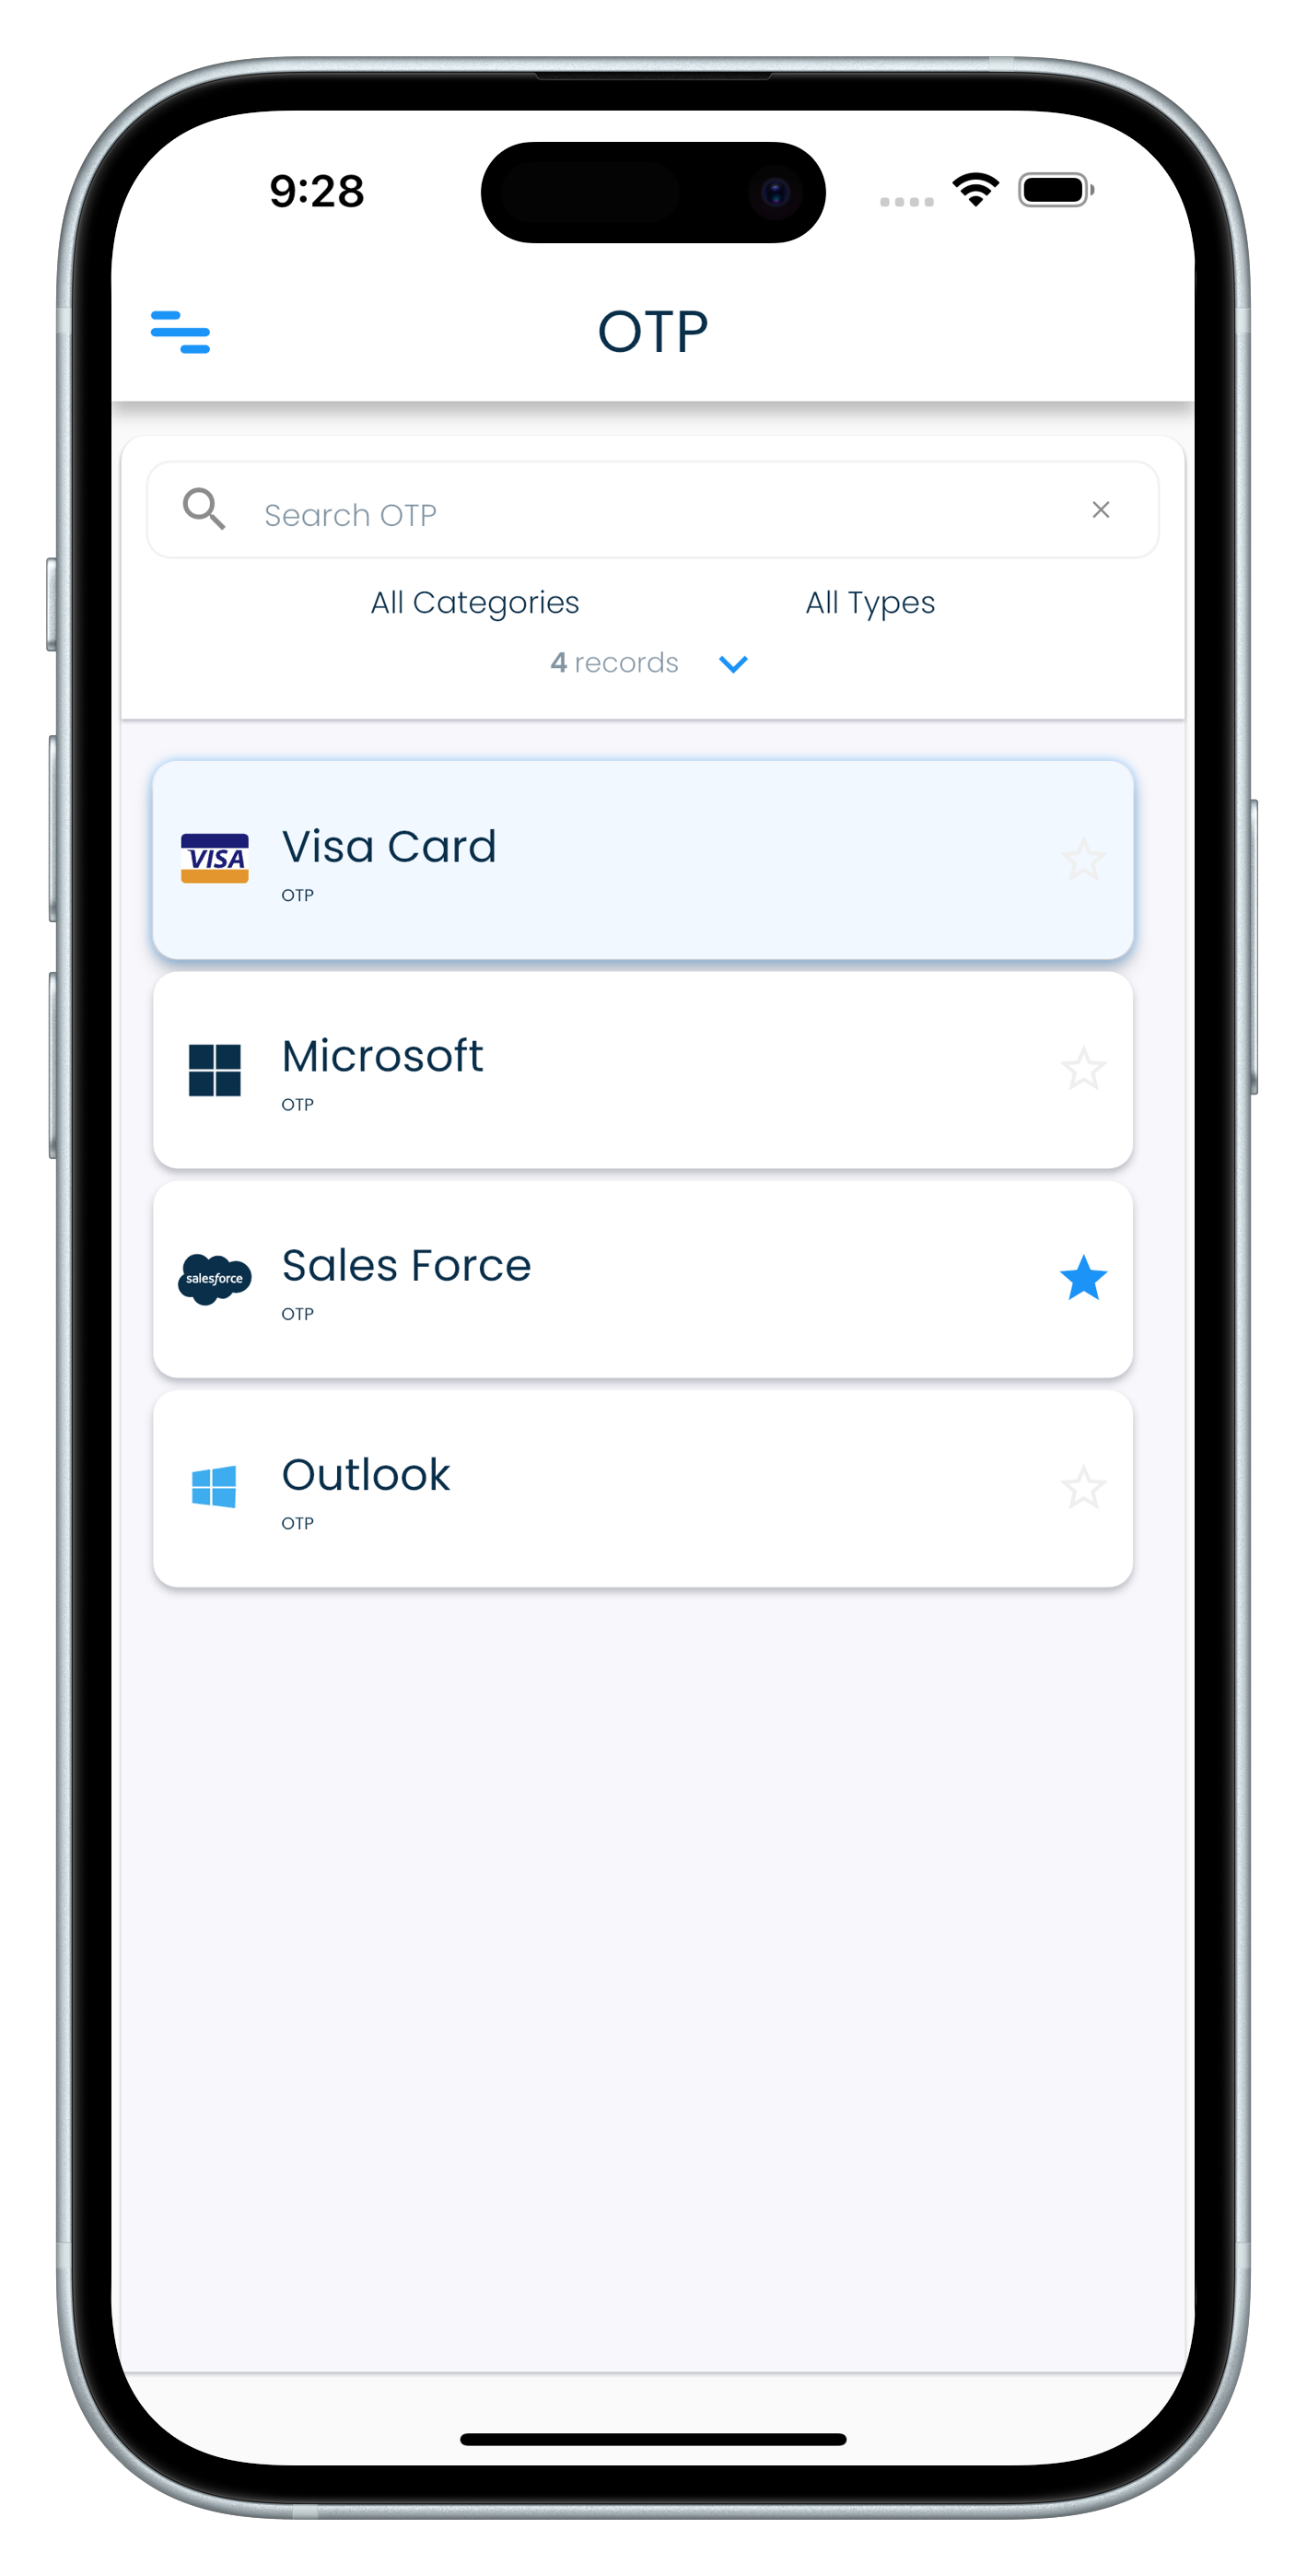
OTP
The OTP screen shows all the OTP fields that you have in all your records in a single view.
It can be used to quickly locate authenticator OTP codes for sites and applications you use without having to go through a record.
| Mac | Windows |
|---|---|
 |
 |
| Android | iPhone |
|---|---|
  |
  |
| iPad |
|---|
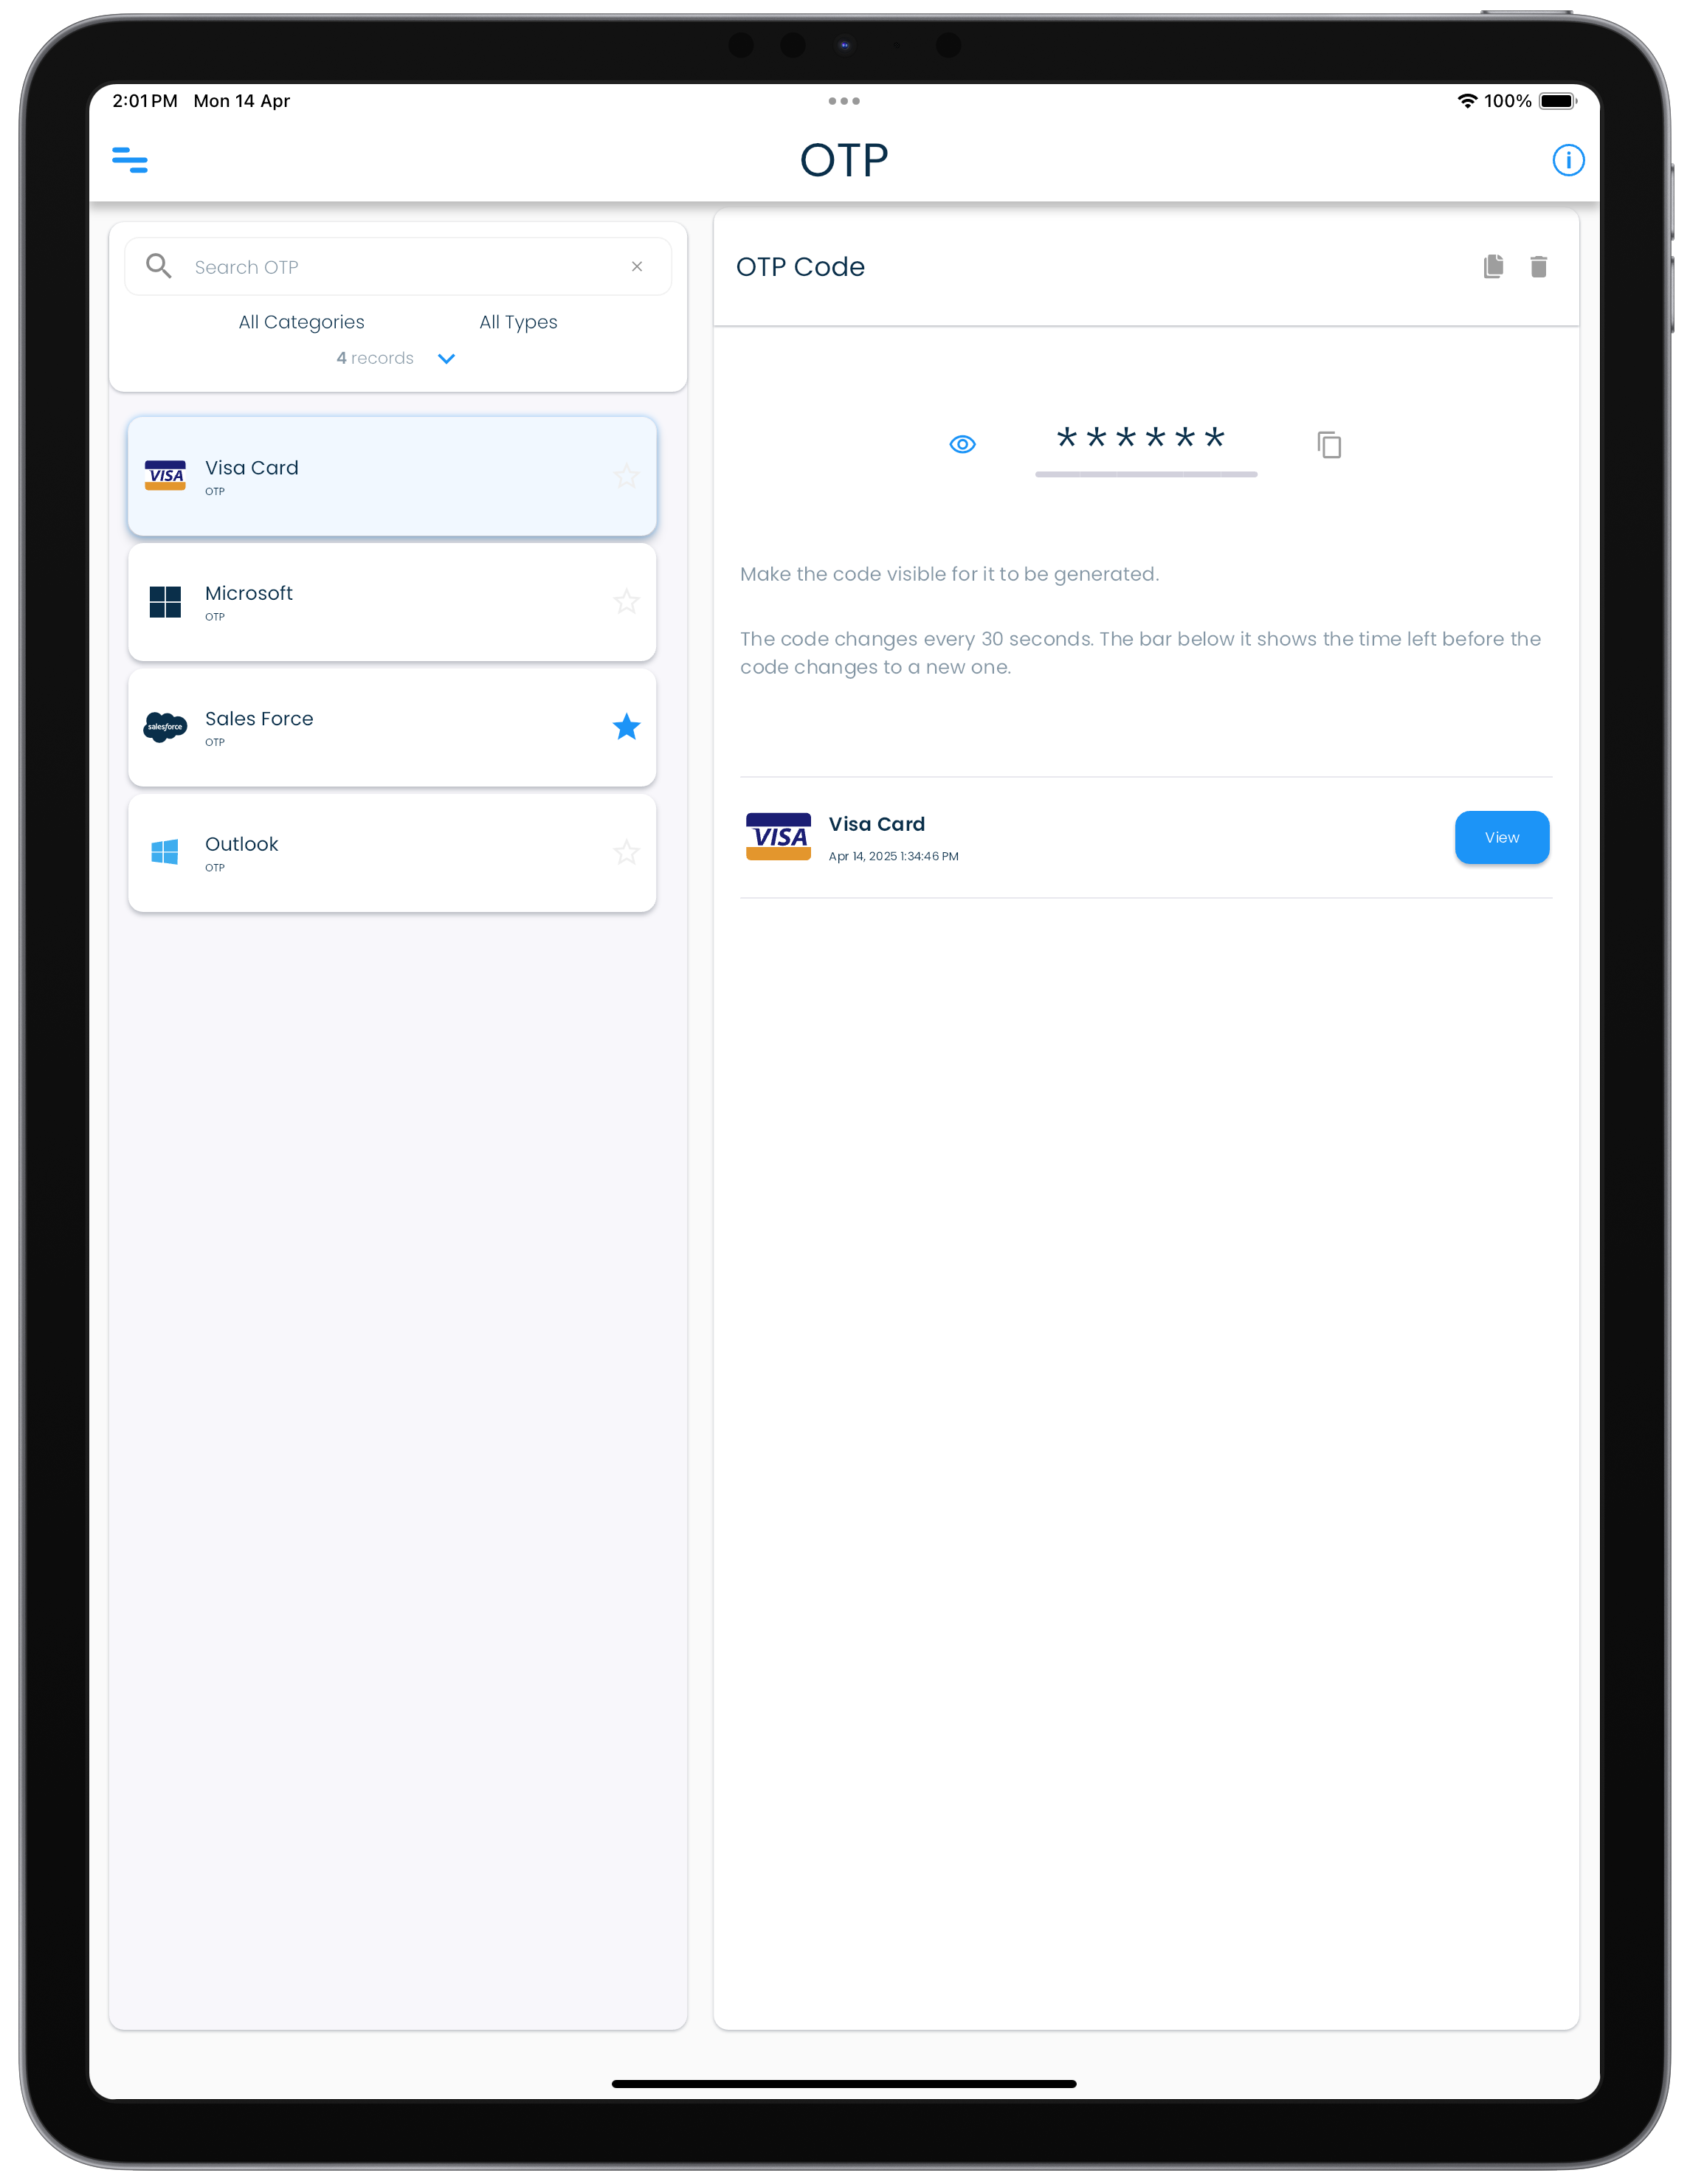 |
Next steps
- Learn how to sync your records.