How does the application look?
Screen layout
The user interface that you see after you unlock a SplashID Classic application depends on the device in which you are using it.
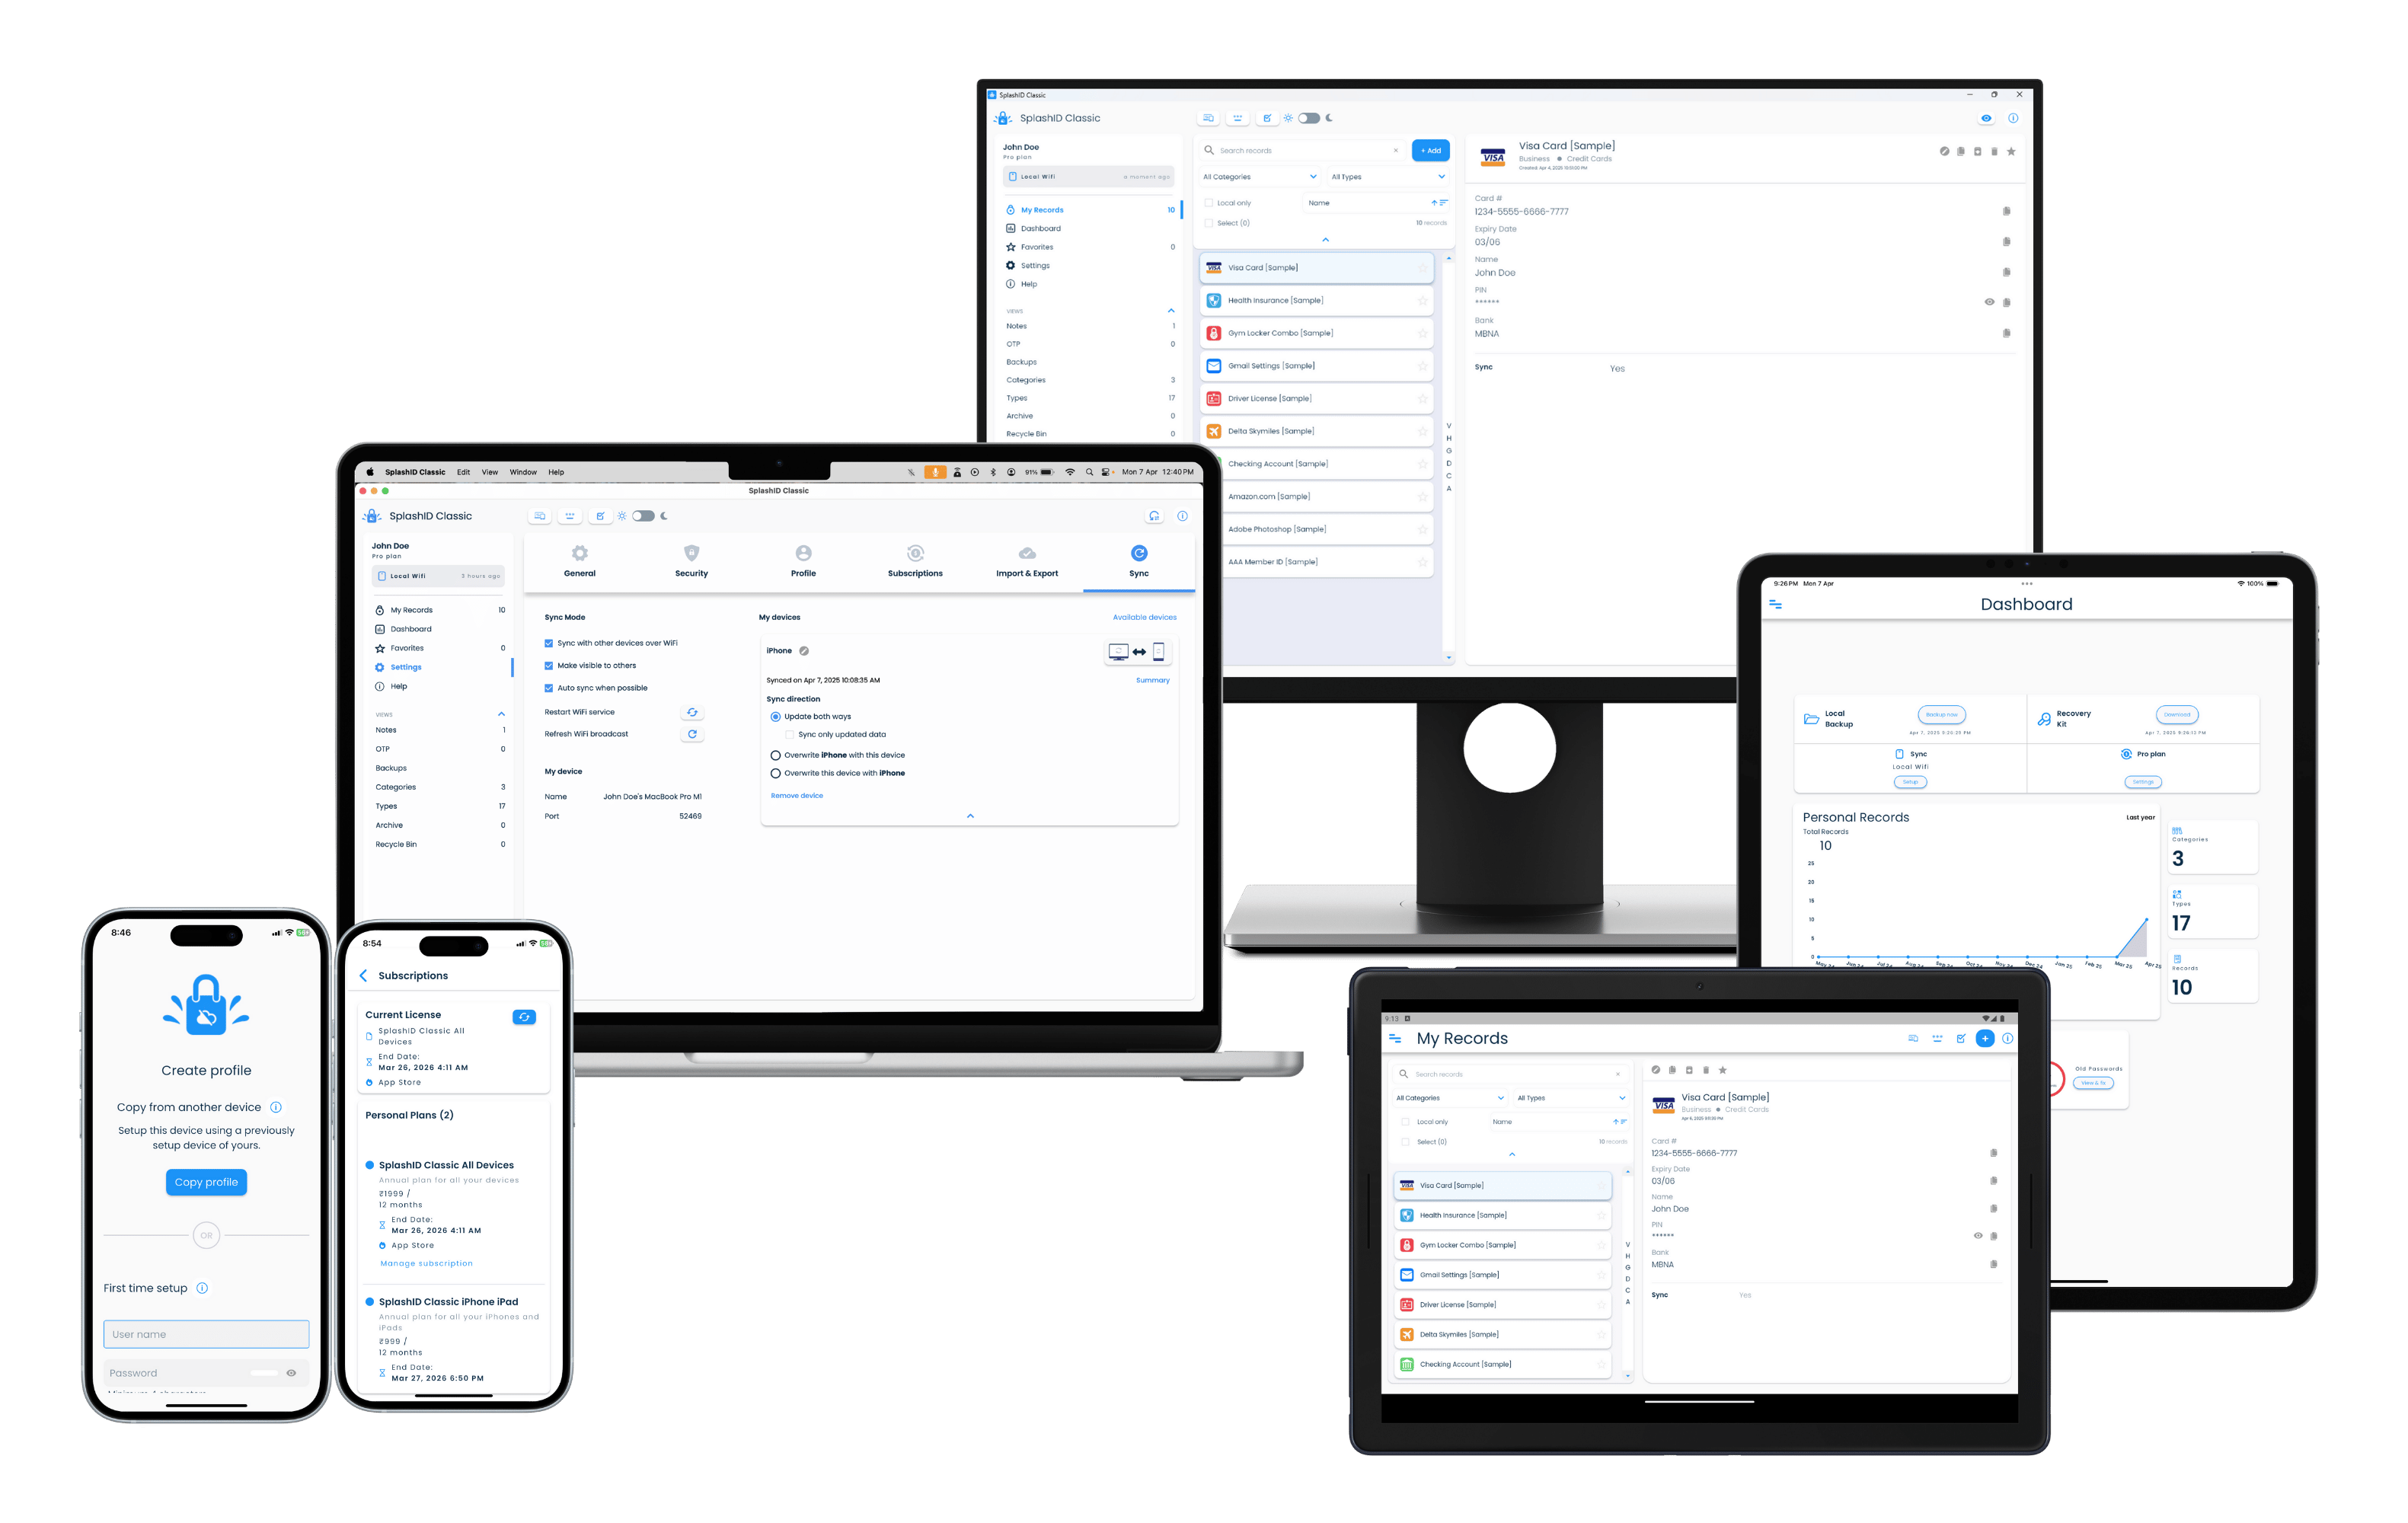
The screens that display your records and their content are composed of panels as listed in the table below. Other screens have a simpler layout.
| Device | Layout for records |
|---|---|
| Laptops and desktops | 3 panel layout |
| Tablets | 2 panel layout |
| Mobiles | 1 panel layout |
Desktops and laptops
On desktops and laptops, the records screens are organised into three columns as listed below.
| Column | Purpose |
|---|---|
| 1, the left panel | Shows the navigation menu for the application |
| 2, the center panel | Show a list of all records that can be sorted and filtered |
| 3, the right panel | Shows the details of the selected record |
If you reduce the width of the window in desktops and laptops, it will change into a two column view. In this view the application menu can be opened by tapping on the app icon in the top left part of the application.
Tablets
On tablets, the records screens are organised into two columns as listed below.
| Column | Purpose |
|---|---|
| 1, the left panel | Show a list of all records that can be sorted and filtered |
| 2, the right panel | Shows the details of the selected record |
In this view the application menu can be seen by tapping on the list menu icon in the top left part of the application.
Mobiles
On mobiles, the records screens are shown with a list of records that can be sorted and filtered using the given options.
On selecting a record, the view will change to showing the details of the selected record. The details displayed include the record name, fields, notes, and update time.
In this view the application menu can be seen by tapping on the list menu icon in the top left part of the application.
Navigating between screens
You can switch between different screens by clicking or tapping on an item in the application menu list. The application menu is displayed in the first panel in the 3 column view on desktops. In 2 column and 1 column views, the application menu can be opened by clicking or tapping on the app icon in the top left part of the screen.
The table below summarises the application menu items.
| Menu item | Description |
|---|---|
| My Records | Show a list of all your records. You can search, sort, filter and store personalised views that are a combination of search, sort and filters used. |
| Dashboard | Displays important information related to your profile. |
| Favorites | Shows all the records that are marked as favorites. |
| Settings | All the settings for SplashID Classic and your profile can be managed from this view. |
| Help | Shows all the topics on which help content is available. |
| Notes | Shows all the notes that exist across all the records. |
| OTP | Shows all the authenticator fields that you have setup in all your records. These are the OTP codes that you use as 2 factor codes in other sites and applications. |
| Backups | You can see all the local backups for your profile here. These exist only on the device where they are displayed. |
| Categories | Shows a list of categories that you have. Categories are used to organise your records into high level groups. |
| Types | Shows all the available templates of records in your profile. Types contain a pre-defined set of fields that are used when a new record is created. |
| Archive | Displays all the records that you have archived. Archived records can be used to move records that you no longer actively use, and dont want to be shown as part of the main record lists. |
| Recycle Bin | All the records that you have deleted will be moved to the Recycle Bin. You can permanently delete them from here if you are sure that you no longer need them. |
Customising the navigation menu
You can customise the navigation menu to suit your preference. You can hide one or more of the following navigation menu list items if you do not use them.
- Help
- Notes
- OTP
- Categories
- Types
To do this go to the Side Menu group of settings in the General section in Settings.